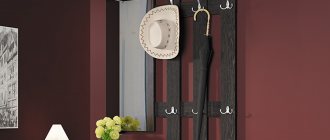
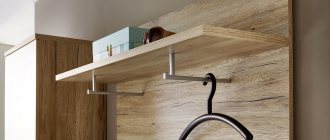
You can't do without a hanger in the hallway. Of course, outerwear can be hung directly in the closet, but this takes longer and is not so practical. The wall hanger is very convenient for narrow and small hallways; it is quite roomy and does not take up much space.
We offer you 5 master classes on making wall hangers with your own hands from available materials: wood, leather, branches or pipes, as well as inspiring photo ideas.
Find out how to make a floor hanger rack with your own hands in this material!
From perforated sheet
This hanger will display the phrase “I can also cross-stitch” in every sense, show your creativity and become a good home decoration.
Materials
In order to create it, you will need the following materials:
- plastic or metal panel with perforation,
- multi-colored floss threads (in principle, knitting threads are also suitable),
- scissors,
- hooks (in this case 4 pieces with a ball at the end).
TIP: where can I get such a perforated sheet? At any hardware or furniture store, ask for perforated sheet. And they will cut you the size you need.
Work order:
- We buy a perforated sheet of the required size.
- You do regular cross stitch with threads, only the fabric is larger.
- You can choose any word you like, or a simple picture (a heart, for example), the main thing is to make sure that everything fits and the spaces between the letters are the same.
- When the inscription is ready, attach the hooks through the holes in the panel and hang the hanger on the wall (you don’t even need to drill holes for the fasteners, they are already there).
Here you will also find furniture ideas for a small and narrow corridor!
Designer hangers for the hallway
You can make a hanger in the hallway yourself. Handmade work, when done with skill and a sense of taste, looks especially attractive and original.
Take measurements first. Then think over and draw up a diagram of the product. In order to decorate the hallway in a unique way, you will need some materials, but in any case it is much more economical. Remains of boards, plywood, and wood are suitable, provided they are intact and durable.
You can buy hooks or make your own. In the end, you will build a real hanger from scrap materials. How about a hanger in the shape of a tree with spreading branches on which you can hang your wardrobe items using hooks?
Mount a shelf at the top or bottom for neat storage of small items that are usually kept in the hallway. Use your imagination.
From copper pipe
This hanger is especially suitable for hat lovers. It is difficult to find a place for them where they can be stored and not wrinkled; it takes up too much space in the closet. This is an excellent option for direct use – for clothing and for decorating a room. Of course, in addition to hats, a clothes hanger will also fit here.
Necessary materials:
- Copper pipe
- Scissors
- Clothespins
- Rope
Step-by-step instruction:
Step 1: Prepare the base
Cut the rope to a size large enough to hang the hanger. Pass the rope through the copper pipe.
Step 2: Attach Hat Hanging Strings
Cut a few more pieces of rope and tie them onto the pipe, leaving enough space between them so that the hats do not interfere with each other later.
Step 3: Hang the hanger
Attach the ends of the rope with the copper pipe to the wall or ceiling (there should be hooks or pipe for this). Attach clothespins to the ropes hanging from the pipe; now you can hang hats on them. You can also hang a clothes hanger on the pipe.
TIP: Choose the length of the pipe depending on the amount of free space on the wall, hats and clothing.
As you can see, it is done very quickly, even in half an hour you can do it, and it looks very original.
Metal clothes hanger
A type of hanger-rack is a “U”-shaped hanger. This detail would be right in the dressing room, in a minimalist Scandinavian interior or loft style. To create a floor hanger with your own hands, you will need copper pipes: this environmentally friendly and durable material has long been used in the interior and does not lose its relevance.
The photo shows a metal stand that perfectly complements the interior, where natural materials are used as finishing.
Tools and consumables
To create a floor hanger you will need:
- Epoxy glue.
- Pipes 150 cm (2 pcs).
- Pipes 60 cm (4 pcs).
- Pipe 90 cm.
- Copper tees (2 pcs).
- Copper corners (2 pcs).
Step-by-step instruction
How to make a hanger with your own hands:
- We fasten the two bases on which the product will stand. We take two 60 cm pipes and fix them with glue and a tee. Using the same method, we create a second support.
- Let's make a crossbar. We connect two corner elements with a pipe 90 cm long.
- Before assembling the structure, you need to make sure that the glue has completely dried and held the parts together. We connect one and a half meter pipes by inserting them into tees.
- Attach the top crossbar to the vertical supports.
- The floor hanger is ready. It is so thin and light that, if necessary, it can fit into a closet or dressing room.
Leather belt hanger
This wall hanger is suitable for the hallway, kitchen, and bathroom. The type is similar to the hanger described in the previous master class, but its use is more universal. It will beautifully complement the interior of your apartment, while requiring very little effort and time to make.
Necessary materials:
- Leather belts (2 pieces of fairly soft leather)
- Two small pieces of leather (harder)
- Wooden stick (from a tree branch)
- S-hooks
- Scissors
- Thread and needle (suitable for leather)
- Leather punch
Step-by-step instruction:
Step 1: Preparing the belts
- Cut two leather belts to the required length, they should be the same. Wrap the strap around the stick and mark how much you need to wrap around it.
- In the place where the belt meets after the girth, it needs to be sewn to fix the stick so that it does not fall out. Do the same with the second belt.
- To prevent the seam from being visible, make decorative leather straps: use a narrow strap to wrap the strap attached to the stick, at the seam, and sew it, connecting the ends (the same with the second strap).
Step 2: Attach the hanger
Using a leather punch, make holes on top of the belts (in the center of the width), using which you can hang this structure on the wall or ceiling (on previously attached hooks).
Step 3: Hanging Hooks
Hang the required number of S-shaped hooks on the wooden stick and the hanger is ready for use.
Types of hangers and materials for their manufacture
Photo: DIY hanger option
When making a hanger, you need to take into account the convenience of the design, functionality, spaciousness, and the height of the hooks.
By design features, the most common models are the following types:
- A design that combines the top and the cabinet.
- Wall hanger with mirror, combined with a cabinet, wardrobe and slatted area.
- The wardrobe is a hanger without doors. The hook panel is in the middle. There are small cabinets with doors at the top and bottom. It has good capacity.
The peculiarity of wall-mounted models is that they are attached to the wall. Main options for mounting methods:
- using self-tapping screws or self-tapping screws (basic method);
- by gluing;
- suction cup mount;
- magnetic mount.
The most durable and reliable fastening is with screws (self-tapping screws). This method is designed for heavy loads (for outerwear). Well suited for regular use. Sometimes it can be strengthened with the help of furniture corners.
Fastening with suction cups and adhesive tape is used for smooth surfaces (for example, tiles). In terms of reliability, it is significantly inferior to the previous method, but the advantage is that there is no need to drill the wall.
We recommend A beautiful do-it-yourself banquette for the hallway - step-by-step instructions
The magnetic fastening method is used very rarely, since it requires the presence of a metal surface in the hallway.
A chic hanger that you can make yourself
The most popular materials for making such furniture are wood and metal.
Distinctive features of the products:
- Products made from wood look elegant and noble. They combine well with parquet or laminate flooring surfaces. Well suited to furniture made of natural wood.
- Metal models are durable and versatile. Metals used for their manufacture are iron, aluminum, steel, copper and others. When choosing this option, you should know that aluminum is not the most successful, it is quite fragile.
- Forged hangers amaze with their beauty and unusual shapes. They look unusual and luxurious. A wrought iron hanger will be the highlight of any corridor. Giving metal an aged look will make it more modern and picturesque. The main advantages of such a hanger are that it is durable, stable, and compact.
- Vintage hangers are very popular. The combination of antiquity and modernity adds sophistication and emphasizes history.
An interesting solution is a combination of materials: wood with fabric and metal. The materials complement each other. Wood gives solidity to the furniture, and the metal part makes it lighter and gives grace.
From branches and cuts
Branches and cuttings are excellent material for wall hangers. First of all, it’s very affordable! And secondly, wood will never go out of style and will perfectly complement the style of any apartment!
You can make a lot of crafts for the home from branches - about this in the article “40 ideas for crafts for the house from branches.”
How to make such a hanger from branches in 30 minutes - in this Master Class!
Materials and tools
Almost anything can be used as a material to create hangers. Wood - in the form of planks, slats, branches; also plywood and chipboard. Fittings, rope, horns (any), pipes (even plastic) will do - it all depends on your imagination.
Self-tapping screws, bolts and screws are used as fasteners. The set of tools is the simplest:
- jigsaw;
- electric drill;
- screwdriver;
- screwdriver;
- hammer;
- roulette;
- level;
- hacksaw for metal.
Naturally, if you work with wood, then a hacksaw for metal will not be needed, and if only metal is present, then a jigsaw is of no use.
From pallets
If you are going to make a hanger for the wall and choose a cheap and quick option, then a hanger made from wooden boards or pallets is exactly what you need. If you think that it will look ordinary and unoriginal, look at the selection of photos below and make sure that from these materials you can create a truly unique thing that will decorate the interior of your apartment.
Select paint (or simply treat the wood with an antiseptic, preserving the natural color), hooks, give the board the desired shape, and come up with your own way to decorate the boards.
More complex hangers can be made from wood. More precisely, it’s not even a matter of complexity, they are labor-intensive, you need to spend more time on them.
Destination options
The convenience of hangers lies in the fact that you can place on them almost any items that should always be at hand:
- outerwear in the hallway;
- everyday wardrobe items;
- accessories;
- kitchen utensils;
- towels in the bathroom and much more.
At the same time, a wide selection of materials and designs makes it possible to create a unique original model.
A self-made hanger will be inexpensive, fit perfectly with the interior, and be an exclusive handmade item.
Technology for making hangers from improvised materials
Having summed up all the master classes, I would like to derive a single formula for making and being creative with hangers. It can be roughly divided:
- The base can be any item from a finished board to old items.
- Hooks for hangers - you don’t have to buy them, you can remove them from coat hangers.
Basics from improvised means
You can also use things for making that, at first glance, are not at all suitable for this: skis, oars, rulers, etc. how much imagination is enough? A wonderful way to find a use for things lying around in the pantry.
Hooks for hangers
Hooks also do not have to be standard (although their range of choice is quite wide). Start looking at things with the thought “where else can you be used?” I am sure that after training yourself a little, interesting ideas will begin to come more and more often, and this applies not only to hangers, of course.
Attach individual hooks to the wall; their design should look like a decorative element, even if there is nothing on them.
DIY hanger
Let's focus on wooden products - they will be easy and quick to make, and they also look the most organic.
In any form, this material is universal: it is quite easy to process, has a beautiful texture that can be easily emphasized with stains and varnish, is easily sanded and polished, and can be combined with any components - from leather and plastic to metal.
It is light in weight, low in price, and if properly processed, the product will last quite a long time. The tree should be chosen of a uniform color, without knots, although they can play a role in giving the product an original look.
It is advisable to use deciduous wood; coniferous wood is more difficult to process.
Step by step guide
First you need to decide on the appearance and size of the product. The simplest option is wall-mounted, with a base made of a horizontal strip. It can be wide, and the length is selected depending on the location.
On paper we draw a sketch of the proposed product, taking into account all the parameters. It is clear that not everyone has the skills of an artist, so you can download photos from the Internet. If the hanger is planned using geometric rather than shaped shapes, a simple drawing is made.
Next, all this is transferred to the material - board, plywood or chipboard; simple shapes can be immediately drawn on the workpiece.
Using a jigsaw (do not forget to read the safety instructions before work), a wood saw or a hand jigsaw (it is better to use it when sawing plywood), we cut out the workpiece.
It will be a supporting structure for mounting on the wall; shelves for hats can also be mounted on it.
These elements can be connected to the base in different ways: directly with self-tapping screws, if the thickness of the workpieces allows, or using a metal corner - it is better to pre-polish it. You can also use a rack.
The finished product is sanded and, depending on the flight of creative thought, treated with stain and varnish. The latter is mandatory - then the product will not dry out or crack.
After processing, hooks are attached - they can be very diverse: store hooks of various shapes, chess pieces, horns, twigs, and even spoons.
You can get creative, using everything that matches your idea and is able to withstand the weight of hanging things.
From a tree trunk
When making a wall hanger, you can use a tree trunk as a blank. The product turns out to be massive, solid and effective.
The only thing that can cause some difficulties is selecting a suitable tree and sawing it to length, which is quite difficult at home.
If you can cope with these tasks, then you need to further remove the bark and trim off excess branches. Some of them should be left as hooks if possible.
After everything is assembled, the product is varnished and attached to the wall.
Floor design
A floor hanger is rarely found in apartment interiors - most often because it takes up precious space. The main purpose is temporary storage of clothes, hats and accessories, such as umbrellas, handbags, backpacks and other items.
Making it is quite simple, but one rule must be followed: the hanger must be very stable.
The simplest and most original idea in this case is three or four beams, 1.5-1.8 m high, connected at the top ends into a pyramid (a connection in the form of a hut tied with a strong rope looks impressive).
You can sew the main guides with transverse bars 30 centimeters below the top, like a ladder. After this, horizontal crossbars from beams are sewn at different heights and from different sides.
The protruding parts will serve as hooks for outerwear, hats, bags, and umbrellas. And on the crossbars themselves you can hang scarves, light raincoats, and, in general, any clothes.
Plywood sheets nailed inside the frame or a stretched mesh will become an additional place for storing any objects, things or attributes.
The finally assembled product should be decorated at your own discretion. In any case, varnish or paint will help preserve the product for a long time.
Advice! You can use a folding ladder as a base - it doesn’t matter whether it’s wooden or metal
Broken stairs and floor lamps, the trunk of a fallen tree in the yard, scraps of plywood sheets, old carob chandeliers gathering dust in the closet.
Sometimes we don’t notice that many objects around us can serve as the basis for an original craft that can not only decorate your home, but also please friends and family. Practical things are necessary in every home. Believe me, there is no such thing as too many hangers!
Wall Hangers Ideas
Designers are increasingly coming up with ideas for creative and functional clothes hangers. Sometimes their designs are quite elementary and not difficult to do at home.
Metal, of course, is more difficult to work with, but if you want to create such a hanger, it will not be difficult. Make branches in the shape of a tree or hang hangers on a pipe - the result will be durable and functional.
All these photos are a piece of what you can create with your own hands. Take the elements you like, combine them, and most importantly, have fun with it all!
Original types of hangers
Any design is interesting for its originality and lack of stereotypes. When making furniture for the hallway, you have the opportunity to show your imagination, experiment, and find a non-standard solution for making planks and hooks using available materials. For example:
Original hanger
- done in a nautical style . The blue color of the base and anchor-shaped hooks will look colorful and elegant;
- artificially aged wood with images of animals and birds will delight nature lovers and give the corridor an interesting look;
- to decorate a loft-style room, hooks made from wrenches will look good;
- a very stylish, environmentally friendly option - connecting slats in the shape of rhombuses . Hooks can be placed at different heights, which will increase capacity;
- affordable and modern - pallet hanger . Strong and environmentally friendly material will allow you to complement the model with various shelves. To give it a finished look, it can be coated with stain or varnish, thereby preserving the beauty of the wood;
- an interesting idea for making hooks from cutlery (spoons, forks), which can be easily bent in half and attached;
- You can decorate the product in an original way with aluminum leaves . The material is pliable to work with, cuts well and looks unusual.
We recommend Making your own shoe rack for the hallway quickly and cheaply
Modern interior style makes it possible to boldly show imagination and combine various materials when modeling a simple wall hanger with your own hands.
Any individual, non-standard solutions will help preserve space and emphasize the individuality and creativity of the room.
Please yourself and surprise those around you with bold manifestations of invention and imagination.


