The kitchen is one of the most important rooms in the house - it is where food is prepared and eaten, where the whole family gathers and where guests are welcomed. In addition to the fact that the kitchen space must be aesthetically attractive, it must meet the requirements associated with special operating conditions.
This applies not only to finishing materials, but also to the design of the kitchen unit, which must be functional, ergonomic and practical. It is not always possible to choose a ready-made set - the reason may be the planning features of the room, special requirements for the design of facades, or a limited budget.
The solution may be a kitchen design with dimensions that meet the requirements of the room. Today’s material is about what you need to take into account when developing a kitchen project.
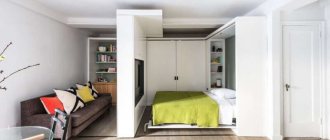
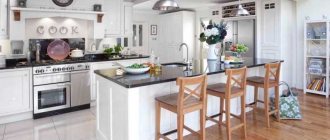
Kitchen project with dimensions
Basic principles for kitchen layout
There are a lot of options for kitchen layouts.
Which option should a skilled owner choose? To make the right decision, you need to familiarize yourself with the main layout rules that are relevant for any type of kitchen. The stove, refrigerator and sink should be located in the space in the form of a triangle. Since these household items are the most important companions of the housewife, it is advisable to arrange them so that all products are within walking distance. Moreover, the recommended order is as follows:
- fridge. It is best to install it in the corner of the room so as not to bump into it when moving around the kitchen;
- washing. It takes up space after the refrigerator, but before the gas stove. This is logical for any type of kitchen layout, since food must go through a sanitary stage;
- gas stove. After washing, the products go to the next “workshop” for preparing the dish.
When installing a sink, it is important to bring it as close as possible to the sewer lines. The proximity of the gas pipe is important when installing the stove. All this will reduce economic costs during installation.
There is no need to place the gas stove directly next to a window, which will constantly open to ventilate the room. Also, for safety reasons, the stove should not be placed close to the wall. There must be a gap from the wall of at least 7 cm. There must be a distance of 60 to 90 cm between the sink, refrigerator and stove.
When installing a dishwasher in the kitchen, do not place it next to a gas stove. The close proximity will interfere with the operation of the electrical appliance due to constant exposure to high temperatures.
- Window sill-countertop in the kitchen: photos of design options, ideas for arranging a kitchen with a countertop under the window
- Cozy interior
How to fit a dishwasher in a small kitchen
Dimensions in kitchen ergonomics
When choosing a layout option, you need to put personal needs first, not imposed ideas. It is important that the location of the kitchen unit and other furniture corresponds to the specifics of the room. For example, if the width of the kitchen is at least 1.7 m, you can choose a linear layout. If there are two rows, the distance between them should be at least 1.2 m. The maximum value is 1.65 m.
Optimal distances
According to the basic principles, access to everything should be free, the path of movement from the work surface to the stove, sink and refrigerator should be minimal. The resulting working triangle “cooking area – sink – stove” should have a sum of sides of no more than 6 m. The minimum distance between the stove and the sink should be at least 50 cm.
Free opening
This applies to the lower tier of modules, drawers, oven, and dishwasher. Opposite drawers and cabinets, the distance should be at least 90 cm, from household appliances to the opposite surface - 110 cm. In general, the total width of the headset and free spaces should be at least 170 cm.
Safety first
Due to a number of thermal processes, we must not forget about the safety of both the person who cooks and other household members and guests. The hob and oven should be located away from the main passage so that you cannot get burned on hot kitchen utensils. There should be a distance of at least 35 cm between the refrigerator and any heating equipment, from the hob to the window or door - from 45 cm. The height between the hood and the stove is 70-80 cm (depending on the type).
Convenient cooking
If you incorrectly determine the height of the countertops, you may experience back problems. Each level of furniture is selected depending on the height of the person who most often cooks. The average height of the working surface is 85 cm. The height from the floor of the upper drawers is 45 cm. Heavy, bulky items are stored only in the lower modules.
As for the ergonomics of an island kitchen, the height of the working area can be 90 cm. If one of the edges is raised to 125 cm, you get a classic bar counter that can be used as a place to eat.
Working surface height and other furniture parameters
When manufacturing a kitchen set according to your own dimensions, it is possible to comply with ergonomic requirements and take into account the anthropometric data of the kitchen owner when calculating the main parameters of furniture modules (height, depth). The main parameter that ensures functional and comfortable activity in the kitchen is the height of the working plane.
Recommendations for choosing the height of the work surface
Note! The height of the working surface should be the same for the entire set.
The anthropometry of men and women is different, so it is worth considering the gender of the kitchen owner
The average height of typical tabletops is 85 - 86 cm and is aimed at the average height of a woman - 164 cm. For taller people, the height of the tabletop is 90 cm. At the same time, 15-20 cm is the height of the support. You should also consider the following recommendations.
Table 5. Standard parameters
| Illustration | Description |
| Parameter No. 1 | The maximum height at which wall cabinets and shelves can be located is 210 cm. |
| Parameter No. 2 | The standard working surface depth is 60 cm and corresponds to the parameters of the stove and refrigerator. |
| Parameter No. 3 | Comfortable and safe is the height of the top shelf of the wall cabinet not exceeding 190 cm. |
| Parameter No. 4 | The pencil case has standard sizes from 210 to 240 cm. |
Parameter No. 5 | The standard depth of wall cabinets is 30 cm. |
Note! When making a kitchen set, corner, straight and end connecting and protective strips are used to connect individual elements of the countertop, which protect the joints from dirt and moisture.
Types of connecting strips
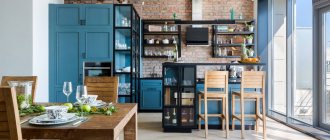
In small kitchens, small-sized household appliances are used, which saves space while maintaining the full functionality of the room.
Interior of a small kitchen
Triangle rule
The three most important elements in any kitchen are the stove, refrigerator and sink. They form the vertices of the so-called “work triangle”. Approximately 1.2–2.3 meters between the refrigerator and the sink, 1.2–1.8 meters between the sink and the stove and 3-4 meters between the distant elements, the vertices of the triangle. The area of this triangle is preferably 5–7 m², less is cramped, more is too far to run. This formula, derived experimentally by designers, is considered the most convenient for everyday life and is standardly used in kitchen layouts of all types and sizes.
The simplest principle to remember, whether you have a linear, L-shaped or U-shaped kitchen, is that there should be free counter space near each of these three elements. The stove is right next to the sink - don’t go near the sink at all while something is being prepared, or you risk getting burned while washing dishes. And there is nowhere to put dishes; the sink definitely needs space for drying dishes.
The stove is very close to the refrigerator - a fire hazard due to the serious temperature difference. If you have everything built-in—both the oven and the refrigerator—then you can put them next to each other, but it’s still not advisable. The refrigerator by the sink is inconvenient to take out and put in food; by the radiator it is again too hot.
A sink blocked by other appliances is bad in any case, since you will have to stretch and jump all over the kitchen to put the washed dishes somewhere. The ideal pair for the sink is a dishwasher. And the communications are all nearby, and putting dishes into the dishwasher from the sink is much faster.
Usually, even in the smallest kitchens, you can find free space to move the refrigerator, hob or stove and sink into different places. For example, in the corners there is a refrigerator and a sink, in the center there is a hob and oven.
Don't break up your workspace
Within the “work triangle” you must move freely and without obstacles. You shouldn’t cut up the space, for example, between the stove and the sink with a full-height solid cabinet or the same refrigerator. Move everything tall to the edges of the headset or move it to the corners.
Space saving
When planning your future kitchen, think about what you will place and where. Built-in household appliances save space and help create visual unity of the interior. Don't neglect the space under the ceiling: here you can hang several small cabinets and store seasonal products (cereals, spices, tea and coffee), as well as rarely used household appliances, such as a yogurt maker or rice cooker.
The countertop is an important element
Don't forget that you will definitely need a work area, so leave room for a good, comfortable tabletop. If space does not allow, then you can use a bar counter or convert the window sill.
Lots of light
In the kitchen, it is best to have several lighting options: central and local. It would not be a bad idea to have a separate bright light above the work area, as it is more convenient when preparing food and safer when dealing with sharp objects.
- Convenient kitchen - the main mistakes that interfere with convenience and tips on how to avoid them
- Original options for zoning the kitchen and living room
- Straight kitchens - what does an ideal straight kitchen look like? Check out the best design options! (59 photos)
Apron made of ceramic tiles or glass
The apron is usually located above the work area and stove. If the style of the tile option is not suitable, use the glass equivalent. However, we note that it is less practical and more susceptible to scratches.
Ventilation
It is very important that there is fresh air in the kitchen, so make sure that the ventilation window is not covered by wall cabinets, and do not spare money on a high-quality hood.
Additional table
The so-called kitchen island should be at least 120x60 centimeters in size, have free approaches and not impede movement in the work triangle. This option is certainly relevant for large kitchens. If the kitchen is small, it is better to abandon it.
Trash can in a convenient place
It is better to place the trash can next to the work area and have easy access to it.
Do not place the hob in a corner
First of all, it's not ergonomic. On burners that are closer to the wall, you won’t be able to unfold the dishes comfortably, the handles of the frying pans will rest against the wall, and it will be inconvenient to reach for the far corner frying surface. In addition, you will have to wash off grease from not one wall, but two.
And finally, if you have a window right next to it, this is a fire hazard, since any spark can cause the curtains to catch fire. The oven, if it is located right under the hob, may not open at all, resting against the windowsill or radiator.
The same applies to the location at the entrance to the kitchen - accidentally touching a pot of boiling soup with your hand is quite an adventure.
Instead of taking into account a bunch of nuances, it is better to move the cooking area away from the corner, and plan a refrigerator or sink in this place.
Do you really need a hood?
Yes! Even if every free centimeter of the kitchen is important to you, do not skimp and spend 50-60 of them on installing a hood. It will protect you not only from unpleasant odors, but will also greatly simplify cleaning in the kitchen, absorbing all the main fumes from the prepared dish. The optimal height for installing the hood is 60 cm from the hob, which is exactly the standard height of a kitchen apron. Below - you will start hitting your forehead or elbows, above 75 cm - poor traction.
The design, type and appearance of the hood are completely up to your taste. Just remember that recirculating hoods without a connection to ventilation are not very effective and do not help eliminate odors.
Storage Distribution
- All instruments, utensils and devices that are used every day must be located in the work area.
- In one place you need to collect only items of the same type in order to easily search.
- For convenient storage, it is recommended to use trays, boxes and other dividers. Closed containers are equipped with labels. Fixing rods are used for lids and boards.
- Drawers and systems will simplify access to even the most remote corners of the kitchen. In addition, every square centimeter is used.
- All things should be stored in rows, not in piles, so that you don’t have to constantly move or lift everything. Trays, hooks, rods or special elements are used for separation. The only exceptions are deep dishes and large pans.
- It is recommended to use non-standard storage places, such as rod hooks on cabinet doors, mounts for jars of spices, clothespins for gloves and kitchen towels, nets for small items, etc. Larger items will support the outer side ends (cans, rolling pins, kitchen towel holders, etc.).
- The interior corners of the set, as well as on the work surfaces, are equipped with carousels or shelves with drawers that match the interior.
- One of the corners of the room can be allocated for a tall cabinet, which will act as a storage room. Its height should be for the ceiling itself. Inside there are shelves, drawers, and fastening systems for different types of products or devices.
- The lowest tier of furniture is equipped with wide drawers in which you can put pans, unclaimed dishes, and bottles.
- There is a lot of wasted space under the sink. The use of trays will allow you to organize the storage of detergents and various household chemicals, sponges, gloves, and buckets.
- The sink organizer will simplify the storage and use of dishwashing detergent and sponges.
Even hard-to-reach places can be used correctly. For example, between the wall and the refrigerator you can place a narrow rack on wheels for spices, and equip the apron with a magnetic knife holder.
Selecting suitable materials
The budget will determine what material you can afford to buy for furniture. The entire layout of the kitchen unit in the kitchen is carried out according to the style ideas of the entire interior as a whole.
The general list of materials from which the frame and facades are made is as follows:
| Frame | Facades | Tabletops |
|
|
|
Procedure for planning:
- Study of different types of materials for each category of furniture (casing, countertop, facades, edges, fittings, etc.).
- We pay attention to the thickness, manufacturer, quality of the raw materials from which it is made, production technology.
- The method of trimming sections by detail is selected.
- A choice is made which cutting options will be used.
- Calculate how many cutouts there will be for installing plumbing fixtures or household appliances.
Sections of parts are trimmed with a special edge. An inexpensive option is paper impregnated with melamine. Standard – PVC (polyvinyl chloride) of different thicknesses (0.4 mm, 0.8 mm, 2 mm). There is also an ABS edge, a thermoplastic polymer. Depending on the surface texture, the facing materials can also be matte or glossy. For tabletops, a wide aluminum or plastic edge is used.
Factors influencing layout
In order for the kitchen to become not only a room where food is prepared, but also a center of attraction for the whole family, it is necessary to organize the space in such a way that there is a place for everything: for culinary creativity, for tea gatherings and even for friendly meetings. All this can be combined with the correct layout, that is, the arrangement of furniture. The following factors influence the purchase and arrangement of kitchen furniture:
- The dimensions of the kitchen and its shape are square, rectangular, elongated.
- Kitchen location.
- Location of utilities.
- Number of family members.
A special case if you combine the kitchen with other rooms.
So, before you go furniture shopping, arm yourself with a tape measure and draw up a plan for your kitchen. This can be done on paper or use a computer program that will produce an online project that takes into account all the features of your kitchen. Ergonomic kitchen layout is:
- Compliance with the “triangle rule”, that is, the work area of the stove-sink-refrigerator is located compactly and conveniently, so that you do not have to make unnecessary movements when moving from one object to another.
- The sink plays a key role in this case; space is organized around it
- The stove should be positioned in such a way that there is free space on both sides, of course, if the dimensions allow. Do not place the stove next to the sink.
- The place for the refrigerator is a corner, then it will not clutter up the space.
Once you have sketched out the layout of your kitchen and have a clear idea of how to arrange the furniture, you can go shopping.
Why is it recommended to create a drawing of the kitchen in advance?
Even with the help of a basic kitchen layout project drawn on paper or graph paper, you can visually get an idea of the future situation in the room. At the same time, it is not recommended to start work immediately after drawing up the project; it should be postponed and after a few days return to the plan again. Over time, it will become clear whether such a project is suitable or not, and, most likely, you will want to add or remove something to it. The plan will make it possible to think through the possible combination of a kitchen and a room (or balcony), which will significantly expand the boundaries of the room.
A pre-prepared project will help you get a general idea of the future kitchen.
Helpful advice! Doing a kitchen project from scratch can be a daunting task, but it often requires getting started to get results. Usually, after the first details are applied, creative thought begins to work, which quickly develops and helps to complete the layout.
A finished kitchen project will provide an opportunity to solve a large number of problems that arise in the process of planning a room renovation. With its help, you can rationally place pieces of furniture and household appliances, which will allow you to wisely use the usable area of the room.
Thanks to preliminary planning, you can immediately determine how much furniture will fit in the room, so that there is enough space for free movement and comfortable cooking. Also, the number of household appliances that fit comfortably into the dimensions of the kitchen is thought out in advance. This step will save you from buying unnecessary or inappropriately sized household appliances.
Thanks to the project, you can intelligently manage the space of the room
The kitchen design picture must necessarily include the location of communications. Thanks to this, it will become clear how to distribute the workspace taking into account the outlet of water and gas pipes. This will help you plan the placement of household appliances correctly. At the same time, it is not necessary to focus attention on the sockets, because during the repair stage they can be placed in any place where it is needed.
If you don’t just draw a kitchen design on a piece of paper, but create a full-fledged 3D design, then, in addition to calculating the required dimensions of the kitchen set, appliances and other furniture, you can decide in advance on the color of the walls and furniture and even the placement of your favorite decorative elements. The finished 3D visualization will allow you to admire the picture of the finished kitchen and decide whether you need to leave your ideas unchanged or whether you need to make some adjustments.
On the Internet, including on large furniture websites, there are design programs with which you can create a free kitchen design project. Often, this requires simply registering on the site. The most popular is the PRO100 program, which has a free trial version.
Using special programs you can create a full-fledged 3D kitchen design
If you decide to do a kitchen project yourself, then a person receives the following benefits:
- the kitchen set fits perfectly into the parameters of the room, since the dimensions and configuration of the room were taken into account;
- the entire area of the room is used correctly;
- the result is an individual kitchen design, one of a kind;
- money is saved on the cost of furniture (if it was decided to assemble the kitchen set yourself).
Layout options
There are only six classic layout options: linear, double-row, corner, U-shaped, kitchen with an island and G-shaped (or kitchen with a peninsula). Let's take a closer look at them, consider all their advantages and disadvantages.
Linear layout
Everything is simple here: furniture and household appliances are lined up along one wall. The working triangle turns into a working straight line - all movements occur parallel to the furniture: a sink is usually installed on one end, a refrigerator on the other, and the stove and oven occupy a position in the center.
This option is suitable for both small kitchens with mini-suites and large and spacious ones. In a large kitchen, free space is usually reserved for the dining area.
Two-row layout
This option can be classified as a linear layout: the furniture is also lined up along the opposite walls. But here a full-fledged working triangle already appears: with this layout, the sink and stove are usually placed against one wall, and the refrigerator against the other.
It is perfect for long kitchens, especially walk-through ones. But if your walk-through kitchen is too narrow, limit yourself to a linear layout against one wall. Otherwise, you will constantly stand in someone's way.
If you nevertheless decide to make a two-row parallel layout, make sure that the width of the room is sufficient, the doors of the cabinets open freely, and you will have enough space to maneuver. It is advisable that you have a passage of at least one and a half meters.
L-shaped layout
An L-shaped or corner layout is rightfully considered universal. It can be used in both large and small kitchens, both in elongated and square rooms. A good part of the sets in furniture stores are designed specifically for corner layouts.
This option uses two walls. The sink is most often located in the corner, and the refrigerator and stove are on two “wings”. The working triangle is compact and movements are kept to a minimum. In addition, the corner layout allows you to organize a dining area next to a free wall. Even in a small space it becomes possible to place a small table, a couple of chairs or stools.
Parallel type
This option is recommended for use in narrow spaces where the entire perimeter of the kitchen can be occupied by furniture. But the distance between structures should not be less than one and a half meters. The disadvantage of this layout is that there is little space for a dining area. In this case, designers suggest using a folding table or sliding modules on wheels.
U-shaped layout
Here the furniture no longer occupies one or two walls, but three at once. Therefore, this option is suitable for spacious kitchens in large apartments or country houses.
You can use a U-shaped layout if the kitchen area is more than 8 - 9 sq.m. In a small room, for example, in a standard six-meter kitchen of a Khrushchev panel building, you simply will not have any room to maneuver - you will be cramped.
The work triangle in the U-shaped (or, as it is also called, U-shaped) layout is close to ideal. By placing the wet, hot and storage zones on three different walls, we get an equilateral working triangle.
In large kitchens, the area of which exceeds 12 - 14 sq.m. It is worth thinking about the placement of work areas in the same way as in the L-shaped layout. In this case, the third wall is allocated either for storage or turns into a large and comfortable work desk. Otherwise, the work triangle will turn out to be too large, and you will have to run a lot.
In the spacious kitchen, the U-shaped layout allows you to organize a dining area in the center. True, it needs to be organized so that it is not in the way from the sink to the refrigerator or from the refrigerator to the stove.
Island layout
A very large kitchen can accommodate an island layout. The island can be either a hob or a sink with a worktop. The rest of the furniture and household appliances are placed along one, two or three walls.
The role of an island can easily be played by a massive dining table or a storage module with a tabletop. In a large kitchen, the island can be combined with both L-shaped and U-shaped arrangement of furniture and appliances. In addition, the island can be a kind of space divider, for example, separating the work space from the dining room or living room.
Peninsula layout
This is a layout option for open kitchens when you want to separate the workspace from the dining room or living room. The peninsula can be a countertop, a floor cabinet or a small bar counter.
The G-shaped (or peninsula) layout is also only suitable for large areas: in a small kitchen, a peninsula will only get in the way. As an option, the G-shaped one will fit perfectly into the interior of a studio apartment.
Small kitchen
I especially need to say a few words about the layout of a small kitchen. Here we must try to place all the necessary elements, all the main zones and maintain space for maneuvers.
There are several options for getting out of this situation:
Modern kitchen interior – 50 photo ideas:
Previous
KitchenHow to make a kitchen countertop with your own hands
Next
KitchenWhich countertop to choose for the kitchen?
Kitchen in the apartment
The layout of the kitchen in the apartment takes into account all the standard rules. The dimensions of the room, its shape, the location of communications and the desired functionality are also important. However, there are a few more tips for organizing kitchen space in an apartment:
It is convenient to “bypass” protrusions and corners with small cabinets. This will smooth out the overall look of the headset and provide additional storage space.
The doorway can be moved, expanded or narrowed. Instead of a door, you can install a sliding structure, this will save space.
For a small kitchen it is convenient to use smaller appliances - a narrow refrigerator, a narrow washing machine and a dishwasher.
Give preference to built-in technology.
Additional storage space can be created by making hanging cabinets up to the ceiling.
For a small kitchen, consider using a folding table and chairs.
To get a clearer idea of what the kitchen in the apartment will look like, you can create its design in computer programs and applications. For clarity, draw the location of objects in real size on the wall and floor. This will help you evaluate the convenience of the designed kitchen.
Kitchen in a private house
The layout of a kitchen in a private house gives more possibilities and options for the arrangement of items, allows you to choose any type and realize any idea. The advantage of a kitchen in a house over a kitchen in an apartment is, first of all, its size. This often allows you to organize a dining area in the same room.
The layout of the kitchen-dining room is the inclusion of a dining area in the headset scheme. To solve this problem, any type of kitchen layout can be used.
The dining area is a separate table with chairs. The absence of walls between the kitchen and dining room makes the space freer and simplifies the process of organizing holidays and family feasts.
To visually separate the kitchen and dining room, the following techniques are used:
- Zoning with color. The kitchen walls and dining room walls are painted in different colors.
- Zoning with light. For example, installing a chandelier or pendant lamps in the dining area and spotlights in the kitchen area.
- Zoning with furniture. You can put a sofa or a shelving unit.
- Partition. It may even be transparent, since the main purpose of zoning is only to visually separate zones from each other.
When planning a kitchen, it is important to consider the functionality of the finished option.
Regardless of the location of the kitchen - an apartment or a house, it is imperative to use the space effectively by thinking through the type of planning and using all possible options for the convenient arrangement of items.
Kitchen layout is not only about the arrangement of furniture and appliances, but also taking into account ease of use and safety precautions.
Features of creating a kitchen drawing: what to put on it and what scale to use
After all the measurements have been taken, you should start creating a drawing. To do this, you need to transfer the obtained indicators onto paper or into a special program, choosing the most appropriate scale. It should be taken into account that a too large scale is inconvenient to use due to the large size of the picture, and if the scale is chosen too small, the picture will be inconvenient to read. As an optimal option, civil engineers recommend using a ratio of 1:10 or 1:20.
If the scale-coordinate markings are done correctly, then creating a kitchen project with dimensions will be quite simple. When developing this sketch, all measurements are transferred to paper - the result is a plan of the kitchen space, showing the view from above. On the drawing it is necessary to mark the location of door and window openings, as well as protruding objects.
It is recommended to create a kitchen drawing on a scale of 1:10 or 1:20
Here they draw and mark with the help of signs the outlets of water pipes, ventilation holes, and heating systems. It is important to correctly depict the distance from objects to walls. After transferring the information to the plan-drawing, you need to additionally enter the kitchen and once again check the drawn sketch and the room, make sure that not a single object is lost. Additionally, it wouldn’t hurt to at least visually check the marked distances.
The second stage of creating a kitchen sketch: drawing out the walls
To make the design of a kitchen in a house or apartment the most informative, it is recommended to show the layout of the walls in the second sketch to visualize the side view of the kitchen. A side scan of the walls is needed in order to depict the surfaces of the walls on a scale, on which it will then be convenient to draw a drawing of the kitchen set and mark the location of the dining group. The development is considered the most convenient tool, using which it is easy to indicate the placement and positioning of shelves, kitchen cabinets and cabinets, as well as the location of household and lighting fixtures.
Archicad and Revit programs are used to create a layout of the kitchen walls.
To create a floor plan, interior designers use special programs such as Archicad and Revit. Of course, if you approach design creation professionally, you will need to study all the nuances of how programs work. However, to create a basic kitchen project, it is enough to watch videos containing simple instructions for working with the programs.
Important! When creating your own drawing, it is first recommended to look at photos of kitchen projects with dimensions that best match the required characteristics.
It is convenient to indicate the placement of kitchen furniture on the wall layout
In addition to using programs, you can do the planning manually using a pencil and graph paper. To do this, you need to draw a rectangle on a sheet of paper, its height (in scale ratio) should be equal to the height of the wall, and its length should be equal to the size of the wall that is of greatest importance in the interior. Having chosen the required distance from the floor and corner, you need to draw window and door openings, draw a battery and other objects that cannot be moved. The scan should be performed for each wall separately. The main thing is to draw a general plan of the kitchen, where each wall is marked with a specific letter.
Related article:
Kitchen interiors: how to make a kitchen not only comfortable, but also attractive
Various interior styles, features of layout and selection of furniture. Photos of kitchens.
Styling
A linear layout, single-row or parallel, is your option if you are a fan of minimalism or modern style. An urban loft or rustic surroundings also respond well to this arrangement. Actually, in this case there are no style restrictions; it is universal. Only the size and topography of the kitchen can limit it.
Corner and U-shaped layouts are very suitable for classic, high-tech or modern styles. Eclecticism, country, Provence also look great with this arrangement.
Where to put everything and place it
When arranging furniture and appliances in the kitchen, it is important to take into account the rule of the working triangle, thanks to which the work process becomes convenient and comfortable, and most importantly safe. This triangle consists of a stove, a refrigerator and a sink. They are the main components during cooking, since it is between them that movement occurs.
The arrangement should be in the following order: the refrigerator comes first, the sink is installed in the middle, and then the stove comes. This is due to the natural sequence, that is, the products first lie in the refrigerator, they are taken out, washed and then heat treated.
The main task is to place these items at a distance of at least 60 cm from each other. It is also necessary to take into account the location of communication systems for installing any element. Now more about each of them.
Where to place the sink
There are several options for placing a sink in the kitchen. The most common of them, which is suitable for any headset layout, is direct installation. Moreover, this is the only way for a linear kitchen shape. The sink is installed centrally between the refrigerator and the stove. It can be rectangular, square, round.
The second option is suitable for an L-shaped or U-shaped corner layout. The location is in the very corner. Such sinks are considered corner, but can also be shaped like a circle, rectangle or square.
The most effective and lightest place to install the sink is near the window. In this case, you can combine business with pleasure by watching the beautiful view from the window while washing dishes or groceries.
Attention! This installation location is generally the most expensive, since it is necessary to extend the communication system quite far. Therefore, the cost of installation increases significantly. In addition, you will have to wipe the window much more often due to drops getting on the glass.
Finally, in a large kitchen it is very convenient to install an addition in the form of an island, where the sink will be located. An island can become an extension of the work surface, and very often there are drawers under the table. In this case, it is necessary to think through the installation of communications in advance, since they will pass under the floor.
Where to install the stove
As already mentioned, the stove is included in the working triangle, so its location depends on the design of the sink and refrigerator. In fact, its placement is possible in the same way as sinks, but certain restrictions must be met.
First of all, it should be at least 60-90 cm away from the sink and refrigerator. According to the operating rules, it should not be installed closer than 50 cm from the balcony door or opening window sash.
A gust of wind can extinguish the flame, which is very dangerous if not noticed in time. Therefore, the stove should not be installed under a window that opens.
Also, safety standards state that the stove should be at a distance of at least 6-7 cm from the walls. Therefore, it is not recommended to install it close to the corner. It is best to place a cabinet near the wall or extend the work surface at least 15 cm, and then place the stove.
Moreover, during cooking, grease splashes are easier to clean from the countertop, rather than from a vertical wall. Therefore, the best option is to place the headset in a straight line.
Where to put the refrigerator
The refrigerator takes up the most space due to its large dimensions, so it is important to choose the right place for it. First of all, you need to look at the side to which it opens.
It is advisable that it be against the nearest wall. In addition, the door must open completely, otherwise the cabinets simply cannot be opened.
The most preferred location for installing a refrigerator is a corner. It will take up little space and will not block the road.
It is often installed near the door, where there is a straight wall and a corner is also formed.
This option may be even more convenient than the first, depending on the layout of the kitchen. Built-in appliances are becoming increasingly popular, so this arrangement of the refrigerator is also relevant.
Placement of washing machine and dishwasher
Washing machines and dishwashers are also often installed in the kitchen. According to the location rules, it is not recommended to place them next to the stove, since, despite the presence of a protective thermal insulation layer, heating can still negatively affect the operation of the device.
You shouldn’t do this.
The minimum distance between them should be 15 cm, but ideally 40 cm. The end cabinet for installing a washing machine is also undesirable. The fastening will be unreliable due to fastening only on this side. The appliances can be either built-in or located under a countertop that does not have palaces.
Advice! The problem of convenience is solved by placing the dishwasher or washing machine near the sink. Not only does it mean having detergents on hand, which is very convenient, but it will also be much easier to connect to the communications system, since everything will be nearby.
Design features of the kitchen set
As noted earlier, first of all, it is necessary to decide on the location of the main working points - the sink, refrigerator and stove, as well as the method of placing the set in the room, based on its area and configuration. After this, you can approach in more detail the organization of the functional equipment of each individual zone - choosing a place to install exhaust hoods, dish shelves, drying racks, drawers with spoons and forks, places to store pots and other kitchen utensils.
Corner set with dimensions
Having decided on the location and purpose of each module, we begin to determine their optimal sizes.
What to consider when designing cabinets
First, you should decide on the internal components of the cabinet. These parameters will affect the type of cabinet construction.
Note! You can save space by installing a roll-out basket inside a standard cabinet.
Roll-out baskets
If you plan to install a roll-out basket in the cabinet or equip it with drawers, then its design is limited to 4 drawers. When the shelves stop, another piece is added. The optimal shelf height is 30 cm, so the lower cabinets can be equipped with two shelves, and the upper ones with three (for a cabinet height of 90 cm) or two (for a cabinet height of 60 cm).
Shelves inside upper cabinets
The design of a standard cabinet is represented by two side, top and bottom parts. In this case, the width of the lower and upper parts is determined as the difference between the width of the cabinet and the thickness of the chipboard, equal to 1.6 cm and multiplied by 2 (40 - 2*1.6) So, if the width of the cabinet is 40 cm, then the upper and lower parts will be have a width of 36.8 cm. Industrial furniture production offers cabinets in which the top cover is replaced by two slats - this allows you to significantly save material, but complicates the assembly process.
Types of cabinet designs
If there is a shelf inside the drawer, its width corresponds to the dimensions of the top and bottom parts. To make the back wall, LDVP is used, which is secured using furniture nails or staples.
The HDF back wall is 2 mm smaller on each side than the size of the cabinet
You can develop a kitchen drawing on a computer using one of the many design programs. A special article will tell you about the main nuances of making kitchen furniture drawings yourself.
Edging parts
When making furniture from laminated chipboard, the end sections of parts must be finished with a decorative edge, which protects the material from moisture and mechanical damage. When designing parts, it is necessary to immediately determine which cuts will have an edge and which will not. You will need to glue the edge on the front side or where there is a high probability of moisture getting in.
Decorative edge
Note! The edge thickness can be 0.4 or 2 mm. Thin and cheaper tape is used to finish structural elements of drawers.
PVC edges are applied to laminated chipboard sections in the factory using special equipment, but a thin melamine edge can be applied independently using a regular iron.
Types of PVC edges
Features of designing corner cabinets
When designing a kitchen set with an L- or U-shaped arrangement, the issue of choosing the design of the corner module is relevant. The cabinets can be connected at an angle of 90 or 45 degrees. In the first case, the cost of the structure is lower, and in the second, it is possible to install a sink or hob.
Corner cabinet at 45 degrees
The main problem with 90-degree corner joints is the difficulty of installing the façades. Drawers and doors will create some interference, so the design of such a cabinet differs from the usual one.
Design of a corner cabinet with inserts
The design can be made more functional by special inserts that pull the drawers together and act as a façade. The width of the inserts is 7 cm, and the height corresponds to the height of the cabinet.
Placement of inserts
To install the facade, another insert 10 cm wide is inserted on the opposite side for fastening the hinges.
Cabinet with additional insert for door fastening
The corner module with a facade at 45 degrees has more impressive dimensions - with a tabletop width of 60 cm, its sides are 90 cm long.
Trapezoid under the sink
When designing such a cabinet, you should take into account the location of the upper and lower parts, which are located and fixed between the sidewalls, and not on top. This is due to ensuring correct installation of the façade and existing hinge designs.
Design of a corner cabinet with a 45 degree front
What to consider when designing a drawer
When designing drawers, you can use standard metaboxes (ready-made drawers) or design your own laminated chipboard drawers of the required size.
Metabox
The main element of a drawer is the guides, which can be roller or ball. The latter provide full opening, and therefore are more convenient and functional. When designing a drawer, it is necessary to take into account the width of the guide, which is 1.3 cm. With a cabinet width of 40 cm, the dimensions of the drawer will be 34.2 x 50-54 cm.
Drawer on roller guides
Examples of interesting kitchen layouts
When planning a kitchen, appearance is no less important. Therefore, to make a room look stylish and attractive, you need to be able to choose the right color scheme and design. There are a lot of interesting options that are equally suitable for arranging large and small kitchens.
For a small kitchen with a large window opening, you can use various layout ideas. They can concern not only furniture, but also other structural solutions: placement of shelves, built-in niches, space under the window.
A light brown kitchen will look beautiful and unusual. The facade of the set and the appearance of the shelves imitate natural wood. The free space under the window can easily be used for a dining table.
A large kitchen with furniture made of natural wood is often made in a gap: that is, the sets are installed separately from each other, in a chaotic order on different sides. The spacious room allows you to place a round island with internal open shelves or a wine niche.
On the opposite side you can arrange a bar counter or make a small, rotating buffet.
In order for the kitchen to perform all its functions, it must have a sufficient number of furniture. For example, in spacious rooms it is absolutely not necessary to use furniture that is too deep. You can hang narrow (up to 20-25 cm) cabinets. But there should be more of them. Such structures are intended only for storing bulk products and seasonings. Some models even have enough space to store saucers and mugs.
It is preferable to install built-in household appliances in such situations so that they do not protrude beyond the boundaries of the work area. The refrigerator will be conveniently located in a niche near an adjacent or opposite wall.
The layout of a kitchen in a small home can also be attractive. For example, if you place a limited number of cabinets and more elegantly shaped hanging open shelves. Such structures are most often made of wood.
The presence of shelving at different levels in the work area allows you to visualize the depth of the space. Such designs fit harmoniously into a room with a real antique stove.
An L-shaped kitchen in a loft style looks no less attractive. Typically, this option is ideal for open or combined rooms. Depending on the dimensions, the furniture fits perfectly into small kitchens without restricting the free space.
The shiny, glossy finish on the floor and façade creates a reflection of light. The room looks spacious and becomes more bright.
The U-shaped layout works well in kitchens with a window opening. For such cases, a separate space for the refrigerator is prepared. It will look built-in and fit harmoniously into the finished interior.
A corner kitchen with a pull-out table or bar counter looks beautiful, rich and functional. It is still possible to have additional niches and drawers.
What you need to complete a kitchen sketch
If the goal of the work is not only to create a general interior concept, but also to develop a detailed plan of the kitchen space indicating furniture and household appliances (taking into account their individual parameters), you will have to create a kitchen project in several different versions. It is necessary to show a top view, a side view, and perform an expansion of the walls, which shows the placement and required number of sockets, as well as lighting items.
It is recommended to create a room project from different angles
Before designing a kitchen and creating a project, you need to carefully take detailed measurements of the kitchen space. You need to understand that this action is carried out after renovation for final finishing, since if moving and leveling of the walls is required, this will significantly change the configuration of the space and affect other parameters.
At the planning stage, the walls and floor should be level, and there should be nothing unnecessary in the kitchen, including construction waste. Only in an empty room can you correctly measure all angles and distances. To take measurements of the room, you need to have a pencil, a sheet of paper or graph paper, an eraser, a tape measure or a construction rangefinder on hand. To obtain detailed information about a room, follow these steps:
- measure the width and length of the walls;
- find out the height of the ceiling;
- take measurements of window openings and doors;
- determine the parameters of protrusions or niches.
To get a high-quality result, you need to take accurate measurements.
In addition, you need to carefully measure items that cannot be moved, these include gas meters, a radiator, a ventilation outlet, and a gas boiler. In addition to the sizes, you need to know the distance from these objects to the key lines. Usually this is the floor or one of the corners of the room - more often the outer corner located near the door is taken. If a kitchen design with a corner layout is being created, then, in addition to standard measurements, the perpendicularity of the walls is additionally measured.
When measuring a wall, it is recommended to mark off intermediate points. One point is usually located at the level of the future countertop, the standard height of which is 800-850 mm. In some cases, depending on the person’s height, this parameter is changed. The second point is set at the level of human height, where the installation of wall cabinets will be planned. It is important to place these points in different places on the wall and connect them using a level to avoid curvature. It is recommended to first apply all the resulting elements manually onto paper, even if you plan to carry out the project on a computer.
A kitchen sketch can be made either manually or using a special program.
Helpful advice! Interior designers often use millimeters as units of measurement, so it is better to immediately carry out all calculations in these units.