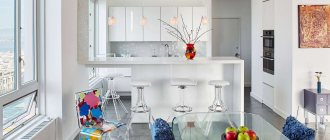
Homemade kitchen furniture will never go out of fashion; these stylish interior items can be found in the apartments of people of various social groups. Sometimes owners start small, first making kitchen shelves with their own hands, gradually moving on to more complex projects and drawings.
Homemade multifunctional shelf
Types of wall shelves for the kitchen with photos in the interior
Wall shelves are a very convenient item, using which you can place many small things without cluttering the space of the room where they are placed. In addition, such items can serve as decorative elements that give the room a certain flavor and originality. Structurally, shelves placed in the kitchen can be of several types: open and closed, corner and cantilever, symmetrical or asymmetrical in shape, with built-in drawers and various additional decorative elements (lighting, inlay, etc.).
Open kitchen shelves
Open shelves are the most optimal in functionality and inexpensive option for such products, which are most accessible for making with your own hands from scrap materials.
A classic version of an open shelf, used in the kitchen of a country house and in a comfortable apartment
The convenience of using an open shelf is that in order to take an item placed on it (dishes, containers for storing spices or bulk products, etc.), you just need to reach out and take what you need.
In a modern kitchen, open shelves look stylish and are easy to use.
Fastening elements for open shelves can be hidden or be additional decorative elements of such structures. These can be brackets of various shapes and sizes or structural elements that combine all the components of the product into a single whole.
Open shelf made of artificial stone
The simplest option for self-production are products of this type, made from wood or panel materials (chipboard, MDF, etc.). This is due to the fact that wood is easy to process and has a low specific weight, which does not require the use of complex fastening elements when hanging on the wall.
Wood is an environmentally friendly material that can be used in various types of premises
In an open type design, several shelves can be combined, while the material used in manufacturing can be completely different.
Open shelves made of glass and metal look light without cluttering the interior of the kitchen
Closed wall kitchen shelves
A distinctive feature of closed shelves is the presence of rear and side walls, as well as doors of various designs (sliding, hinged, lifting).
Closed shelves can be decorative elements of the kitchen space and a place for placing kitchen utensils
The presence of doors allows you to store on such shelves sharp-smelling ingredients used during cooking (spices) and utensils used in everyday life.
Closed shelves with doors equipped with a lifting mechanism
When made with your own hands, these products are more complex, because... when assembling them, it is necessary to ensure reliable closing of the doors, and the product itself, as a rule, has more weight than open-type analogues.
Closed wall mounted shelf made of metal
For the manufacture of products of this type, various materials can also be used: wood and metal, glass and panel materials made from wood processing waste (chipboard, MDF, etc.), as well as durable plastic.
Wall shelf model PO-1200/400
Corner kitchen shelves
The corner structure can be open or closed; its distinctive feature is its placement on two walls located at a certain angle to each other.
Corner shelves are very functional, especially in small kitchens
The materials used in manufacturing can also be completely different, which allows you to choose a model in accordance with the design style of the kitchen space.
Open design is most often used in corner shelves
There can be a huge number of design options for corner shelves, so you can always find a model that satisfies the user with all the requirements placed on it.
Corner glass shelves
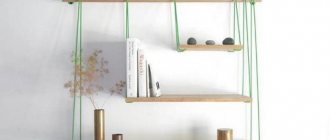
Decorative wall shelves for the kitchen
Decorative wall shelves serve to create coziness in the kitchen, giving it a certain style and flavor.
Using decorative shelves you can decorate your kitchen space in any style.
These are, as a rule, open-type shelves made of lightweight materials, because decorative items are also lightweight and there is no need to construct durable structures.
Utensils not used in everyday life can be placed on decorative shelves
It is quite possible to make decorative shelves yourself using available materials.
Decorative wooden shelves "Ferro Raffa"
Related article:
Wall mounted shelf : varieties, what materials they can be made from, photos of the product in different rooms, how to make it yourself and how to attach it correctly.
What material can shelves be installed from?
When determining which raw materials to choose from for kitchen niches, it is necessary to take into account the strength of the wall and the purpose of the shelves. Any type of wall racks will look relevant in different kitchen options if they are chosen correctly:
- Plastic. They often have an extraordinary design, but are strong. Can be single or multi-level. It is customary to install oversized household appliances in such niches: sandwich panels, toasters, microwave ovens, blenders.
- Glass. In addition to the work surface made of tempered glass, these have protective tubes that will prevent the dishes from falling. Typically, wall-mounted glass shelves have a metal frame.
- Wooden. Such products are considered to be universal, as they are durable and perfectly hold not only decor, but also various types of kitchen utensils. Such designs do not require special installation; they can be made independently, having on hand a board of suitable thickness.
- Metal. Such models are quite unusual. When choosing these options for kitchens or dining rooms, it is necessary to select those that are not susceptible to corrosion. The material must be protected from rust.
When focusing on a particular shelf material, it is also necessary to take into account whether they will be combined with other items in the kitchen.
Kitchens in white from a metal frame Source journal.homemania.ru
Wooden shelves with equal tiers for the kitchen Source dekormyhome.ru
Glass frameless shelves for the kitchen in the apron area Source brunoberger.at
Materials for making kitchen wall shelves
As already written above, various materials and their combinations can be used to make wall shelves for the kitchen. Distinctive features of the materials used for these purposes are:
- for metal – strength and the ability to harmoniously fit into an interior where there are already metal surfaces and products;
Metal spice rack is quite popular among users
- for wood – environmental friendliness and “warmth” of natural material;
Wooden shelves for spices are also in demand by housewives
- for plastic – low cost, variety of shapes and colors;
Plastic shelves can be of different shapes and colors
- for glass - fragility, as well as external lightness and airiness;
For the manufacture of glass shelves, glass with a thickness of at least 6 mm is used
- for stone – strength and significant weight.
Artificial stone is used more for decorative purposes, to create a certain appearance of the kitchen space
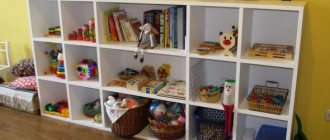
What to put on kitchen shelves
The shelves usually contain:
- decorative plates, cups, vases;
- cookbooks with bright covers;
- photos, framed paintings;
- all kinds of figurines, souvenirs, decorative candles;
- jars with seasonings, coffee, tea, cereals;
- TV, lamps;
- bottles with drinks, glasses (placed on special holders);
- pots, salad bowls;
- live potted plants;
- detergents in jars, sponges, potholders.
On the surfaces located inside the set, less beautiful dishes are placed, cutlery, textiles, equipment for cleaning various surfaces, and cutting boards are placed.
Making shelves from wood, glass or other material yourself is not at all difficult if you have interesting ideas and suitable mechanical tools. It is important to decide in advance on the purpose, design, and installation method. Homemade shelves will become a real work of art or will be standard - rectangular, corner.
Such designs occupy a minimum of usable space and contribute to the creation of an ergonomic design.
How to choose a shelf for the kitchen
The variety of offers on the domestic kitchen furniture market sometimes creates difficulties with its choice, which fully applies to wall shelves intended for placement in the kitchen.
Shelves can be decorated in various styles, including “antique”
In this case, in order not to make a mistake, you must follow the following selection criteria, using which you can make the right choice:
- Initially, you should decide for what purposes the shelf will serve, and what dishes or other items will be placed on it.
- The dimensions of the shelf should correspond to the number of items placed on it and at the same time not “put pressure” on the overall perception of the kitchen.
- The design style must match the existing one or the one being created anew.
- To store small items, it is most convenient to use shelves with a multi-level arrangement.
- The removable structure, fixed to the wall using hanging hinges, is convenient to use, because It can be easily removed and washed if necessary.
Even a small shelf can make kitchen work easier
Step-by-step instruction
You can make a similar shelf yourself
- An ordinary board left over from the renovation will be suitable as the main material. The width should be selected individually, based on the items that will be placed on it and the place where it will be installed.
- In addition, for fastening you will need glue with a dispenser and screws (3.0x25 mm). Semicircular slats can be used as decoration.
- We mark the board at a 45° angle to the required length and use a hacksaw to cut it at an angle of 45°. As a result, we get 4 shelves.
- From the remains of the board you need to cut out racks of the same size (for example, 5x20 cm) in the amount of 6 pieces.
- All elements should be sanded until perfectly smooth.
- Let's start assembling the structure. Each shelf, except the top one, must be secured with two racks. The markings are applied in the middle, then the elements are fastened with screws. To strengthen the fasteners, use PVA glue.
- For ease of fastening, the middle shelf posts are placed along the edges.
- The remaining parts of the corner shelf are assembled in the same way.
- If you wish and have free time, you can decorate the shelves using semicircular slats. So, with their help you can make low handrails so that small or round accessories do not fall out. At the final stage, the shelf is painted.
Making a shelf
How to make a kitchen shelf with your own hands - nuances
When making a shelf yourself, as well as other furniture, you should remember the following nuances of the work, namely:
- Before starting work, you should make a sketch (drawing) of the product being manufactured;
- The dimensions of the shelf and the style of its design must correspond to the location;
- Having thought through the design and choosing materials, it is necessary to prepare the tools required to perform the work;
- the fastening elements used in the design must correspond to the selected materials and ensure reliable fixation of the shelf to the wall surface.
Shelves in the “Russian style” can be made from edged boards using a minimum amount of tools - a hacksaw, a plane and a jigsaw
For tools
There are many designs of racks for storing a variety of tools. There are classic and original options. You can make them yourself.
Necessary equipment and materials:
- plywood, beams, slats, boards;
- self-tapping screws, nails, screws;
- hammer, screwdriver;
- jigsaw, saw.
To assemble the easiest option it is enough:
- Prepare two narrow boards (up to 10 cm wide) for verticals and several for shelves.
- Grooves for various tools are cut in the horizontals. Select holes for screwdrivers and hammers.
- The shelves are nailed to the racks.
If the wall is easy to drill, then this option is also possible.
Here the tiers of shelving are screwed directly to the wall. To do this, holes are drilled in it into which dowels are recessed. Corners are screwed to the shelves, with which they are attached to the wall.
The final stage is finishing. This operation can be carried out in different ways. For example, paint the rack, sand it, and then cover it with drying oil or varnish, cover it with paper or other suitable material.
Installation of wall shelves for the kitchen
For the correct placement of a hanging shelf, it is necessary to have a measuring construction tool (level, plumb line, tape measure), as well as careful marking in the place of its placement. The shelf must be located strictly in a horizontal plane, and its fastening elements must correspond to the material of the wall on which it is placed.
For your information! Self-tapping screws are used for fastening on a wooden surface, expansion dowels are used on a brick wall, and anchor bolts are used on a concrete wall.
Mounting options may be slightly different, but the above are the most common among experienced users.
A retro-style kitchen shelf can be made from wood with your own hands
Other options for the kitchen
- The cabinet is retractable. It conveniently includes plastic and wood modules; they can be selected in different shades and sizes.
- Pull-out narrow box for storing vegetables and fruits like a bar. It has a metal base. The option is practical and compact.
- Railing system. A convenient way to store spices, they are always at hand. On the rail you can place not only frequently used spices, but also essential items: containers with vinegar, oil, cutting boards, a ladle, a knife.
- Cabinet doors. An option for both ready-made furniture facades and products made to order. Craftsmen can attach the shelves themselves to the inner sides of the doors of the sets.
It is advisable to purchase cells with handles, as they are easy to get from the very depths of the cabinet.
How to properly and effectively arrange shelves in the kitchen
The location should be such that it is convenient to use the items placed on the shelves. Experienced designers and constructors recommend following the following recommendations when choosing the location of wall shelves:
- for kitchens with L- and U-shaped layouts, corner models are easy to use;
- if there is a hood located above the hob, shelves can be placed on both sides of it;
- placement above the countertop is a classic location option;
- If the kitchen has a niche in the enclosing structure (wall, partition), then this is an ideal place to place shelves.
Wall shelves in the kitchen are a functional product and an interior item
In each specific case, the placement location is considered individually, based on the nature of use of such products, the personal preferences of the user and the design style of the kitchen space.
Advantages and disadvantages of open shelves
Such interior solutions have a number of pros and cons. It's important to note the benefits first:
- add zest to the room;
- create a visual expansion of space;
- complement functionality;
- are convenient and practical;
- are easy to install.
As for the disadvantages, they include:
- danger of collapse (but only with poor-quality fastening);
- difficulty of care (too often you have to wash all the dishes and wipe down the shelves);
- requires the use of only beautiful dishes.
Open shelves for the kitchen are portable and easy to transport. They can always be moved to any convenient place. For this purpose, the main thing is to have the appropriate installation skills.
Material for work
Before starting work, be sure to check the quality of the material. The boards must be smooth, without knots, cracks, dry and without traces of mold. Before work, treat them with an antiseptic primer.
If you use tree branches for a shelf, then sand the trunk well so that during the work there are no surprises in the form of a rotten knot or traces of mold under the bark. You can also use chipboard and laminated chipboard for work.