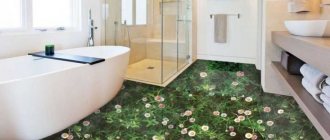
Advantages of mosaic
The choice of mosaics is currently very large, so choosing it for the bathroom is not entirely easy. In the case of combining a bathroom with a toilet, it is necessary to improve ergonomics in the equipped areas. In addition to thinking about where and what will be installed - a bathroom, a shower stall, you also need to calculate the points where the lighting will be located, the design of the mirror, hangers, etc.
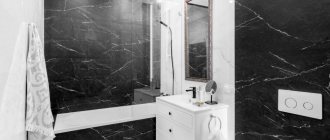
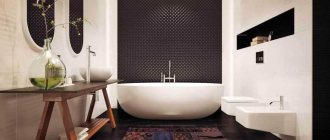
The entire design should be based on the same color shades or completely contrasting solutions. In terms of texture and color, the selected decor should have something in common with the installed plumbing fixtures (sink, shower stall, bathtub) and ceramic tiles. Most bathrooms have a small area. In such cases, mosaic comes to the rescue, since rooms made with its help are visually enlarged and seem lighter.
Tips for caring for mosaic tiles
In order for the mosaic to maintain its original aesthetic appearance and last as long as possible, it is worth adhering to some rules of care:
- after completing the masonry, do not use the bath for 14 days to allow the material to cure;
- equip the room with ventilation that allows excess moisture to naturally escape;
- When cleaning, use only products with a soft, gentle composition;
- after bathing, wipe the finishing parts dry to prevent mold from forming in the seams;
- Once a month, treat the seams with special fungicidal agents, gently rubbing them into the tile seams.
After laying the mosaic, it is not recommended to use the room for two weeks
. By following these simple rules, you will preserve the original appearance of the mosaic for many years.
The possibilities of this modern fashionable material are limited only by your imagination. There are a lot of options for mosaic cladding. As you already understand, you can combine mosaics in a variety of options and styles, be it classic or modern.
Mosaic in bathroom design
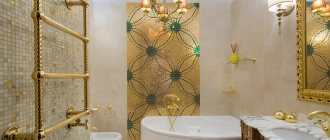
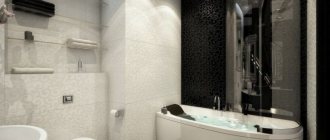
The combination of tiles and mosaics looks impressive when decorating a bathroom with a shower. This stylistic solution of combining all complex components will give the room harmony and comfort. It is worth paying attention to glass mosaics, which in the bathroom will serve as aesthetic and reliable protection for the walls.
Advantages of glass mosaic:
- provides protection of actively used surfaces from mechanical damage;
- excellent coating that protects walls from bacteria;
- has increased strength;
- water and moisture resistant.
Use Cases
Bathroom finishing options can only be limited by your imagination. It is important to know moderation in everything; it is not necessary to cover all the walls with it. It will be enough to place the correct accents on individual areas of the room.
Let's consider common decoration options in detail.
Sink area
Decorating the sink area will allow you to focus on the work area, while protecting it from moisture. Most often, decorative frames are laid out for mirrors, shelves and window openings.
Mosaic in the sink area protects the wall from excessive moisture and dampness
Vertical surfaces
Wall cladding above the bathtub will completely transform the room. It is on this that the main attention is concentrated.
Laying a mosaic on the wall above the bathroom is the most popular option.
Laying out the partition separating the bathtub from the bathroom with metallic-colored material creates a unique effect.
Covering the floor with mosaics gives the interior a special appeal. In addition, this coating is reliable and will serve you for many years.
The main advantage of mosaic flooring is its high wear resistance.
The display in the form of a “rug” under the sink or a panel in the very center of the room looks very original. Glass mosaics of dark shades are mainly used to decorate the floor.
Cladding of individual surfaces
The mosaic looks best when it is allocated individual surfaces, such as niches and shelves.
Mosaic shelves look effective and very stylish
Selected individual elements combined with the overall interior give a special coziness.
Individual mosaic elements give the bath a special coziness
You can also highlight the shower area by creating a vertical stripe that will blur the boundaries of the space, visually increasing the height of the room.
A mosaic wall in the shower erases the boundaries of space in the room
Bathroom with complex geometry
Mosaic is ideal for tiling a room with asymmetrical walls or a sloping ceiling. With its help, you can not only beat up asymmetrical walls, creating an original ornament, but also decorate plumbing items, for example, a sink or bathtub.
Mosaic tile materials
Mosaics are made from glass, natural stone and ceramics. For finishing a bathroom, the latter option is most often used. The ceramic option in combination with plain tiles looks very impressive. You can use its individual elements for patterns. Stone mosaics are made from granite, jasper, marble and other natural stones. This stone is given the required shape by polishing it.
But made from glass, it looks the most original, as it has many color solutions and can be matte, transparent and glossy. Thanks to heat treatment, this finishing material is very durable and safe. It is a wonderful decoration for walls. Not afraid of temperature changes and moisture.
When installing, you need to choose a moisture-resistant glue and then the beauty of the mosaic in the bathroom will delight your household for many years. Unlike ceramic tiles, this material does not have small pores, so it is necessary to use viscous adhesive for vertical surfaces, and elastic adhesive for horizontal ones.
Types of materials for manufacturing
A wide range of materials for the production of mosaics allows you to create an original interior in the bathroom in accordance with the conditions of the given room.
The most common materials for its manufacture are:
- Natural stone is the most expensive material for production, which has a number of advantages:
- strength and durability;
- environmental friendliness;
- creating a chic look for your bathroom.
Natural stone mosaics create a unique design
As a rule, mosaics made of natural stone, namely granite and marble, are used for floor finishing.
- Cork is a finishing material with high moisture resistance, environmental friendliness and durability. Thanks to special manufacturing technology, cork is resistant to moisture, does not form mold and is easy to care for. A panel made of cork material will look original in the bathroom.
- Glass is a durable, moisture-resistant, waterproof and wear-resistant material. The glass version is very easy to care for; it is not susceptible to modern chemicals and sudden temperature changes. With the help of correctly selected mosaics for lighting, you can visually expand the boundaries of the room.
- Ceramics is a popular material; it is not expensive, but has high qualities. The main advantage of ceramics is the variety of colors and shapes with which you can create a colorful, unique interior.
- Shell is a unique, durable, environmentally friendly material that does not fade over time and is highly durable. A room decorated with mother-of-pearl mosaic takes on a sophisticated, luxurious look. Thanks to the multiple colors, the shell will fit into any interior.
- Smalt is a priority, affordable material for making mosaics. It is durable and highly moisture resistant, which makes it widely used for cladding bathrooms. Smalt can withstand a high degree of load, so it can be used to decorate the floor.
- Metal is an uncommon material because in conditions of high humidity in the bathroom it tends to oxidize and rust. As a rule, such material is used only imported in certain places of the room to give the interior some kind of futuristic hint.
- Plastic is a popular material that is wear-resistant, moisture-resistant, and is not susceptible to steam and temperature changes.
Natural stone is one of the most durable materials.
Cork mosaic is suitable for creating panels. Glass mosaic is recommended to be used above the sink
Ceramics are very popular when finishing the bathroom due to their low cost.
The shell gives the bathroom interior an unusual style. Smalt mosaic is mainly used for floor finishing.
Metal mosaic is suitable for modern style in the bathroom
Plastic mosaic is another economical option for finishing a bathroom.
Facing
Finishing with mosaic cladding is not an easy task. And for those who have never encountered laying tiles on their own, it is better to seek help from specialists.
It is necessary to remember some points when performing work:
- the surface that is planned to be covered with mosaics - concrete, metal, wood - must be perfectly flat;
- Grouting of joints is carried out no earlier than every other day. Epoxy grout is the best option.
Complex room geometry
If you have a non-standard room design with rounded planes, curved lines, and many corners, mosaic will come in handy.
Its flexible base is capable of repeating intricate configurations, and the interior will become streamlined and holistic. If you use ceramic tiles, you will need a lot of effort and time for cutting and installation.
Mosaics can be used to decorate the outer surface of a bathing bowl, pedestal, boxes with pipes, columns, and rounded racks.
In attics and other rooms with sloping ceilings, mosaic tiles can be a successful covering. This type of finishing is also relevant for partitions that zone space - in combined bathrooms, between the shower and toilet.
Preparing the mosaic for installation
Dividing the cardboard into smaller pieces is easy and all you need is a knife or scissors. When preparing the base, it is useful to keep in mind that only complete mosaic pieces can be laid.
Cutting elements (cubes) is quite demanding and requires a lot of patience. In the case of small formats 2.3 x 2.3 cm, the main rule is that a part smaller than half the cube cannot be separated.
- The interlocking mosaic combines 2.3 x 7.3 cm rectangles with the classic 2.3 x 2.3 cm small cube format.
- The contrast of metallic effects and shiny glaze gives the mosaic a new three-dimensional effect.
- Due to the combination of an elongated format with a square format, working with a rope requires a different installation method.
Woven mosaic tiles are especially suitable for use on flat surfaces; due to the elongated segments, they cannot be rounded at large angles.
Small blue bathroom
The main thing for a small room is to choose the right design for the main background. The best option is a smooth flow from the dark bottom to the light top using horizontal and vertical lines in the wall decoration. You can also make several walls white, and decorate one in a blue palette. Large mirrors will expand the space as well as glossy surfaces.
Here it is better to abandon the standard bath in favor of a corner or shower stall. A toilet or washbasin can take up another empty corner, freeing up a decent amount of space. Only the most necessary furniture is installed. You can use a cabinet with a shallow sink built into the countertop and a washing machine into the lower part. A pair of non-bulky hanging shelves or a cabinet will be enough.
If you have a small space, you shouldn’t get carried away with decor. Its role will be played by a couple of sconces near the mirror, towels, bathroom curtains, and a small picture under glass on the wall.
Preparatory stage
Before laying the mosaic on the shower floor, a check is made of the concrete or cement bases, which must withstand the weight of the finishing materials.
The planes of the walls and flooring are leveled. Water pipes and sewer lines are laid in pre-cut channels. It is recommended to consider the installation locations of service hatches intended for servicing water supply elements.
It is recommended to cover the walls adjacent to the pallet with a layer of cement with the addition of liquid glass. If you plan to install additional equipment in the shower stall (for example, a hydromassage device), then water pipes and electrical wiring are installed in the wall cavity in advance. There are designs with an additional seat that is screwed to the wall surface.
Selection of consumables
When laying a mosaic ornament, tile adhesive on a cement or polymer base is used. When choosing an adhesive composition, you must remember that glass mosaic has a transparent structure. The use of dark glue leads to a distortion of the color of the tile. Cement-based materials are used for walls made of concrete or plasterboard.
If partitions made of wood or plastic are installed in the room, it is recommended to use polymer-based glue. When laying finishing material on the floor and the lower edge of the walls, 2-component adhesive can be used. The material has increased strength and provides additional protection against water.
Required Tools
The minimum set of tools required to complete the work is as follows:
- construction level (hydraulic or laser);
- container for mixing glue with water;
- electric drill with mixer;
- trowel for applying adhesive mass;
- set of spatulas;
- rubber roller;
- a tool for cutting tiles (for example, a circular saw);
- measuring devices.
Mosaic laying - all the important working points
Laying mosaics is a very interesting and creative process. The photographs show examples of the work of professional craftsmen - all of them are worthy of praise and admiration. In this part of the article we will try to learn how something similar can be implemented yourself with minimal time and labor costs. We will also cover all third-party issues regarding materials and tools to make everything as clear as possible.
Mother-of-pearl surface - elements are arranged in a checkerboard pattern
Unique handmade
The sink is lined with white smalt mosaic, the countertop is made of acrylic stone
Selection of adhesive composition
The choice of glue type is influenced by the material used to make the mosaic, as well as the base on which it needs to be placed. You have several options from which we will choose.
Table 2. What type of glue to choose for mosaic
| Photo | Description |
| Dry cement-based adhesive | The most common solution is cement-based adhesive. It is sold in bags of different packaging. It is inexpensive, but has good characteristics and properties. These compositions are made on the basis of white or gray cement. More often, the first option is purchased for mosaics, as it allows the material to become less dirty. When preparing it, it is mixed with liquid latex or water. There are three types of such adhesives - deformable, elastic and rigid. They are selected for the base to be finished. Rigid adhesive is needed to work on stationary dimensional surfaces, which, if they experience deformation, are very insignificant, for example, on a wall made of brick, cinder block, etc. Elastic and deformable adhesives are very effective when the house is constantly subjected to loads that create deformation of the structure and its vibrations. For example, it is framed or there is a metro line nearby. They are also designed for installing tiles on wooden surfaces and other materials with high thermal expansion rates. |
| To work with mosaics, it is very convenient to use diluted glue. It is stored in a hermetically sealed bucket, which significantly increases its production time. Since mosaic processing can take a long time, this property will help avoid wastage of material. The cost of such glue is higher. The composition includes various minerals, acrylic and water. Its consistency is pasty, medium thickness - it is very convenient and pleasant to work with. The color of the material is white. The setting time of this glue is higher than that of cement glue and reaches 40 minutes, which allows you to adjust the position of the glued sheets if necessary. It has excellent adhesion even to complex substrates - mosaics can be glued directly onto old tiles, for example. The use of this solution is 100 percent justified when you are engaged in complex, painstaking work. |
| Two component adhesive | Two-component reactive adhesives are made from epoxy resins and polyurethane. They consist of two substances mixed together - a hardener and a base. In this case, a chemical reaction occurs - the resulting mixture hardens into a very strong and elastic mass. These compounds are completely waterproof, so they are ideal for swimming pools, baths, saunas and bathrooms. The composition does not use water, so this solution is the only correct one when laying mosaics made of sandstone and similar rocks. Mosaics can be mounted on any surface, even glass. The strength of such compounds is very high and they last an incredibly long time. For beginners, it is not recommended to use such glue, as it has a short development time. You need to have experience and accurately calculate the amount of mixture to be prepared. |
Now let's summarize the information a little to understand which composition is better to choose. If you want to finish the job as quickly as possible, then two-component compositions are what you need. We also take them for complex foundations in terms of its material and movements. If the mosaic is transparent, then it would be correct to choose the color of the glue to match it - more often they take white as a neutral base. Opaque elements can be installed with any adhesive.
Expert opinion: Masalsky A.V.
Editor of the “construction” category on the Stroyday.ru portal. Specialist in engineering systems and drainage.
If the tiles are laid in places that are constantly in contact with water, it is necessary that the adhesion of the adhesive is at least 2 MPa, and that it itself is waterproof.
It’s a crime to save money when creating such luxury on glue.
What should be the base for a mosaic?
An ideal mosaic wall will be smooth, durable and clean. If it does not crumble, then applying glue to it is very convenient. Such a surface will be gypsum or cement plaster - we do not write how it is made, since this is the material for a separate article. Just remember what the wall should be and achieve it with all your might. We are now interested in its preparation.
Table 3. Substrate preparation
| Step, photo | Description |
| If the presence of small recesses on the wall when laying large tiles is not of particular importance, then the mosaic cannot be placed on such a base, since individual elements have a small area and can fly off. Therefore, we arm ourselves with medium-grade putty, spatulas and inspect the wall. If we find something, we eliminate it. Large and smooth changes will not affect the strength of the finish, but when they pass through a mosaic on a fiberglass mesh, the size of the seams will change, so it is first necessary to achieve a certain evenness. To work, use a rule and a spatula. |
| After all restoration measures have been carried out, growths and debris may remain on the wall. We clean everything with a spatula and, if necessary, bring the surface to a smooth state with an abrasive mesh. |
| Next, the walls are primed. Deep penetration compounds are usually used, which will make the plaster stronger and bind all the dust on it. The primer is selected according to the glue that will be applied to it. Interesting to know! If your bathroom walls are covered with plasterboard, then you will need to seal the seams between the sheets and cover the screw caps. |
The working process
Along the way you will need the following tools:
- An electric drill with a mixer attachment for mixing glue.
- Buckets for these purposes and cleaning tools - if you bought a ready-made composition, we do not take these points into account.
- A laser or water level for setting rows and a bubble level for checking the position of individual elements.
- A notched grinder for applying glue to the wall (you can also use a spatula).
- Any roller for pressing and rolling mosaics on the wall.
- The right tool for cutting. A stationery knife, a mosaic cutter, an electric machine for part-time work and an emery stone for the same purposes will come in handy here.
- A grater for rubbing seams.
Roller mosaic cutters
Among additional devices and materials, we note grouting paste for seams and spacer crosses.
Mosaic grout
Table 4. Instructions for laying mosaics
| Steps, photo | Description |
| It is very important that the position of the mosaic is level. We mark the wall horizontally at the height of the second row. You need to take into account the height to which the floor will rise when laying it, if the mosaic reaches it. If the floor has already been laid, then laying can begin directly from it. |
| According to the markings, we attach the metal profile PNP 27*28 - it will serve as an excellent, even base while the glue sets. It is difficult to align the mosaic on the canvases, since they are flexible and the mesh can sag. Take the canvas and make a vertical marking, which will serve as an additional guide. |
| So, we can begin. We take the chalk and apply glue from the bucket to its flat side with a spatula. We then spread it on the wall in a layer of several millimeters. We pass in this manner only the area that we are guaranteed to have time to fill. It is important to cover the entire base evenly so that the gray concrete walls do not show through. |
| Then we take a comb and stretch it through the glue applied to the wall. We do this once, in one direction. The size of the mosaic comb is 3*3 mm. |
| Step 5 – glue the mosaic | We remove the protective film from the back of the mosaic and glue it at the intended level. You can actively use a laser axle builder in your work. |
| Now the canvas needs to be pressed evenly to the base. This can be done using a flat grater or roller like this. In this case, excess glue will be squeezed out a little into the seams, which will strengthen the adhesion of the materials. Then we remove the excess glue and move on. |
The rest of the canvases are placed in exactly the same way. If trimming is required, then send it to the inner corners, but it is better to try to avoid them altogether. Finally, the joints are grouted - for this they use the same grater. The mosaic wall is ready and looks great.
When renovating an apartment, the planned design of a small bathroom often causes difficulties for many. Therefore, a special article will examine the main factors that influence the ease of use and aesthetics of a given room, and will also present several options for designing a bathroom.
