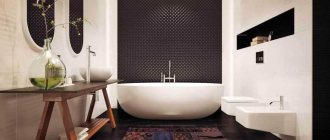
The interior of any room should be not only functional, but also aesthetically balanced. For those who are starting to renovate their bathroom with their own hands, interesting ideas will be very helpful. In addition, it is important to understand the intricacies of finishing, installation and selection of plumbing and the nuances of furniture. How does the current design of this room look today? We talk about it in the article.
Features of bathroom renovation
At the planning stage, you need to assess your capabilities and determine an approximate budget. If some types of work are difficult to do with your own hands, then it is worthwhile to include in the budget payment for the services of specialists. Below is how to do a DIY bathroom renovation on a small budget.
When planning, it is recommended to draw up a sketch of the future premises, which will help determine the choice of suitable plumbing fixtures. The sketch diagram should indicate the placement of the washbasin, shower stall, mirrors and other elements of the room. It is important to calculate the required dimensions. Also at this stage you should think about color solutions.
Textile
When thinking about where to buy bathroom decor, many do not take into account ordinary textiles. Bright towels, floor mats, and bathrobes help create a cozy interior and enliven the space. In addition, this way you can place color accents.
To create a spa-like feeling and make the atmosphere suitable for relaxation, you just need to roll up beautiful towels and place them on open shelves.
A well-curtained bathroom curtain can radically change the impression: photo prints with landscapes and panoramic views will visually expand the room and create the mood.
Replacing pipes in the bathroom
During repairs, it is imperative to replace metal pipes that were installed several decades ago. Their service life has already expired. But replacing them with steel pipes is impractical. They are expensive and not very convenient for transportation and installation.
The best option would be polypropylene pipes. They are welded using a welding machine (if necessary, it can be rented for a day). It is quite easy to hide such pipes in wall grooves or behind finishing materials.
There are a large number of different products for sale for polypropylene pipes, including fittings and valves. This allows even beginners to renovate combined bathrooms with their own hands. If necessary, you can build a water supply system of any complexity.
Everything unnecessary goes to the top!
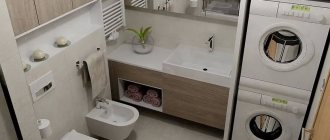
This option will not only update your bathroom, but also save space in it. Install a cabinet or shelf 2 meters above the floor in any free space. There you can put away everything that should not be always at hand. This could be household chemicals, supplies of cosmetics, shaving accessories, towels and much more.
The cabinet or shelf must be made of waterproof material or painted with waterproof paint. Then they will not be affected by humidity, they will last for more than one year.
Bathroom ceiling repair
There are budget options for ceiling repairs. If you need to do an inexpensive bathroom renovation yourself, then painting with water-based paint would be an excellent option. But this procedure is carried out under the condition of a flat surface.
You can level the ceiling yourself using plaster and putty. To do this, you first need to clean the surface of the ceiling from old paint, and then saturate it with a primer.
Next, the plaster is applied with a wide spatula. Then it should be grated with a grater and left to dry. Then the plaster is impregnated with a primer, after which putty is applied in two layers. Now the ceiling is ready for painting.
Another budget option is the use of PVC panels. First, a frame is constructed, on which the panels are then placed. Only a galvanized profile is suitable for the frame, since the bathroom has a high level of humidity.
Private house versus apartment
There are many videos on how to make a bathroom, but almost nowhere is it told about the advantages and disadvantages of organizing a themed room in a house or apartment. The latter offers a small area, which negates the creation of a large bathroom.
Usually you can’t count on daylight due to the lack of windows. But you have to spend less building materials on repairs.
Also, one cannot but rejoice at the preliminary installation of pipelines from water supply and sewerage.
In a private home, on the contrary, the costs are very high. However, the finished result is impressive in its advantages:
- Large interior area;
- Arrangement of plumbing, furniture, household appliances;
- Availability of glazing;
- Individual access.
DIY floor repair
The best option for finishing the floor would be tiles. If you need to do an economical renovation in the bathroom yourself, then the tiles can be replaced with linoleum. It is advisable to choose linoleum that has moisture-resistant properties. It costs a little more, but has a longer service life. This material will prevent the appearance of mold and mildew.
An important stage of repair work is waterproofing the floor. Before installing it, you need to make sure there are no gaps or cracks in the screed. If they are present, they should be treated with a primer and filled with sealant.
There are several options for waterproofing. The simplest of them is considered to be the coating option. To do this, it is necessary to apply a special composition along the edges of the floor, as well as in the lower parts of the walls. Then waterproofing tape is applied at the junction of the walls and floor. When everything is dry, the rest of the floor is treated with a waterproofing compound.
Combination of materials
When renovating a bathroom, you need to remember that finishing materials should not only protect all surfaces from temperature changes and high humidity, but also be very practical in terms of maintenance. The other side of finishing is the aesthetic side. This is a creative combination of different finishing materials.
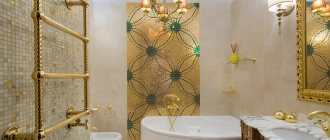
Laying tiles with imitation brick, which is combined with a thematic pattern, has become extremely popular. Also, mosaics, which appeared in ancient times, do not go out of fashion.
Mosaic masonry can be both calm and bright. Using mosaics you can decorate your bathroom. Skilled craftsmen can create an entire underwater kingdom.
Wall repair
Tiles are most often used to decorate walls in the bathroom. But instead, you can use other finishing materials, in particular wallpaper, moisture-resistant paint and PVC panels.
The latter option is characterized by low cost and ease of installation. Communications can be easily hidden behind such panels. Other advantages worth noting are ease of maintenance, since a cloth or sponge is suitable for cleaning the surface of the panels.
Moisture-resistant paint is also quite cheap. There are a large number of different shades on sale, making it easy to choose the optimal color. But painting walls is only permissible if their surface is smooth.
Recently, waterproof wallpaper has been increasingly used. In this case, special glue should be used. You can see photos of a renovated bathroom with different color schemes. On the market you can find a wide range of such wallpapers with different images and textures, which will allow you to create a stylish interior.
Install a modern shower holder
A shower holder can also be a decorative element. There are many options - regular, with a suction cup, in the form of a barbell. The latter are the most convenient. in them you can adjust the height of the nozzle, in some - the angle of inclination. You can attach a soap shelf to the vertical rod.
But such holders have a problem. If you constantly change the height, the chrome wears off over time. But there are advanced models made of stainless steel. To secure the holder you will need to drill 2 or 4 holes in the wall (depending on the model). You can install it in 5-10 minutes.
Fixed shower holder. Without the ability to adjust the height and angle of the nozzle.
Vertical shower holder with the ability to adjust the height and tilt of the nozzle.
Electrical wiring in the bathroom
To increase safety, you should choose wiring with good insulation. Additionally, it is recommended to place the wires in a corrugated plastic pipe.
To lay the wiring under the tiles, you will need to make grooves, but when using panels this is not necessary. Wires should be laid to those places where it is planned to install sockets and lamps.
Once the electrical wiring is installed, it should be checked for correct connections. It is not recommended to connect it to the network until all repair work has been completed.
It is possible to connect a lighting source, but you must carefully monitor compliance with electrical safety rules.
Moisture-resistant drywall as an independent coating
Few people know that green plasterboard is intended specifically for wet rooms. Its installation is not difficult, and even non-professional craftsmen can perform it. To do this, you must first install metal profiles. However, this option cannot be called final - the panels require decorative finishing or painting.
The main advantage of the finishing material is that no preliminary preparation of the walls is required: plasterboard hides all surface defects. In addition, this is also additional soundproofing of the room. It must be remembered that installing the frame will take up some space in the bathroom, which is undesirable for small rooms.
Moisture-resistant drywall
Related article:
Installation of plumbing in the bathroom
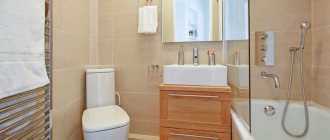
When the walls, floor and ceiling are ready, you can begin installing the plumbing. Experts do not recommend saving on it. You can look at DIY bathroom renovation ideas on the Internet.
It is better to replace old washbasins and toilets with new plumbing fixtures. If the budget does not allow you to buy new plumbing fixtures, then you can refresh the appearance of old washbasins and toilets using special compounds that allow you to get rid of plaque.
Once the bathtub is installed and leveled, it must be connected to the sewer drain. And after installing the faucets, you need to make sure that there is no water leakage. Once the installation of plumbing is completed, the rest of the accessories, such as shelves and mirrors, are placed in the bathroom.
Preparing a bathtub for enameling or acrylic application
Old bath
Although these methods have their own characteristics, the preparation procedure is completely identical. It is necessary to remove the layer of old enamel and achieve maximum adhesion of the future coating to cast iron/steel.
It is necessary to prepare the following materials and devices:
- cleaning powder;
- solvent;
- fabric-based sandpaper (for example, P24);
- quick-hardening polyester automotive putty;
- polyethylene, newspapers and masking tape;
- vacuum cleaner (or wide soft brush);
- grinder + grinding wheels;
- clean, lint-free cloth;
- construction hair dryer;
- screwdriver
Step 1. Clean the entire surface of the bathtub with a brush and an abrasive agent (powder).
Bathtub cleaning
Step 2. Take sandpaper and clean the bathtub until risks from abrasive appear. There is no need to rinse off the cleaning agent when sanding. Instead of sandpaper, you can use an angle grinder with a special attachment. This will greatly simplify the work and speed up the preparation process.
Bathtub sandingGrindingGrinding
Step 3. After sanding, thoroughly rinse off all crumbs and soap film. We etch the bath using oxalic acid. Neutralize the acid with soda.
Step 4. Fill the bathtub with hot water up to the sides. We wait about 10 minutes, open the drain to let the water drain, and then wipe the bathtub dry with a cloth. You can warm up the vessel with a hair dryer. This way, the moisture will quickly evaporate and the bathtub can be further prepared for restoration.
Drying and warming up
Step 5. Inspect the bathtub for major defects and potholes. We apply automotive putty, and after it dries, we sand it with fine sandpaper. Remove dust with a vacuum cleaner/soft brush, then thoroughly degrease the entire surface of the plumbing fixtures with a solvent and wipe with lint-free wipes.
Step 6. Unscrew the shower hose. We wrap the spout and taps in polyethylene so that drops of water do not fall into the bath during operation.
We wrap the spout and taps in polyethylene
Step 7. Armed with a screwdriver, remove the drain grate and siphon under the bathtub. We place a container under the drain hole into which drops of acrylic or enamel will flow.
Strapping diagram. 1 - overflow pipe; 2 - drain pipe; 3 - metal wedge of support; 4 - floor siphon; 5— sewer socket; 6 - metal grounding strip Diagram of a siphon in the bathroom
Step 8. Cover with masking tape all surfaces that are adjacent to the vessel being restored. We cover the floor, the washing machine next to it, and the sink with polyethylene or old newspapers.
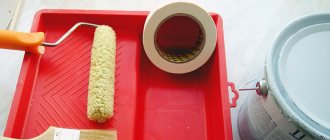
Let's begin the restoration process.
Photos of new bathroom designs for 2022
Decoration
The design is ready, but will it fit into the surrounding interior? To do this, you need, even at the stage of choosing a material, to imagine what the bathroom will look like later, so that each element looks harmoniously as part of the whole.
The facing material must meet 4 requirements:
- moisture resistance;
- impact resistance;
- durability;
- aesthetic appearance.
As a rule, the entire inside of the bowl and sides are covered with facing material.
Finish options:
- Laying mosaics is a great option. It is small, moisture resistant and durable. There are many colors. You can safely line baths of any shape. However, it is better to invite a master for finishing; this is a labor-intensive task.
- Ceramic tiles - if the bathtub has a simple shape - square or rectangular, then finishing with tiles will be the ideal solution.
- Liquid acrylic - the bathtub is simply filled from the inside with liquid acrylic. It will give the necessary smoothness, shine and rich color. Drying time is 3-5 days.