The simplicity of installing a self-leveling floor is stated in its name: just combine several components and pour the resulting composition onto the floor surface, and you will get a perfectly smooth, beautiful coating. However, the composition of the mixtures, as well as the order of their preparation, affects the technical characteristics and decorative properties of the resulting result.
Let's try to understand the technological nuances and determine whether it is possible to make a self-leveling floor in the bathroom yourself, without involving specialists?
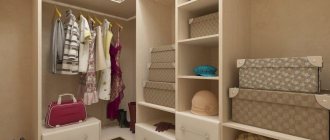
Ideal surface for any floor covering
The mixture poured onto the base is leveled, and after setting, the floor forms an ideal seamless surface.
Depending on the type of material, self-leveling floor technology allows you to create a final coating with a pattern or a 3D effect.
The design of the self-leveling floor in the bathroom depends on your imagination and preferences.
Types of self-leveling surfaces according to manufacturing technology
Despite the variety of coatings made from various polymer materials, the technology for pouring liquid floors is identical. The main differences relate to the composition, recipe for preparing the liquid mixture and drying time.
Let's look at the main types of self-leveling floors (each of them has varieties).
Polyurethane
Compositions based on polyurethane are used everywhere: in production workshops, in children's public institutions, and in private homes. They work well with cement-concrete screeds and adapted finishing varnishes.
The advantage of the coating is that, regardless of the coverage area, it has no seams and is a single durable monolith. It is logical that polyurethane is also suitable for the bathroom, but not any kind. The fact is that there are two types of material:
- thin-layer;
- highly filled.
Thin-layer coatings have a thickness of no more than 0.4 mm and can easily withstand medium-intensity loads. They can withstand light impacts and recover quickly if necessary, but are not suitable for the bathroom.
High humidity leads to delamination of the material, and constant repairs in a room that is used regularly are uncomfortable.
Professionals recommend highly filled liquid floors consisting of at least 2 components. The thickness of the main layer reaches 25 mm, that is, they are stronger than thin-layer analogues.
Such qualities as wear resistance and resistance to temperature changes are also higher.
For a bathroom, water resistance comes first, thanks to which a beautiful decorative coating in the bathroom will last 10 or even 15 years without repair
If you follow the pouring instructions, observe the time intervals for drying and do not start using the floor ahead of time, the strength will reach a level where abrasive powders, sharp objects and aggressive chemical environments are not scary.
This means that accidentally spilled bleach will not harm the decorative coating, and dropped scissors will not leave scratches.
Methyl methacrylate
Polymethylmethacrylate, more commonly known as plexiglass, has been improved and is successfully used as a liquid floor. At first glance, you cannot find a better material for a bathroom - it lasts up to 40 years, and is considered the most wear-resistant of self-leveling coatings.
Its strength is such that this material is chosen for the construction of garages, workshops, and warehouses. It can easily withstand heavy loads and is not afraid of any influence: chemical, temperature, ultraviolet.
A property that will appeal to those who like quick repairs: the pre-hardening process lasts only 2 hours - the material dries so quickly (subject to the pouring conditions)
It would seem that the solution is simply ideal! However, not all so simple. There are a number of technological subtleties, without knowledge of which it is impossible to begin repairs:
- professional skills in installing a self-leveling floor are required, since the pouring must take place quickly and without flaws (due to rapid drying);
- good ventilation in the bathroom is necessary - the chemical smell is not only unpleasant, but also harmful to health (for the same reason, the mandatory use of special clothing and a respirator);
- There are about 30 primary colors, plus tinting with color and chips, but still, in terms of the variety of the palette and the possibility of decoration, methyl methacrylate flooring is inferior to its analogues.
It turns out that for industrial use there is no better option, and in domestic conditions only specialists should deal with methyl methacrylate.
For those who decide to experiment, a little advice on choosing a material: by purchasing components from a domestic manufacturer, you will spend 3-4 times less money. For composites and dry mixes manufactured in Russia, the components are purchased abroad, so they are not inferior in quality to their foreign analogues.
Epoxy
The technology for pouring epoxy floors is no different from previous ones, the only difference is in the components. The resin hardens under the influence of the hardener and forms a very durable seamless layer. The solution is usually prepared in small portions, since within an hour the finished mixture must be distributed over the planned area.
Drying time depends on temperature, humidity, set of components and texture of the base.
A pattern or drawing is obtained as follows: the finished image is placed on the bottom base layer, then filled with a transparent or translucent quickly hardening solution
In terms of strength and wear resistance, epoxy coatings are not inferior to polyurethane coatings, however, crystallized epoxy resin is inherent in some fragility. For this reason, floors of this category are not used, for example, in rooms where heavy equipment operates.
The option is suitable for the bathroom, since the surface of the epoxy layer does not react to chemicals and is resistant to moisture.
If you like to experiment with decor, then epoxy resin coatings are a real find. With their help you can implement a wide variety of designs:
- monochrome contrasting patterns;
- 3D coatings with images of sea animals, flower cascades;
- imitation of a cliff, waterfall, cloudy sky;
- jewelry macro decor;
- colored fills with chips;
- neutral glossy and matte finishes.
The variety of shades is reflected in color cards and RAL tables, which in the form of folders and fans are attached to the products of a particular manufacturer.
Approximately 15-30 colors are usually stated as standard, but by mixing the base with the color you can achieve exactly the shade you need
The technology does not require the installation of beacons
One of the important advantages of self-leveling floors is that when preparing for a flood, there is no need to install beacons.
If you decide to make a self-leveling floor in the bathroom with your own hands, then you won’t have to do this long and painstaking work.
Leveling mixtures have the ability to level only small differences in the floor.
When deciding on the thickness of the mixture, you need to take into account the presence of unevenness in the surface. There is no need to purchase pouring material 100 millimeters thick if you need to close depressions of only ten millimeters.
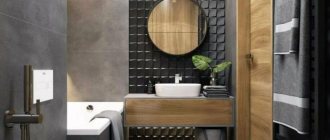
What to consider when choosing
Self-leveling decorative floors look very beautiful. But you shouldn’t rely only on your artistic preferences when choosing. Remember that self-leveling flooring is a very durable, monolithic structure; it will last for many years. Therefore, choose a color and design that will not irritate you not only today or in a month, but also in five, or even ten to fifteen years.
Please also consider the following factors and points:
- Foundation and floor materials;
- The condition of the base on which the finishing coating will be poured;
- Estimated level of mechanical loads.
The composition of the mixture for self-leveling floors is approximately the same, differing only in the type and quantity of various additives with different effects. The hardening time and level of strength will depend on this.
Before you go to the store, think again about what you expect from the floor, what functions it will perform and the loads it will withstand, write down all your requirements and wishes on a sheet. And then select the optimal product - all the information you need is usually indicated on the packaging.
Cost and manufacturer are not the last indicators that are also recommended to be taken into account. Since this type of flooring is not made for one season, saving is inappropriate - it is better to buy a high-quality mixture from a reputable manufacturer to get a really good and durable result.
You can save on other things - on finishing materials, auxiliary compounds - sealants and antiseptics, varnishes, paints, tools and containers that are needed, for example, when laying tiles in the bathroom yourself. In this case, you won't need all this. Only the mixture, which is offered in stores already in liquid form, completely ready for application, and a special brush.
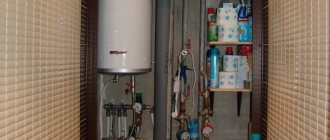
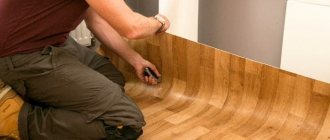
Preparatory work
At the preparatory stage of installing self-leveling floors, you will need to do the following:
Note!
- IKEA bathroom: TOP-140 photos and videos of IKEA bathroom design options. Manufacturer's advantages. Features of the collections
PVC panels for the bathroom: TOP-180 photos and video reviews. Advantages and disadvantages of the material. Varieties of PVC panel models. Mounting methods
- Bathroom faucet: types of faucets and coating materials. Shower switch mechanism. Built-in and external mixers (photo + video)
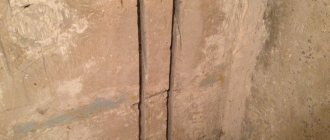
Dismantling of old surfaces
Before making a self-leveling floor in the bathroom, it is necessary to remove the concrete from the base. Cracks and seams between tiles are removed and joints are sealed.
If the base is a concrete slab, then it is necessary to remove the ends of the reinforcement. The seams must be sealed using a mortar of sand and cement.
The applied latex liquids will perform waterproofing functions. If you subsequently install a self-leveling gypsum floor, it is best to seal the seams with alabaster.
Sanding the surface and priming the base
After the concrete has acquired sufficient strength, the surface is treated with a grinding machine or grinder with a diamond blade to obtain a perfectly smooth base. The treated surface is cleaned and re-inspected for chips and cracks. If necessary, all errors are covered with cement mortar, and cracks are sealed with epoxy resin or sealant.
Self-leveling floors are laid only on a perfectly flat and clean surface.
Tip: For high-quality removal of construction and other debris, it is better to have a household or industrial vacuum cleaner on hand.
The primer is designed to increase the adhesion of the floor to the base. When applied to a concrete base, the primer composition covers the pores of the screed, preventing the formation of air bubbles on the surface. Covering microcracks in floors, it acts as the final touch in leveling.
Surface treatment
When choosing a primer, preference should be given to materials whose composition is similar to that from which the 3D floor will be made. Apply the primer composition to the surface with a short-nap roller or a wide brush in two layers. Subsequent work can be performed after 12 hours.
Video tutorial for making a 3D floor:
Padding
In order for the surface to absorb better, it is necessary to apply a layer of primer. To achieve a higher level of adhesion, you need to apply a deep action acrylic primer. To strengthen the cement base, primers are used.
The process itself is indicated in the instructions for the purchased primer. To make the right choice, it is best to choose a material with universal properties.
We count material consumption
The amount of the required mixture is taken based on the dimensions of the room.
On average, you can make the following calculation when installing self-leveling floors: 16-17 kilograms of mixture per square meter, if the filling level is one centimeter.
Floating or connected self-leveling floor?
It is important to know that you can install a self-leveling bathroom floor either connected to the base or isolated from it.
Note!
Bathroom 6 sq. m.: 175 photos of practical ideas for applying bathroom design and video description of styling- Bathroom lamps: 140 photos and video description of how to install beautiful and stylish lamps
- Washing machine in the bathroom - types, nuances of application and installation features of the washing machine (145 photos and videos)
A floating self-leveling floor is usually placed on a soundproofing substrate to cover the heated floor. Another type of surface is used when pouring no more than thirty millimeters.
Regardless of the technology and type of self-leveling surface, it is imperative to insulate it from the walls of the room itself.
For these purposes, a damper layer is used. To tie a screed, about 5-10 millimeters of damper is enough.
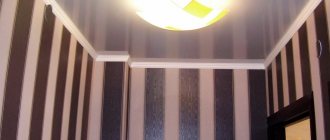
Coating with a protective layer
Final finishing
At the final stage, the deformation tape is cut out and the seams are filled with sealant. Only after this the floors are covered with polyurethane varnish. This treatment helps protect the surface from chemical and mechanical damage, as well as improve the performance characteristics of the coating. The protective layer is applied 12 hours after pouring. You can walk on this floor within a day.
Marking
First of all, you need to find the zero point of the level. To do this, using a regular or electronic level, draw a line from below along the wall above the base of the floor along the entire perimeter.
Then, using a tape measure, and possibly visually, the highest place of the base for filling is located, where a mark is placed below the line.
Above this mark, taking into account the planned thickness of the screed, a control line is drawn along the perimeter of the walls, at the level of which the floor will be poured.
Making a concrete screed
The concrete screed is applied either to the repaired base after dismantling the old coating, or on top of the waterproofing. To create a smooth and neat surface, a “zero level” is formed using beacons. Its height from the base is 1.5 cm.
Video guide to creating a screed
Cement marked M200 is optimal for screeding. The prepared mixture is poured onto the base and leveled with a toothed roller. The use of this tool allows you to eliminate small bubbles in the solution, which can cause a deterioration in the strength of the leveling layer.
Attention: The humidity of the cement base should not exceed 4%. It can be determined experimentally by covering the screed with plastic wrap overnight and securing it with masking tape. Drops of condensation that appear overnight indicate high humidity in the base.
Combining ventilation with heating the room using a special dehumidifier helps speed up drying.
Pouring process
Filling must be done continuously, the entire square footage of the room in one day. It is best to start the process from the far corner of the room and gradually move towards the exit.
By its nature, the solution is similar to thin sour cream. 1 liter of material spreads on average onto a pancake with a diameter of 40-45 centimeters.
If you have never had to deal with such work, it is better to first look at a photo of a self-leveling floor for a bathroom on the Internet.
After the solution is evenly distributed over the entire area of the bathroom, an aerobic roller is used to remove air bubbles. The builder puts on special attachments, takes this tool and calmly steps on the self-leveling floor.
The roller must be rolled over the entire area for about 20 minutes. The roller cannot be removed from the solution.
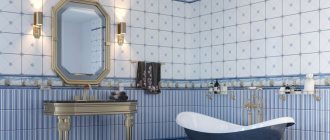
Offers on the market
The existing range of different colors and patterns for flooring is very wide. There are more options than for ceramic tiles. As for the cost, prices vary. They largely depend on the design, but also on the composition of the product and the brand.
If we talk about brands, the products from Gipcreet Thermafloor performed best. This is a fairly light polymer composition in which cracks never form. Flooring from the Elakor PU brand is also widely popular. The mixture contains an excellent hardener, which must be mixed with the main composition before use. The color base is also quite high quality. The result is a coating that is maximally resistant to any loads, moisture and chemicals.
Control inspection
The process of completing the installation of a self-leveling floor is characterized by checking the quality of the work performed.
In the light, you need to pay attention that the self-leveling floor is smooth, there should be no bubbles and various pores. The surface must be flat and not move from side to side.
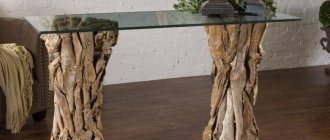
3-D floors
This is a technology that allows you to create a very realistic three-dimensional pattern under your feet.
Sometimes it’s even scary to step on the floor, because an abyss has opened up in front of you, or a dolphin is swimming towards you.
The image itself is printed on paper or polymer material and spread on a flat surface. The transparent mixture is poured directly onto it.
Instead of photography, materials such as coins, stones, wood cuts and other materials may well be used.