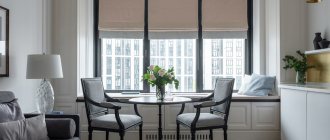
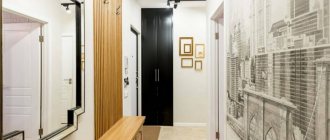
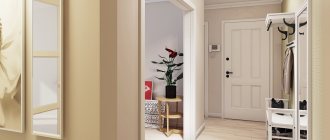
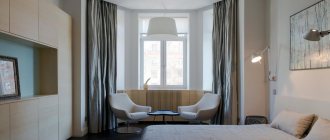
Can a hallway in a Khrushchev-era building be called a spacious room? Easily! You just need to try to arrange it well, and “one by two meters” will no longer seem like a problem area. Various photos of the hallway in Khrushchev show hundreds of layout options for a narrow but functional room.
The target audience is lost among the many ready-made solutions, so when arranging the hallway area you have to be guided not by pictures, but by rules.
Brief overview of the article
Arrangement concept
Instead of spending a long time choosing a shoe rack or a mirror for the future interior of the hallway, it is better to first draw up a plan for arranging the room itself. Experienced designers recommend observing:
- Light background;
- Wear-resistant materials;
- Minimum products;
- High quality lighting.
Adherence to these rules does not prevent you from creating classic and modern hallways in Khrushchev. In particular, we are talking about style. Although it must be admitted that the modern direction, in contrast to its classical counterpart, is more characterized by minimizing details.
Niche for technical elements
If the apartment owner does not see the need to equip a niche in the hallway for storing clothes
, then you can use another solution. After all, with the help of this design you can hide various technical elements (meters, electrical panels) from prying eyes.
In a small space, these elements are frankly disturbing, but even in a spacious hallway they can be annoying. After all, a person can constantly cling to them with his hand while changing clothes. In addition, they spoil the appearance of the interior. And so this is a great solution to the problem.
Light background
Thematic space is often compared to the calling card of a home. Indeed, the hallway is the first place that catches your eye when entering the apartment. If the background of the hallway is dark, then it will turn into a corridor to the basement, where no one wants to go down. Therefore, the walls and ceiling inside a cramped hallway should be light in color:
- Grey;
- Marble;
- Cream;
- Beige;
- Sand;
- Lemon, etc.
It is advisable not to use cool colors like blue, because... they suppress the feeling of cheerfulness. The thematic range is more typical for the bathroom and bedroom.
Dark products, including furniture and the front door, look very advantageous against a light background. The bright interior of the hallway in the Khrushchev-era building visually seems spacious. This effect is enhanced by 30-40% if the flooring is also light. Moreover, it is not necessary to maintain each plane in the same color. The walls can be warm in color, and the ceiling and flooring can be neutral.
Ceiling finishing
The best solution for finishing ceilings in Khrushchev-era apartments would be a suspended ceiling. It will hide all the unevenness and imperfections on the ceiling. If the ceiling is glossy, the effect will be enhanced: the room will become larger and filled with additional light due to mirror reflection.
A multi-level plasterboard ceiling would also be a good solution. The only disadvantage of this ceiling design is a reduction in height by 8-10 cm, but the use of additional lighting sources: spotlights, hanging sconces or LED strip makes this reduction unnoticeable.
Limited furnishings
Standard furniture sets are becoming a thing of the past. Therefore, it is customary to use a floor hanger for outerwear with a shoe cabinet in a classic style. This is not so bad if the hanger does not interfere with anyone, which by default is impossible inside a cramped hallway. It is better to leave the corners free and store shoes inside a shoe chest that runs along the wall.
This chest of drawers has several open-closed shelves or compartments with hinged doors. Also, a narrow hallway in a Khrushchev-era building suggests using a themed piece of furniture along with a bench (so you can sit while changing shoes) or inside a closet that replaces a floor hanger.
But to maintain free passage, the most convenient solution is to minimize the details. This solution offers:
- Arrange a niche along one wall for shoes and outerwear;
- Hang a vertical mirror opposite the niche, occupying 1/3 of the wall;
- Mount one or two lamps;
- Place a doormat.
The result is a hallway in a modern style. Wallpaper with patterns, a laconic frame for a mirror, and lamps in the Art Nouveau style will help turn the latter into neoclassicism.
Accordingly, the usual classics welcome as many vintage and woodland products as possible. These products can be replaced with analogues whose profile imitates wood.
Doors for tiny corridors
Their choice depends on how big your family is. If you live alone or alone with your husband or wife, you can really do without doors at all (except, of course, the bathroom). Widen the openings - and you will be surprised how spacious your apartment has become.
Photo: Instagram small.flat.ideas
Free passages between rooms visually lighten the interior. But it is very important that the rooms are decorated in the same style.
If this extreme is not for you, take a closer look at transparent or frosted sliding doors. They don’t steal space, they protect you from odors from the kitchen, and buyers don’t complain about sound insulation.
You can install regular doors, but with glass inserts. And the interior walls bordering the hallway should also be glass at the top to allow natural light to enter.
Photo: Instagram _marina_ky
Simple glass is good because it functions as a partition, but allows sunlight to pass through and does not obscure the view. It also looks laconic and is suitable for a brightly decorated room.
Additional recommendations
The mirror inside the hallway allows you to put yourself in order and also reflects light. Therefore, a large transparent base contributes to visual spaciousness.
Niches and a wardrobe with sliding doors when open save more space than their counterparts with hinged doors. The fact is that the latter cannot work in the same plane.
Often the hallway in a Khrushchev-era building demonstrates only three colors through the background and furniture. It is simply necessary to create a focus of attraction in such an atmosphere. To do this, you can hang a colored picture near the mirror or install a seat in the form of a bright rectangular pouf.
Note!
- Modern hallways: 120 photos of the best new designs and decorations
Hallway furniture: review of new models, recommendations for choosing and combining color and style (80 photo ideas)
- Hanger for the hallway - which one to choose? TOP 100 photos of new designs
How to transform an unsuccessful niche?
When moving into a new apartment, some owners are faced with another problem, which is no less common. After all, a ready-made niche does not always correspond to the wishes of the new owner. And therefore there is a need to somehow transform it.
The easiest way is to simply furnish it differently. Sometimes the problem is related to incorrect dimensions of the structure. And therefore, sometimes there is a need to redesign a niche, expanding it and making it more spacious. After all, a built-in wardrobe in a narrow niche in the hallway
it will not be possible to install.
Photo of hallway design in Khrushchev
Floor repair. Step-by-step instruction
To repair the floor in the corridor, you need to follow only the instructions in accordance with the selected top material. But some steps are universal:
- Remove old flooring. Naturally, the corridor must first be cleared and all the furniture removed. If you plan to change the front door, this must be done before the renovation of the corridor begins.
- Clean the base. You can use brushes and soap suds to thoroughly degrease the surface. No other work should be carried out until the base has dried after cleaning.
- Make preparations. Most types of flooring are laid and secured over the sheathing. This is exactly what she has to do at this stage.
- Install the selected floor covering. If you use modern materials, no difficulties arise. Typically, they already have special grooves, as well as trimming capabilities to fill a non-standard shaped room.
When renovating the floor, the flooring can be used on the threshold of the living room. In this way, designers further expand the space, which makes a narrow room less congested.
Wall repair. Step-by-step instruction
Just like with the floor, before repairing the walls, you need to clean them of the old finish. It is necessary to choose wall decoration with the utmost care and attention, since it is they who will set the mood and have a special impact on the overall style concept.
The instructions for repairing walls are similar to those used when working on the floor. The exception is lathing, since in some cases it is not required. It all depends on the chosen material. If you plan to paint or glue wallpaper, no sheathing is required, but then you need to carefully level the surface.
You can choose different finishing materials:
- Brickwork. There is no need to narrow the space by using real bricks. Various other materials that simulate this surface are now offered.
- Photo wallpaper. This option is perfect in limited space. But they should expand it, so don't use abstractions or large images of birds/animals. A view of the ocean, beach or city at night looks better.
- Cork covering. This type of finish is ideal for fans of natural materials. First, wallpaper is applied, which is then covered with a special cork compound. It seems as if the walls are made entirely of wood and paper chips, which looks very stylish. There will be no problems with applying the material, since the manufacturer offers clear instructions on the packaging.
What not to do when constructing a mezzanine
It’s not difficult to make an add-on for storing household belongings, but to make the product convenient and functional, you should still take into account the advice of experienced craftsmen:
- you should not place the superstructure lower than two meters above the floor level, otherwise your household members or tall guests risk getting injured when passing by the structure;
- when decorating your new shelf, you should not cover the doors with wallpaper in the same color as the walls, otherwise the design will visually clutter the space;
- in addition, the wallpaper quickly gets dirty, scuffs appear and its attractive appearance is lost;
- at the stage of hanging the sashes on gas lifts or mezzanine hinges, do not open downwards, this option will be extremely inconvenient for use at height, since the ability to get the necessary thing from the depths of the superstructure is limited;
- the mezzanine doors should not touch the chandelier and interfere with the opening of doors to other rooms.
You cannot place furniture too close to the mezzanine, which will interfere with its opening
Tools and components for assembling the mezzanine
Before you begin assembling the mezzanine, you need to prepare all the necessary materials and tools that you will need during the work:
- tape measure and level;
- screwdriver (preferably a screwdriver);
- perforator;
- pencil;
- jigsaw;
- aluminum profile;
- wooden beam;
- screws and dowels;
- furniture fittings, hinges or guides (depending on the door opening design)
- facade material (wood, chipboard, MDF)
- material for the body (wood, chipboard, plasterboard, plywood)
You may need edges for furniture, gas lifts, if according to the design the door will open upwards


