Many people think about how to decorate the hallway. Since this is where the entrance to an apartment or house begins, you want the hallway to make a pleasant impression on guests and be convenient for the owners.
To create an impressive hallway decor, it is important to correctly select the basis for the created mood. And don’t forget about the functionality of the room.
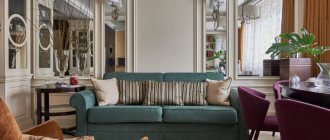
The interior of the hallway sets the tone for the overall style of the house and forms the first impression of those who cross its threshold.
Decorating the walls according to the area of the room
The design of any room usually begins with the decoration of the walls. Taking into account the total area, you can create interiors that will visually adjust the space. The photo of the walls in the hallway perfectly shows the options for solving various interiors.
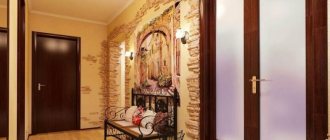
Modern design options present a lot of possibilities for decorative wall decoration. Various textured wallpapers, natural stone, wood and vinyl panels, as well as a combination of various materials - all this can create a unique hallway interior.
DIY cozy home ideas from scrap materials
An ordinary vase or flower pot can be turned into an exclusive one. The vase should be wrapped with rope, ribbon or decorative wire. Decorate with multi-colored buttons or flowers from any available material (fabric, beads, foil, cardboard). All flower pots in the house can be made in the same style. To do this, we wrap each pot with burlap, then either sew its edges or set it on glue. Next, decorate with a flower made from fabric or crocheted.
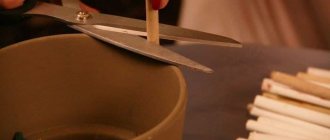
Empty coffee, canned food or baby food cans make interesting containers for storing tools, kitchen or office supplies. The jar can be painted, covered with colored foil or wrapped around with a beautiful braid.
An amazing idea is decorating glass bottles. Carefully place cereals of different colors in a transparent bottle in layers. This thing will find its cozy corner in the kitchen. The bottles can also be painted with paints and pasted over with various small things. This option is suitable for rooms or a corridor.
Wallpaper
The most common and inexpensive method of decorating walls in the hallway is wallpaper. By choosing the color scheme, texture and material of the wallpaper, you can create a unique design for the walls in the hallway. Decorating the walls with wallpaper in the hallway makes it possible to change the overall appearance of the room as often as you want. In addition, wallpaper is combined with absolutely all materials for wall decoration.
Panels
Decorating the walls in the hallway with panels allows you to create different styles and trends in design. PVC panels for the hallway are quite convenient. They do not require special care and can be quickly replaced if desired, thereby changing the overall appearance of the room in a short time. The panels look very nice in combination with walls finished with textured plaster or plain wallpaper.
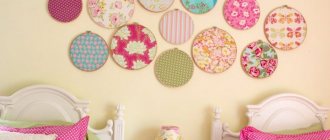
We decorate the hallway with paintings, posters, photographs
Paintings, photographs, posters are a traditional way of interior decoration. May you be greeted by friendly photographs of your loved ones, or the brightest moments captured on film.
Place them in frames throughout the hallway - this method remains popular for a reason - it works. In the same way, you can hang simply beautiful landscapes, views of cities, works of famous photographers. If the size of the hallway and the chosen style allow, hang a painting. Prints and posters are also a good way to decorate your hallway. All this can support the overall style of the apartment. For example, graphics are for minimalism and hi-tech, modular paintings are for Art Nouveau style, posters with plant motifs are for Provence. Focus on your taste and remember an important rule: the brighter and more expressive the image on the canvas, the more modest the frame should be.
Panel
A volumetric panel on the wall of a spacious hallway looks unusual and luxurious. Made from special material, it amazes the imagination. There may be flowers, birds or murals, depending on the overall design of the hallway that was intended. You can decorate the walls in the hallway using fabric panels or use 3D wallpaper. This design stands out from the usual, so it makes an unforgettable impression.
Christmas mirror decoration
No hallway is complete without a mirror. Its surface along the edges can be decorated with frosty patterns.
Decorating a mirror for the New Year
It’s easy to make this decoration in the hallway for the New Year with your own hands:
- Cut out a shaped snowflake from paper. The more intricate rays she has, the better. In general, you can cut out any figure or composition.
- Place the stencil on the mirror.
- Dilute a small amount of toothpaste to the consistency of liquid sour cream.
- Take a bristle brush or stiff toothbrush, soak it in the solution and sprinkle generously on the snowflakes.
- Dry the paper with a hairdryer - it will dry and fall off on its own, leaving a snow-covered pattern on the mirror.
The mirror frame is decorated with tinsel, an LED garland or a composition of branches with ribbons and cones. It is fixed at the top of the mirror or placed on a shelf for hats.
To decorate a mirror, paper snowflakes glued to a soap solution or ready-made vinyl stickers are suitable.
Hallway wall color
As a rule, there is not enough light in the hallway, so it is best to choose light colors. If the design of the hallway is made in a dark color, then there should be bright lighting so that you do not experience discomfort in the dark hallway. The design of the walls in a small hallway should obey certain rules.
To visually enlarge the space, you need to choose light colors, a glossy wallpaper surface, and decorate most of the wall with mirrors. This solution will help to enlarge the hallway and visually expand its boundaries.
If the hallway is quite large, then you can use dark shades, a matte wall surface, combine several materials on one segment and use textured elements. With the help of wall decoration, a zoning of the area is created, without, however, going beyond the boundaries of the room itself.
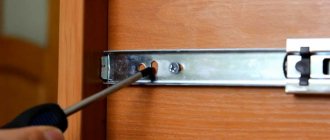
Built-in and hanging shelves
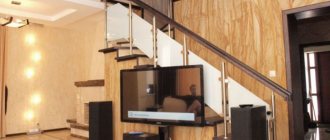
An original solution would be shelves built into the wall with spot lighting. In combination with them, you can create a built-in wardrobe that will imitate walls, thereby leaving space uncluttered with ordinary cabinets.
The decoration of the walls of the hallway, where there is “no” furniture, should be careful, however, there are many options for different designs possible here. Hanging shelves are less convenient in a small room, but in a large room they can serve both a decorative and practical role, adding originality to the interior.
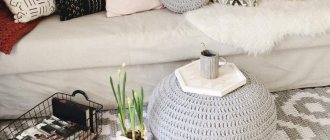
Knitting for furniture
Knitted furniture covers will warm your soul and body, and make the room a real cozy nest. Knitting of this kind is worth a closer look not only for those who like to knit, but also for everyone who has long wanted to reupholster furniture or replace it with a new one. Such an original idea can extend the life of old things.
You can also knit an ottoman on which you can sit or lie, like a soft pillow. The outer cover is knitted and stuffed with filler (polystyrene or cotton wool).
To knit such an ottoman, you will need thick yarn (about 50 m by 50 g), as well as 12 or 15 mm knitting needles. All rows are knitted with knit stitches in two to four threads.
Progress:
- Cast on 24 or 30 stitches, depending on the desired size;
- Knit two rows in garter stitch;
- In order for the product to tighten well, it is necessary not to knit the last four loops, but to unfold the knitting, tighten the first loop, and continue knitting until there are 4 loops left. Then we repeat: turn, tighten and knit until 8 loops remain. And again: turn, tighten the thread, knit a row until 8 loops remain. Then knit the reverse row on 16-22 loops and 1 row on all loops;
- Repeat step 3 until the product reaches 120-130 cm;
- Pull the thread through the edge stitches along one side of the knitting, carefully pull and secure the thread. Do the same at the top, but do not tighten the thread;
- Sew the cast-on and cover rows;
- Fill the ottoman, pull the threads up and secure.