Every home still has furniture from the last century: everyone’s favorite wardrobes, which can hold quite a lot of things, and sideboards. The furniture looks boring, and has also lost its appearance. The houses or apartments of modern people should have stylish furniture. After all, what was fashionable 10-20 or even 30 years ago is now considered relics of the past.
We are not forcing you to get rid of your interior items, but we are presenting some tips that will help you transform your old furniture.
Required Tools
To repurpose old furniture, you will need certain materials and tools. Depending on what kind of furniture needs to be remodeled and what method will be used for this, the choice of tools depends. Most often needed:
- Brushes of different hardness, width and bristle length;
- Roller;
- Sharp knife;
- Needle;
- Metal meter;
- Protractor;
- Hammer;
- Grinder machine;
- Chisel;
- Screwdriver.
What you need to update the facade of an old cabinet with your own hands
According to the recommendations of the master, in order to update an old cabinet with your own hands, you will need:
- A rosette (medallion) made of plaster of suitable diameter.
- Small nails without heads and a hammer.
- Double-sided tape and masking tape.
- Moment glue or liquid nails.
- Paint in the desired color (it is better to use chalk paint, it “fits” beautifully even on chipboard).
- Brush, sponge, roller - everything you need for painting.
True, finding a plasterboard socket on the Russian market is not so easy. Mostly, gypsum and polyurethane foam are used in finishing.
Sculpting an easily wrinkled polyurethane foam blank onto the front of a cabinet is not the best idea. It hangs entirely on the ceiling, since it is not a door that everyone uses. Fragile plaster molding (which also costs significantly more) is also not worth sculpting on a movable door.
Adapting to our realities, you can choose a suitable carved wood blank. Moreover, our carpentry masters can carve even less beautiful things from wooden blanks!
Many overlays are sold freely - the main thing is to know the “places”. And they are available in almost all more or less large construction hypermarkets. Well, no one canceled online stores - if there was a desire.
Expert advice
Restoring furniture yourself is not easy, but it is possible. Don't be afraid, even if something goes wrong, you can always fix it.
- It is best to carry out restoration work in a special room. A garage, loggia or balcony are suitable. If this is not possible, you need to prepare the room. Cover the rest of the furniture with film, take out carpets and textiles. Cover the floor.
- Prepare tools and materials in advance. Don’t rush to buy a power tool; you need it if you have a lot of furniture to restore. In another situation, you can rent it.
- Restoration can take a long time, so don't expect quick results. Quick-drying materials can speed up the work.
Remodeling methods
Do-it-yourself furniture remodeling begins with examining the product. It is necessary to determine the condition of the furniture, its rotten places and breakages. To update the product, different methods and technological processes are used.
Painting
This method is used to update all wooden products ─ tables, chairs, chests of drawers, cabinet walls, cabinets. Water-based paint is used to refinish wooden furniture. It is characterized by high moisture resistance and heat resistance.
For work, use acrylic paint, which dries quickly and does not have an unpleasant odor. The texture of the plastic surface on the product can be obtained using thixotropic paint. It does not leave streaks and goes on in an even layer. To remake furniture with your own hands, you need to follow the sequence of work:
- Disassemble the structure ─ unscrew the fittings, remove the doors, pull out the drawers;
- Cover mirrors, glass, and parts that cannot be painted with construction tape;
- Wash each part with soapy water;
- Work in glasses and a respirator;
- Clean wooden surfaces with fine-grained sandpaper;
- Prime the parts of the product;
- Putty on existing cracks and chips;
- Eliminate dust formations;
- The product is ready for painting.
The paint in the can is applied with smooth movements at a distance of 30-35 cm from the surface. To obtain a good result, it is recommended to apply the paint in 2-3 layers to the product. You can open the surface of the product with varnish, and after the varnish has dried, remove the construction tape.
Film
A special decorative film is used to remake Soviet furniture. Furniture structures decorated in this way turn into beautiful and presentable products with different images. How to remodel furniture using decorative film:
- Clean the surface of the product from paint and varnish;
- Open the surface of the product with a degreasing liquid;
- Cut the film to the dimensions of the parts;
- Remove the protective film, apply it to the product and smooth it with a plastic spatula to remove bubbles.
Video description
The video shows how to apply large posters to wardrobe doors:
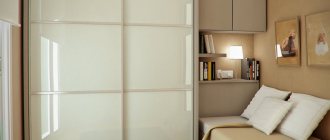
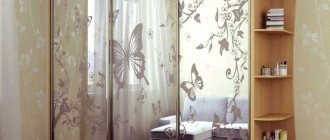
Method three - stained glass
It is easy to remove the doors and replace them with stained glass windows made in specialized workshops. Only wealthy people can do this. But even here, if you wish, it is not difficult to save money by choosing translucent stained glass film instead of stained glass finishing. It is also allowed to be used if the doors have a mirror surface.
Bright stained glass film for a closet in the living room Source maksdecor.ru
The film has a translucent base. It lets light through. It is reflected from the mirror and comes back. In this way, a glow effect is formed, similar to the reflection of colored glass. The film is applied in the same way as a vinyl sticker. The following photo allows you to evaluate the result.
Bright stained glass films Source i.ytimg.com
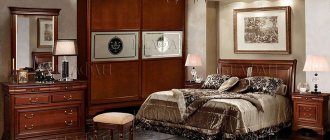
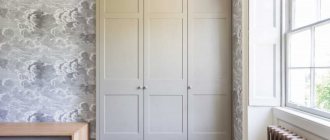
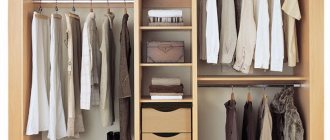
Wardrobe restoration
Built-in furniture usually comes into the house with a ready-made design; the customer chooses it himself, so it meets all existing requirements. But it often happens that after another renovation, the cabinet doors do not fit well into the new design style. In such a situation, you can also use restoration and completely change the appearance of a large object. Today there are technologies that allow this to be done quickly and inexpensively.
One wardrobe – different decor options Source media.makler.md
Work technology
Furniture from the 60s and 70s is still considered reliable, strong, but not very beautiful. But many are in no hurry to throw it away, but try to remake it into attractive and modern furniture. Let's consider several technology options for reworking furniture structures.
Don't rush to throw out old cabinets. A creative approach to it will allow it to take its rightful place among interior items. Today, even a non-professional can transform a cabinet into an original designer product using the decoupage technique.
Action 1. You need to decide on the color scheme, style, fittings and decorative elements.
Action 2. Select tools and materials:
- Paper napkins with a pattern;
- Paint brushes for applying varnish and glue at least 2 cm wide;
- Paint roller and ditch;
- Water-based varnish;
- PVA glue;
- Acrylic paint;
- Paraffin is a material with which you can achieve abrasions on furniture;
- Fine-grained sandpaper;
- Water spray;
- Construction tape;
- Acrylic primer.
Action 3. Decoration technology:
- Remove the old coating from the furniture with sandpaper or an electric sander;
- Prime the surface and let it dry for 3-4 hours;
- Paint the surface of the cabinet with paint in one layer (dries in 15-20 minutes);
- Rub paraffin over the intended areas for aging. In this case, the structure of the wooden surface will be exposed or the paint will be erased;
- Paint the surface of the product a second time with a layer lighter than the previous one. Doors and crossbars can be painted in a different color. The line of contact between the two colors must be covered with masking tape;
- We use the decoupage technique for the ends and drawers. To do this, cut out a pattern from a napkin and, using a spray bottle, glue it to the parts of the product. Then you need to smooth the sticker with a brush to avoid unevenness and bubbles. Cover the top of the pattern with PVA glue. Allow 20-30 minutes to dry;
- In places where paraffin was used, wipe again with fine-grained sandpaper;
- Apply several layers of varnish. Each layer must be well dried;
- Install fittings.