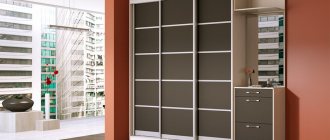
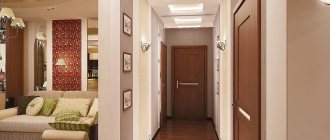
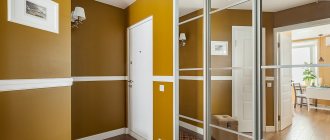
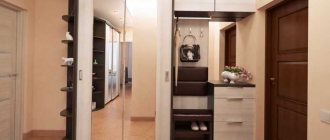
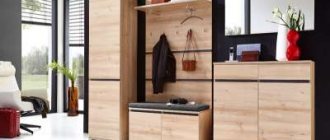
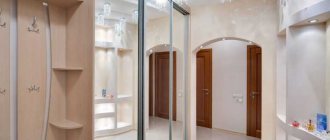
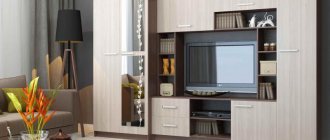
A hallway in an apartment is needed so that a person can undress in it and leave clothes and shoes. In addition, seasonal clothing can be stored here. Unfortunately, we inherited apartments with rather small premises. The same is true for the hallway. It is not possible to install any furniture here, so you have to order it for specific room sizes. The best option is to install a sliding wardrobe, since this type of furniture does not have hinged doors, which are very inconvenient.
Possible wardrobe designs
Depending on the purpose, as well as the installation method, sliding wardrobes are divided into 3 types. Built-in furniture is different in that it is installed in some kind of niche, while it does not have its own walls, floor and ceiling. This type of construction is also used when it is necessary to fence off an area from opposite walls. This cabinet design consists only of the facade, as well as guides and rollers along which the doors move.
Built-in wardrobe
All the necessary partitions and shelves are installed inside the structure. By the way, they are also attached not to furniture, but to walls, floor or ceiling. In some apartments, the layout includes storage rooms, so it is permissible to install a wardrobe in the place of this storage room. If the hallway is long, then in this way they simply fence off part of the room at the end, then the room does not seem so long.
If the layout of the room and its area allows, then a full-fledged cabinet-type sliding wardrobe is installed. Typically, it has a back wall, sides, floor and ceiling. It may differ in the design of the doors, as well as in the filling. In order to make optimal use of the space in the room, they try to install the cabinet right up to the ceiling. Such furniture always looks more harmonious and more practical.
Cabinet sliding wardrobe
The next type of wardrobe is a corner one. As a rule, there are many doors in the hallway: the front door, the door to the hall, the door to the kitchen, etc. The area of the room may be such that it is difficult to resolve the issue of furniture, so a corner wardrobe is what is needed.
Corner wardrobe
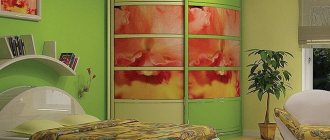
Radial sliding wardrobes are distinguished by the fact that their front part is not straight, but curved. The side walls can be just as uneven. As a rule, such furniture is made to order according to individual sizes, and such furniture is not cheap, although it looks exclusive and non-standard.
Radial sliding wardrobe
If you know what types of sliding wardrobes there are, then it is not difficult to determine which type is more suitable for a particular room. In this case, you should take into account how many doors there are in the hallway and in which direction they open, otherwise you won’t get a comfortable hallway. As a last resort, if necessary, some doors can be re-hanged by replacing the hinges.
What do we make furniture from?
Making a wardrobe out of wood is a traditional and prestigious solution. However, for furniture installed in a niche, this is not the best choice. The reason here lies in excess dampness, which almost certainly forms in the built-in structure.
After all, there is almost always a difference in humidity on a blank wall and on the doors; in addition, this material is adversely affected by sudden changes in humidity when opening the cabinet. Wood will warp over time, and it is much more convenient to use other modern materials as a decorative element.
If, for one reason or another, a tree is chosen, you need to make sure that it is straight-grained, seasoned, and free of twists, knots, and cracks. Without thorough impregnation with a water-polymer emulsion or hot drying oil, nothing worthwhile can be done.
A thin profiled board (lining) can be used for a do-it-yourself cabinet without restrictions or previous preparation. However, the frames of the door leaves significantly complicate the whole process, because they will have to be made of wood, and in addition to the already mentioned influence of humidity, the importance of measurement accuracy should be taken into account. It is possible to make a wardrobe from clapboard, but it is difficult. This material can be recommended for furniture in the hallway only when it fits organically into the interior.
It is possible to make a built-in wardrobe from plasterboard, but the question arises: why all these difficulties, and how long will the structure last? After all, in fact, it will not turn out to be furniture, but a structure. The only advantage of using this material is its appearance.
Drywall is easy to work with and is preferred by designers, but it is heavy, fragile, and not very durable. It is perfect for finishing, but it is not capable of serving as a load-bearing structure. You can’t put much on plasterboard shelves; it itself needs support. Over six months, a sheet of this material laid flat on a frame will sag considerably.
In addition, each shelf will be a box-like spatial structure. The construction of a complex frame will be required. Do not forget about the additional need to do putty and decorative finishing so that the cabinet in the hallway acquires an aesthetic appearance.
Simple and economical solution
The most suitable basis for the manufacture of a wardrobe placed in a niche should be considered laminate (laminated chipboard, laminated chipboard), MDF, fiberboard (medium or high density). You don’t need any special skills to work with these materials, the costs for them will be minimal, and besides, it is possible, without turning your apartment into a carpentry shop, to order cheap sawing.
Please note that the back wall of budget cabinets is often made of low-density fiberboard, which is similar to single-sided corrugated thick cardboard. Such “savings” are inappropriate in the manufacture of built-in furniture. Low-density fiberboard will soon lead, you yourself will create a headache for yourself.
The recommended materials retain all the beneficial properties inherent in wood, and at the same time they have reduced sensitivity to gradients and changes in humidity, since the microstructure of wood was transformed into a different one during their manufacture. Of course, you can find cheaper material by using plywood or something else, decorating it with painting, gluing and laminate finishing. But in this case, you can’t count on a decent result.
Note! Laminate flooring emits formaldehyde, which is harmful to health, due to the use of a binder for gluing sawdust. After edging, its emission decreases, but is not completely removed. GOST 10632-2007 specifies the permissible minimum concentration of formaldehyde; use it as a guide when choosing a material. The most expensive, but also safer, would be to use foreign-made Super E class slabs.
It is better to make doors from non-staining material. A solid mirror or one with laminate inserts would be perfect. Sandblasting is impractical; stains that appear on such glass are difficult to wash off.
Wardrobe dimensions
Small designs of sliding wardrobes are designed for a pair of doors and they differ in width up to one and a half meters, no more. The length of the wardrobe depends on the number of doors. As a rule, more than 5 doors are not installed. You should also take into account the fact that the design of the sliding wardrobe includes wide guides along which the doors move on rollers. The more doors, the wider the profile and the more space it takes up. This data may be needed when calculating the depth of the cabinet. As for the hallway, every centimeter is important. It should be noted that the depth of the wardrobe can be any.
Sketch of a sliding wardrobe with dimensions
Despite this remark, there are still certain standards: 45 and 60 centimeters. By ordering furniture, you can have a wardrobe with a depth of 400 to 700 mm, although these figures are not maximum. The height can also be any, but most furniture is made in the range from 2 to 2.7 meters.
Prices for built-in compartments
When planning a purchase, you should understand that such furniture cannot be very cheap. The cost of the model depends on the size, material used in production, the number of doors and the mechanism for opening them, and other factors. Custom-made furniture will always cost more than standard options in standard sizes.
To give you a rough idea, the average price is 15-20 thousand. This is how much a typical wardrobe with sliding doors made from inexpensive materials will cost. Two sliding doors increase the cost of furniture to 25-35 thousand, and three – to 35-40. The price depends on the model. The most expensive ones are corner ones, since their production requires a large number of structural elements.
Before making a purchase, study the offers of different manufacturers in your region to roughly understand what amount to target.
Filling options
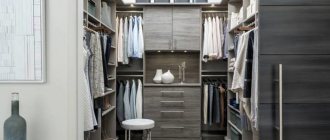
When the type of cabinet and its dimensions become known, they proceed to an equally important stage - filling. The filling is what is inside the cabinet, along with shelves and partitions. First of all, determine the place for clothes and shoes, since they together take up the most space.
Wardrobe layout
Place for outerwear
Outerwear requires a little more space, especially since you need to think about how to place hangers. If the cabinet width is 60 cm or more, you will need the most common crossbar on which hangers (hangers) are placed, and they are placed perpendicular to the doors. The height of placement is somewhere at shoulder level.
Place options for outerwear
If the width of the cabinet is 45 cm, or even less, then this arrangement of hangers is not suitable. In this case, the retractable design option is more suitable, when the hangers are located parallel to the door, and not perpendicular, as in the first case. Such structures are located at a height slightly above head level. To hang the hanger, just raise your hand up. At the same level, a shelf is mounted, as well as a retractable bar.
Rods in the wardrobe
The height of the departments depends on the size of the clothing to be stored: a raincoat, coat and fur coat require a height of 130 to 150 cm, and a jacket, jacket, etc. require a height of 90 to 120 cm, depending on the height of the residents.
If the height of the cabinet is about 2.2 meters or higher, then in one of the sections you can place 2 compartments with a crossbar and hangers. Moreover, in the upper compartment you can install not a barbell, but a pantograph, which will allow you to raise and lower items of clothing.
Option with pantograph
Such design elements allow optimal use of all the usable space of the wardrobe.
Space for shoes
As a rule, shoes are stored in the lower part of the wardrobe, and the design of the shelves is significantly different: instead of shelves made of chipboard, mesh shelves are installed. This option provides a lot of advantages, especially since there are a lot of shoes. Firstly, mesh shelves, like transparent ones, provide an excellent overview of the storage area, and secondly, although there is dirt on such shelves, there is very little of it. And one last thing: it’s convenient to put high-heeled shoes on such shelves.
Mesh shoe racks
The photo shows options for special retractable systems for storing shoes. Narrow mesh shelves are conveniently placed 2 in 1 compartment, on the left and right sides. They are compact because there is still not a large gap between them.
Pull-out shoe shelves
Instead of mesh shelves, it is permissible to use pipes, placing them parallel to each other at the required distance, while the rear pipe should be located slightly higher in relation to the front pipe.
Pipes for shoes in the closet
The volume of space depends on the number of shoes, and the number of shoes depends on the number of family members: the more there are, the more storage space is needed, including shoes.
Availability of shelves and drawers
As a rule, in the upper part of the structure, almost under the ceiling itself, space is provided for storing large, not often used or seasonal items. The height of this shelf can be up to half a meter, although it is always necessary to look at the circumstances.
Upper shelves for seasonal items
All remaining free space is distributed between shelves, drawers or wire baskets in which various utensils are stored, including hats, bags, mittens, scarves, gloves, etc. It is necessary to provide a compartment for umbrellas, especially for those like the “cane” type that do not fold. In this case, the distribution of shelves and drawers can be arbitrary: whoever wants it and how they want it. Drawers are mounted so that they do not interfere with the sliding system of the wardrobe and vice versa.
Space for a vacuum cleaner and ironing board
A household appliance such as a vacuum cleaner can be called oversized, since it is not so easy to find storage space for it, but as for the ironing board, everything is somewhat simpler here.
Sliding wardrobe with space for a vacuum cleaner and ironing board
In the figure you can see how the problem of storing a vacuum cleaner and ironing board was solved. The main thing here is to be smart and then you can solve any issues.
Assembly events
Do-it-yourself assembly activities should be considered if you are willing to devote a few days to them. Let's look at how to make a hallway cabinet with your own hands using the example of a cabinet product with three doors. The width of the doors is 60 cm, the width of the shelves in the amount of 4 pieces is 57 cm, the mezzanine with 5 compartments is 57 cm wide, the shoe shelves are 2 pieces, of the same width. Assembly height – 240 cm.
- Assembly Tools:
- 4 mm hex key for confirmats (Euro screws);
- hammer;
- Phillips screwdrivers No. 1 and No. 2;
- tape measure 3-5 m;
- building level;
- screwdriver or drill;
- drills 2.5, 5, 7 mm.
- Preparing the base.
First, let's prepare the base by securing the front and back stands with confirmations. To do this, through holes (for thickening the confirmat) are drilled 7 mm with a countersink for the head, and 5 mm for the screw part of the Euroscrew.
- Installation of partitions and shelves.
After the base is ready, place it vertically on the long side. We also attach the internal and lateral vertical partitions to it with confirmations. We attach the shelves with the top cover, but do not tighten them all the way yet. Since the section for outerwear is large, it is necessary to secure additional stiffeners inside it on the back of the closet between the side wall and the partition. We turn the structure over, resting it completely on the base, and check with a building level that it is installed without slopes. At this stage, you may need an assistant.
We recommend Making your own shoe rack for the hallway quickly and cheaply
- Back wall
We check the diagonals: lower left corner and upper right, upper left corner and lower right. If the distances coincide, we wrap all the untwisted confirmations all the way and fasten the back wall. Fiberboard sheets are usually used for it; the ideal option for a three-section cabinet is three fiberboard sheets. We nail them with small nails; you should not rush, as if you miss, you can damage the edges of the shelves or partitions. The joints are additionally nailed with special spider-shaped brackets.
- Installation of door guides.
We screw the bottom rail onto the screws in a checkerboard pattern, deepening them so that the door rollers do not subsequently “stumble” on the fastener heads. Holes for self-tapping screws must be prepared with a 2.5 mm drill. The distance from the rail to the edge of the base should be 15 mm. Next, similarly fix the top rail to the cover.
- Clothes rails and accessories.
We prepare 2.5 mm blind holes on the walls. The distance from the top cover to the center of the rod should be the same on both sides. We secure the base of the bar under the outerwear with self-tapping screws on the left side, insert the bar with the base on the right, screw the fasteners on the right side (for a solid bar) or fasten it to the stand. We mark and fasten accessories with self-tapping screws.
- Hanging doors.
The side doors are hung first, then the central door. To hang, place the upper part of the sash into the far groove of the upper rail, then, pressing it upward, place the lower part into the far groove of the lower rail. Similarly, we hang the front sash into the nearby grooves of the guides. The final stage is installing plugs to match the color of the cabinet into the heads of euroscrews and gluing self-adhesive seals to the edges of the doors. The seal will protect the contents of the cabinet from dust, as well as from structurally destructive impacts of doors on the side walls or each other.
- How to make a mezzanine in the hallway with your own hands for a wardrobe?
There are two options. The first is to make a built-in wardrobe combined with a mezzanine. It is assembled according to the same scheme as without it, only in this case the mezzanine cover will be the attachment point for the upper guide of the sliding door. The second is when the mezzanine is a separate block, installed already assembled on a mounted wardrobe.
Aspects of decoration and design
First of all, you need to know what materials furniture is made from these days. As a rule, any furniture design has a body and a so-called facade, or rather a front wall. The furniture body can be made from either chipboard or MDF, but only laminated. Only straight structures can be made from chipboard, since this material does not bend. As for MDF material, it is more expensive, but at the same time more technologically advanced, so structures with rounded shapes can be made from it.
Wardrobe DOOR design
- Facades or doors for cabinets are made from different materials, but a metal decorative profile is used for their design. Therefore, we use: Laminated chipboard or MDF. Using a laminating film, you can obtain a surface similar to the surface and texture of any wood, as well as other finishing materials. In this case, the surface can be glossy, matte, or with a geometric or floral pattern.
Laminated facade - Glass. As a rule, colored or frosted glass is used and transparent glass is not used.
Glass facade
- Mirrors. They are very popular, and a pattern is applied to the surface using a certain technology. The design can be voluminous and occupy the entire area of the mirror, leaving only a small part for the mirror, and also consist of separate, small fragments.
Mirrored wardrobe facade - Separately on the list is photo printing. Using a similar technology, which uses a special film, you can get any image on the front wall (facade).
The use of photo printing in facade design
Most of them, as a rule, are combined facades in which various materials are used. In this case, it is possible to get a lot of design options. The developed design will be able to satisfy the needs of any potential client.
Where to buy a built-in compartment
The process of home improvement is always nerve-wracking. To reduce tension, before you go looking for the ideal option, study the offers of online catalogs.
This way you will form an idea about the range presented and prices on the market. By searching for offers, you can find the model of your dreams, then you won’t have to go to stores and shopping centers.
To ensure that the compartment does not disappoint your expectations, follow the simple rules for choosing any furniture:
- determine the required size of the cabinet, its installation location in advance, take the necessary measurements;
- carefully consider ergonomics so that the necessary things are always at hand;
- decide whether you can assemble your purchase yourself or invite a specialist;
- Study sellers' offers before making your final decision.
With a competent approach, you will not be disappointed with your purchase, and the furniture will last you much longer.
Photo ideas
How to update built-in wardrobes in a hallway
There are a lot of examples of how to update old built-in cabinets in a hallway. The simplest and least expensive way is to paste with film with designs, patterns or landscapes; the option of tinting or applying three-dimensional designs with fusing elements is also possible.
In order for the hallway to look impressive, the choice of furniture, especially cabinets, must be taken very seriously.
Furniture can be updated with large mirrors that will add light and volume to the space. A built-in mirrored wardrobe that slightly does not fit into the new interior of the hallway will be brought to life by new original lighting and some fittings.
Built-in wardrobes are a convenient, practical and valuable purchase for many years.
