An apron is a very common and practically unchanged piece of clothing from ancient times to the present day. There were aprons for men and women. Their roles were different - ceremonial, working, status, decorative. Nowadays, housewives do not often use an apron, finding a more modern alternative. But in vain! This is a very comfortable and cute piece of clothing. Moreover, even a schoolgirl can make an apron.
The technology of sewing an apron and its patterns is studied already in the 5th grade during labor lessons. This easy-to-make item is the perfect choice for learning sewing skills. In this article we will look at how to construct an apron drawing, as well as sewing several models.
Basic models of aprons
The school textbook “Technology Grade 5” includes sections on the technology of processing wood, metal, artificial materials, and child-friendly information about rational housekeeping technology. Many of these jobs require special clothing in the form of a children's apron. That is why the ability to sew an apron for a girl is very important.
All apron models are divided into two groups - an apron with a bib and an apron without a bib. Options for models with a bib, in turn, can be divided according to cutting technology into cut-off at the waist and one-piece.
The simplest types of aprons offered for making in labor lessons are shown in the following pictures. For each apron, the construction of the drawing is made on 1⁄2 of the full pattern. This was not done by accident. This is how you should mark out the details of the apron by applying half of the pattern to the fold of the fabric. This will ensure complete symmetry of the product.
If the girl has already sewn a simple apron model, then she can decorate the apron with various details. Several interesting options are shown in the following figure.
Based on simple basic patterns, you can simulate an apron pattern by flaring or changing the bottom cut line. The schematic construction of the drawing is shown in the figure below.
Each hand-sewn apron is sure to be interesting and unique. A novice craftswoman can select jewelry and choose a style at her own discretion.
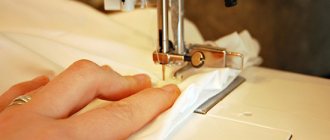
Next, let's look at sewing an apron step by step.
Advantages and disadvantages of plastic panels
Compared to tiles and other materials, plastic (with the exception of PVC) has a number of advantages. Here are the main ones:
- reasonable price,
- moisture resistance,
- the ability to withstand elevated temperatures, the negative effects of household chemicals, food acids, fats,
- resistance to mold growth (if installation was carried out correctly),
- light weight of material,
- tight fit to the wall,
- possibility of installation by yourself,
- Possibility of adjusting height and length.
Due to the low price and cost of work in comparison with tiles, which should be installed only if you have experience, a plastic apron can be changed more often - this will not cause a “hole” in the budget. When replacing the apron, you don't even have to move the furniture.
The material also has disadvantages. You should not glue it next to a gas stove - any type of plastic will deform over time, even the most fire-resistant, because exposure to heat will be frequent and prolonged. Plastic should not be scrubbed with hard brushes.
Polycarbonate will not withstand intensive processing either - small scratches will still appear. Only some types of design will smooth out this drawback: if the surface is decorated with relief images, made to look like aged stone or brick, minor flaws will be invisible.
Apron for work
The apron pattern for a technology lesson in 5th grade is very simple. How to build the main part is shown in the drawing below. The belt ties and straps need to be made according to your own measurements.
To sew an apron for a schoolchild you need to prepare:
- fabric 0.6 by 0.6 m;
- bias tape to match the color of the main fabric - 3 m;
- Velcro tape for the belt;
- threads, sewing tools.
Description of tailoring
Mark the details on the fabric. An example of the layout is shown in the following figure. In addition to the apron, it also shows details of arm ruffles and scarves.
We cut out all the details (except for the belt and straps) without seam allowances, since we will process the cuts with bias tape.
We process the sections of the main part with bias tape.
We cut out the blank for the belt with an allowance of 1 cm in width. Fold the strip in half with the wrong side inward, and sew along three sides. Turn it inside out and iron it. Fold the free edge allowances inward. The dimensions of the finished belt are 2.5 by 16 cm. We fix the belt on the main part with pins and attach it. Sew Velcro tape onto both parts of the belt.
On the pocket blank, turn the top cut 5 mm to the wrong side and stitch. Then we make another turn at 25 mm, stitch along the edge of the fold.
The remaining sections of the pocket should be finished with bias tape. Place the pocket on the main piece, baste or secure with pins. Machine stitch the pocket. Make triangular tacks at the corners. Sew a dividing seam in the center of the pocket.
Finally, remove the basting threads and iron the product.
Classic "butterfly"
The butterfly is a table model that has been known for several decades. When assembled, the furniture is a small narrow tabletop on a solid base.
Hidden under the side panels are support legs, onto which auxiliary tabletops are fixed when the table is opened.
This model is a typical representative of a transformable dining table (for festive evenings).
A simple apron pattern for a child 5-7 years old
For a girl, the opportunity to cook in the kitchen with her mother is not just work, but a kind of status acquisition. She becomes a real adult hostess. And, of course, such work requires appropriate clothing. We invite you to sew a simple but cute apron for your little helper.
For sewing you will need:
- dense fabric of natural composition, linen, cotton are suitable - 0.4 by 0.43 m;
- oilcloth of the same size - optional;
- strip of lace (optional) – 19 cm;
- bias binding – 0.6 m; 0.75 m; 0.75 m; 0.16 m or strips of fabric of similar length, 3 cm wide;
- threads, sewing tools.
Description
The pattern must be constructed according to the proposed drawing.
If desired, you can make a second layer of oilcloth for the apron. In this case, we cut out the second part, put them together (oilcloth at the bottom) and stitch. Next we work as if we were working on one piece.
Using a basting stitch, sew bias tape along three sides of the apron. Attach and, if necessary, trim off excess trim.
If a strip of fabric is used instead of a finished binding, then we make two counter folds on it and iron it.
We also trim the top edge with bias tape or a strip of fabric. If desired, sew in a lace ribbon.
We process the cuts on the sides of the apron, deciding on the required length of the ties. First we fix the parts with pins, then stitch them.
Repeat for the second side.
We hem the open edges of the trims by hand or by machine, tucking them inward.
Iron the finished product.
Glass transformable tables
Most often, such tables are used to decorate a living room. The production uses tempered glass with decorative coating and a corrugated surface of the tabletop.
Both metal inserts and purely glass supporting structures can be used as a frame.
Note!
Black furniture: TOP-160 photos and videos of design ideas with black furniture. Rules for combining colors and shades. Choosing an interior style for black furnitureComputer desk: TOP-130 photos and videos of types of computer desks. Choice of shape, size and material of manufacture
- Solid wood table: advantages of the material. Tips on choosing the type of wood and the shape of the countertop. Photo and video instructions for production
Apron made from old jeans
If your son needs an apron for labor lessons, we suggest sewing it yourself from old jeans. This solution has several advantages. Firstly, denim fabric is quite durable, which is important given the purpose of the apron. Secondly, sewing such an apron is simple and quick, since there is absolutely no need to create a drawing. Thirdly, in the end you will receive a unique product, different from boring store-bought analogues. Fourthly, you will save your family budget.
Description
Let's look at making an apron step by step. First, let's cut off the belt from the front. We do this carefully, without damaging the straps.
Cut the legs to the desired length and width.
We cut along the central seam, ensuring that the legs lay evenly.
We fix this position with pins.
We sew the trouser legs, trim off the excess fabric on one of them. We sew the belt.
For the bib, we cut out a rectangular blank from the remains of the trouser leg. We make a fold along the top edge.
For the strap, you can use a seam cut from the same jeans.
We sew the bib with the apron. We make loops in the bib and insert the ends of the straps there.
It turns out to be a completely unglamorous, masculine version of the apron.
If you are using skinny jeans to make, then when you combine the legs, you will end up with an open area. We cut out the desired part and, placing it under the bottom, attach it.
We get a work apron.
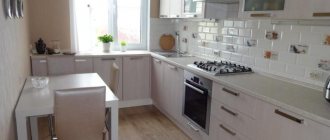
Color selection
Light shades of the protective panel will suit any kitchen set color
When the choice of material for covering the working wall has already been made, the next step is to decide what color of apron is best to choose. Here you can follow simple rules for combining shades and color selection.
Universal cladding colors - white, cream, beige. The least practical are dark shades; any dirt is visible on them.
Interesting. Red and orange colors in the kitchen awaken the appetite, as does light green. It is better not to use purple, blue and all their shades - these colors in large concentrations have a depressing effect on the human psyche.
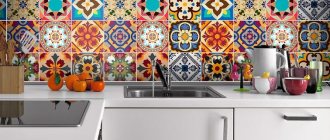
So, a dark or colored apron looks good When choosing, you need to take into account that even minor dirt will be clearly visible on glossy surfaces. Therefore, it is better to consider matte options. Cream, gray and beige shades of an apron in a white kitchen will look restrained, but a little boring.
Bright colors, mosaics, and rich shades are perfect for a gray kitchen A white finish on a work wall will also look good, but only if you use easily washable materials (tiles, glass).
A very dark color of the kitchen set , for example, wenge, is better to be set off with a light apron, so the kitchen will look more airy. The nobility and restraint of natural color will set off all shades of green, red, orange, but in warm colors and without inclusions of other colors.
The easiest way to select aprons for kitchens is from IKEA - they are usually made of natural materials and have a color close to natural shades. In this case, the winning option is to play with contrast or choose an apron of the same color, but a tone lighter/darker.
You also need to take into account the degree of illumination of the room . If there is not enough light in the kitchen, then it is better to make the walls and apron as light as possible. Spaces flooded with sunlight can be decorated in any color.
Apron with applique
Child's age: 3-4 years.
For sewing you need to prepare:
- plain, wrinkle-resistant fabric for the main part;
- checkered fabric for facing;
- white fabric, not “loose” - for appliqué;
- black floss threads;
- sewing supplies.
Description
First you need to make a template for the application. The finished diagram is shown below. Draw the drawing from the monitor or print it to the required scale.
We don't need to make an apron pattern. We will mark directly on the fabric. To do this we need two measurements. We measure the length of the product from the shoulders to the desired level and the distance between the shoulders. For example, it turned out 60 cm and 25 cm.
We build a rectangle according to these measurements, set aside 6 cm on each side to the center, cut out the armhole.
Using the main part as a template, we mark the facing.
Let's cut it out.
This is what happened.
Cut out the ties.
We sew them on three sides.
Turn it inside out.
We place a facing on the wrong side of the main part. We place ties between them as shown in the photo. Baste and stitch at a distance of 1 cm from the cuts.
We cut allowances along the bend lines.
Turn the facing right side out, secure it with a basting stitch at a distance of 1 cm from the edge, and iron it.
The wrong side turns out neat.
We turn the edges of the facing inward, leaving a width of 25 mm. Then we baste.
Sew with a zigzag stitch.
Using carbon paper, transfer the design to the fabric and cut out along the contour.
We cut out the ears
sweep away in pairs,
we sew, turn, iron.
We embroider the face of a hare. We baste the applique by inserting the ears. Sew on the applique with decorative stitches.
Place a stitch at the bend of the eyelet. The apron is ready!
Lifting table-transformer
Depending on the author's idea, the table can be adjusted manually, or it can be equipped with a pneumatic unit for adjusting the height of the tabletop.
Thanks to this feature, such models are used for children's rooms.
Combined models are much more common. Modern design involves the presence of several fastening and rotating mechanisms in the structure.
And the main qualities that determine the buyer’s choice are maximum practicality and compactness of furniture.
Photos of transformable tables presented in catalogs and design projects will help you choose a model of the desired shape, style, texture and color composition.