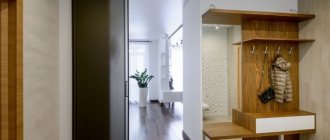
As you know, the house begins with the hallway. This small and cramped room is the first to greet owners and guests, and it also creates a general impression of both the apartment itself and the character of its owners. Order in the hallway is of paramount importance. A properly organized storage system will be the key to a tidy environment. First of all, this concerns shoes, which in large families can accumulate in “indecent” quantities in hallways. Special shelves, cabinets and drawers are provided for it. Some are included in the “hanger-wardrobe” set, others are free-standing pieces of furniture. Let's talk about how to make a shoe rack with your own hands, what tools you will need for the job, and get acquainted with the principles of selecting the optimal materials.
Shoe rack - types and characteristics
Choosing the ideal shoe rack is complicated by the rich assortment of these products on the furniture market. There are both modest, compact “bachelor” models and massive storage systems designed for entire shoe collections. There is no single classification for shoe shelves. They vary in height, width, depth, materials, opening methods, the presence of additional compartments, holders, stands for other items. The so-called shoe racks can be divided into several types:
- Whatnots. They are small open shelves separated by horizontal shelves. The number of “floors” depends on the volume of shoes that will be stored on them. In common parlance they are called galoshnitsy.
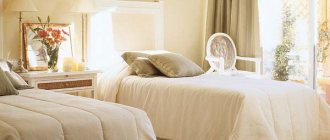
- Banquettes combined with shelves. The lower part of the furniture element is reserved for storing shoes, and the upper part is designed as a seat. Such benches are compact options for tight hallways.
- Shoe tables. Essentially, these are the same banquettes, but on top of the storage system they attach not a seating area, but a tabletop. You can put a flower arrangement, small sculpture, clock and other decor on it.
- Closed or “slim” shelves and cabinets. Conventional horizontal drawers are considered impractical, so modern models are increasingly using special slim mechanisms that rotate along with the door and bring the shelves into an “inclined” position. When closed, shoes are stored in an upright position.
Depending on the location, the shelves can be floor or wall mounted. Hanging models are very rare even in original design projects.
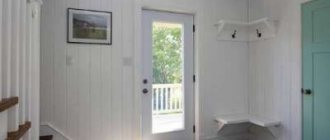
Corner shelf in the hallway
The corner shelf is a non-standard solution for the hallway. This option is suitable for owners who do not know how to decorate a corner in their hallway; one way to close the corner is to put a corner shelf there.
Such shelves are generally small in width, but reach several meters in length. This is not only a significant space saver, but also a great way to keep your apartment tidy.
Even if you don't have the largest hallway, with the right furniture you can make the most of its full potential.
Selection of materials
The main material for the manufacture of storage systems is wood, its derivatives (MDF, chipboard), PVC pipes, metal, metal profiles and even thick cardboard and laminate. Also suitable for work are pallets - wooden pallets used in construction. In some models, materials are combined. For example, the frame of a shelf (overshoe) can be made of metal tubes, and the shelf-beams can be made of wood or plywood.
Preparing parts
The best option is to immediately include parts for the shelf in the list when ordering the cutting of components for assembling a kitchen, wardrobe, children's room or any other furniture. If this moment is missed, you will have to act on your own.
Cut with a jigsaw
Almost every seasoned furniture maker, at the beginning of his career, tried to replace a format-cutting machine with a jigsaw. At first it turned out so-so, but with each damaged part the hand became stronger and the quality improved. For an amateur craftsman, a jigsaw is an ideal option, but first you need to “practice on cats.”
It will take some time to get used to the instrument. To do this, it is recommended to cut out several small parts from unnecessary chipboard scraps. After training, you can begin the main cutting:
For cutting with a jigsaw, it is advisable to choose so-called progressive files. Their teeth on a tapering blade are sharpened using Japanese technology, which ensures the thinnest cut and clean sawing without chipping on the laminate.
Shelf styles
Like any other piece of furniture, the shelf must match the chosen interior style of the room. For high-tech and loft, simple models made of metal and pipes are suitable. This option will look especially colorful against the backdrop of the “branded” brickwork in the hallway. For a group of rustic styles headed by Provence, open-type wooden shoe racks are suitable. The surface of the product is covered with discreet paint and artificially aged. This option will look great in combination with wicker boxes-baskets, which are placed on the upper tiers. For country music, you can choose a model from boxes that are placed on top of each other, after which the entire structure is secured with glue. For minimalism, original options are used. For example, a product that can hardly be called a “shelf” in the truest sense of the word: a row of vertical poles on a stand. Each one is “put on” a boot. For classic styles, luxurious closed models with carved doors are used. They also go well with elegant banquettes on twisted legs with a storage system located under the seat.
What are the easiest shelves to make from chipboard?
The scope of application of this furniture is not limited and depends on their size, design, shape. You can quickly make a shelf with your own hands to place on it:
Theoretically and practically, the shelves are suitable for storing any items that fit in size and do not roll off the horizontal plane. They can even hold dumbbells.
Master classes and unusual solutions for making shelves with your own hands
Before work, you need to decide on two main nuances:
- Shelf design.
- Materials.
The more complex the design of the product, the more skill and time it will take to create it. For beginners, it is better to start with simple forms of shelves or tables, cupboards combined with shelves.
From chipboard
You can make an original, designer model of a shoe rack from chipboard. Let's consider the process of manufacturing an unusual labyrinth design. To work you will need:
- Jigsaw.
- Chipboard sheets.
- Pins and special glue.
- Screwdriver.
- Grinding machine for processing cuts.
- Tape measure and pencil.
- Iron and edge tape.
- A utility knife for trimming excess tape.
- Confirmations, screws, plugs.
- Square.
- Drill.
This design has an arbitrary number of shelves, which form a system with different-sized “cells”. Chipboard must be cut into separate modules. They can be divided into two types:
- Four parts for the sides, lid and bottom tray.
- Modules of the same length, from which elements in the shape of the letter “P” will be formed.
The last parts fill the interior of the box in random order. How exactly the shelves will be located depends only on the imagination of the master. The parts are connected to each other using confirmations. First, using a hot iron, glue the edge tape to the sections.
Made of wood
Wooden boards in processed form can be purchased at any hardware store. All that remains for the craftsman to do is trim and correctly connect the parts. To work you will need the following set of tools and materials:
- Saw.
- Tape measure, pencil.
- Self-tapping screws and screwdriver.
- Metal corners.
- The boards themselves.
- Sandpaper.
- Varnish or paint.
- Drill.
First you need to decide on the design of the future shoe rack. It is better to make a sketch on a piece of paper in advance. On the drawing you must immediately indicate the length, width and depth of the shelf. Let's look at the process of creating a shoe rack using the example of a simple open shoe rack:
- The lines of future cuts are marked on the boards. You will need to cut two sides, the lower and upper parts (lid), and the transverse shelves directly under the shoes.
- After this, you can start cutting the boards using a saw. Uneven cuts are sanded with sandpaper.
- Then the assembly begins. The shelves and the top/bottom cover are attached to the sides using self-tapping screws, corners and a screwdriver. At the fastening points, holes with a slightly smaller diameter than self-tapping screws are pre-drilled.
- The surface of the shoe rack is covered with varnish or paint.
After the composition has dried, the finished shelf can be placed in the hallway or corridor and shoes can be placed on it. Instead of classic board sides, you can use bars, bricks or even glass bottles. For the latter option, you will have to cut holes in the shelves for the necks on which they will be “put on.” The option using bricks is suitable for the laziest. This composition is not suitable for every style. It will look best in an industrial interior. First, “legs” are formed from bricks stacked in two or three rows. After this, the first shelf is attached to them. Then there is a second side row of bricks and again a horizontal crossbar. The number of floors of such a rack is unlimited. Over time, you can even add new shelves to the structure.
Made of metal
To make a simple metal shelf, you don’t need to pore over in a forge. Laconic shelves made of thin tubes are very popular in modern interiors. Modules of different lengths are cut out of them, which are then fastened together using fittings (tees, angles). The edges are sealed with plugs, and the structure itself is fixed to the wall. Pipes must be coated with a special anti-corrosion compound, which will protect the material from the harmful effects of moisture. You can use special paint with the effect of bronze, silver or gold. This shelf is ideal for interiors in steampunk, retro and loft styles. For minimalism, an even simpler design is used in the form of a “bare” frame. Hooks are attached to its crossbars, on which shoes will subsequently be hung.
From plywood
Working with plywood is in many ways similar to making a chipboard shelf. However, the material has several advantages compared to its main competitor:
- Plywood has better moisture resistance than chipboard. After getting wet, which often happens with “street” shoes, the material will dry out and not deform. Chipboard may lose its shape.
- For many aesthetes, plywood is more visually attractive than chipboard. It is quite often used in its raw form for final repairs.
- Plywood has higher abrasion resistance than chipboard, which begins to crumble over time.
Large, full-fledged semi-closed plywood shelves (with a backdrop) look best, which are filled with numerous shelves of different sizes in random order.
From wooden slats
To make a shoe rack from wooden slats, you will need the following tools:
- Sandpaper.
- Screwdriver.
- Self-tapping screws for wood.
- Hacksaw.
- Paint or varnish.
You can get by with slats alone or combine them with bars that will play the role of sidewalls. Let's consider the first option:
- First, measurements are taken and a drawing of the future structure is drawn.
- After this, marks are made on the slats for cutting.
- The material is cut into the required number of modules. You will need four racks for the sidewall, paired supports for each shelf, and the shelves themselves.
- The modules are connected to each other in accordance with the drawing. Work should begin from the bottom shelf.
- The structure is coated with varnish or paint. If necessary, the cut areas are pre-treated with sandpaper.
After the composition has dried, the shoe rack can be used for its intended purpose.
From laminate
You can quickly make a simple shelf out of laminate. To work, you only need basic material and metal tubes. The number of laminate sheets depends on the size of the future shoe rack. Slots are made in metal tubes using a grinder. Then shelves are inserted into them. Plugs are attached to the ends of the tubes to protect the holes from dirt and dust.
From a metal profile
The metal profile in the stylish homemade shoe rack harmoniously combines with the tempered glass from which the shelves are made. To work you will need:
- Screwdriver.
- Drill.
- Level, roulette.
- Bulgarian.
- Jigsaw.
- Glass cutter for shelves.
Metal profiles make unusual wall-mounted shoe racks. First you need to take measurements, fix the guide to the wall using self-tapping screws and check how level it is using a level. After this, you can assemble the frame from the metal profile. Then the shelves are made using a glass cutter. Tempered glass is inserted into special niches in the frame and the shoe rack is ready. This design will ideally emphasize the coldness of high-tech and the laconicism of modern style.
From boxes
This may seem surprising, but quite strong, wear-resistant furniture can be made from thick cardboard. The only drawback of this material is the lack of protection against moisture, which cannot be compensated for in any way. A structure is assembled from several modules, which are cut out of boxes. Each part is manufactured separately. A piece is cut off from the box along with the bottom. The height of the module will be equal to the depth of the future shelf, since it will be located horizontally (i.e., the bottom will “look” at the wall). Each part is covered with a second layer of cardboard to give additional strength. After all the modules are ready, they are connected to each other, placing them on top of each other. It turns out to be a compact bookcase. Since the cardboard surface has a rather unsightly appearance, it is additionally covered with paper.
From wooden boxes and pallets
Shelves made of pallets and boxes are considered, perhaps, the most laconic and easiest to manufacture. The structure can be built in just a few hours. The construction pallet is thoroughly sanded using sandpaper or a sanding machine. Then it is coated with a special moisture-repellent composition. After this, the pallet is brought into a vertical position and simply leaned against the wall. Shoes are placed in the spaces between the cross boards. To make a classic shelf, the pallet is cut into several parts, which are connected to each other in the manner of a shelf, separated by bars. The structure of the boxes is assembled using glue. The material is also pre-sanded and coated with a special protective compound. After assembling the structure, it can be coated with paint. There is also a wall-mounted option for the “lazy”. The boxes are painted in different colors, based on the principle of analogy or contrast, and screwed to the wall, leaving gaps between the modules. The composition takes up exactly as much space as the master allocates for it. Some drawers can be “broken” inside using shelves. In the future, they will be used for “low” shoes (boots, shoes). Others decorate with vertical partitions. This option is suitable for compact storage of summer shoes (slippers, flip-flops, flip-flops). Those boxes that remain untouched are used to place high boots. This method of organization looks bright, cheerful and slightly chaotic, which is why it is suitable exclusively for light styles: fusion, eclecticism, ethnicity, a group of rustic trends.
Made from PVC pipes
A shoe rack made of PVC pipes is quite simple to make. To work you will need the following tools:
- Special knife for cutting plastic.
- Glue.
- Pipes.
The structure will have a “honeycomb” shape. This shelf is assembled according to the principle of a designer: it is convenient to add new modules to it and easily give it the most bizarre configuration. The pipes are cut into pieces of equal length so that the shoes fit. Then these models are connected to each other by gluing them on their sides. The finished structure can be coated with paint or pasted over with any available material. Even not very clean shoes can be placed in a PVC shelf, since the material, unlike wood and metal, is not susceptible to moisture.
Round rotating cabinet
Making a round rotating shoe rack is not as difficult as it might seem at first glance. For work you will need sheets of chipboard or plywood at the choice of the master. You need to make several preparations:
- Round for shelves.
- In the form of rectangles for internal cross-supports on which the entire structure will be supported.
To carefully mark circles on a sheet of material, you can use a special compass or use the old “old-fashioned” method using a thread, which is fixed in the center of the future circle, and then the outline of the figure is traced with a pencil attached to the other end. Uneven cuts should be sanded with sandpaper or a sanding machine. After this, they are decorated with edge tape, which is glued using a hot iron. Then the rectangular elements are connected to each other, forming crosses. The number of these parts depends on how many spaces there will be between the shelves, that is, on the number of storeys of the shoe rack. Every two adjacent circles are connected using crosses. Work begins from the lower tier. Finally, a special rotating stand mechanism is attached to the bottom.
Shoe rack pouf/bench
In fact, this is an ordinary shoe rack, which is covered on top not with an ordinary lid, but with a tabletop or seat. You can assemble a shelf from solid wood or chipboard, sometimes using bars. If the shoe rack will be used as a bench for changing shoes, then the structure must be additionally strengthened to increase the safety margin. Instead of assembling a new shelf, you can use an old chest. It is sanded, covered with a layer of varnish, paint or covered with paper. The storage system is formed from sheets of plywood, making a “lattice”. Its width should be equal to the height of the chest, since it should be placed inside upside down. Shoes are placed vertically in it. The top of the chest lid is covered with soft pillows or a special seat for ease of use.
DIY corner cabinet
To make a corner cabinet, it is better to use plywood, chipboard or wood. The shelf will have backdrops, from the connection of which work on assembling the structure will begin. You also need to cut two identical parts for the tray and lid. It is better to smooth out concave areas and make them semicircular. You will have to tinker with cutting the material, but the result is worth it. Soft, wavy lines are suitable not only for the Art Nouveau style, but will also organically blend into any modern or classic direction. The lid and tray are connected to the sides, after which they begin to work with filling the shelf.
We prepare the necessary
You need to make your own shelf for the mirror from materials that are easy to process. Glass is good because it is impervious to moisture, but it is difficult to work with - you cannot cut it without special equipment.
The best option is wood or plywood . They are not moisture resistant, so for use in a humid environment they must be treated with enamel or varnish. It is easy to distinguish: the varnish is transparent and does not hide the wood texture, and the enamel is opaque; it is used if they want to mask possible surface defects. These compounds cover the wood material with a dense layer and prevent moisture from penetrating inside.
Tools and materials
For a stylish shelf you will need a board 25 - 30 mm . You can take pine, it is easier to process, but it is prone to chips, and if your hand trembles, the workpiece may be damaged. It’s great if you can get a piece of solid beech wood - it’s denser, but not as sticky, and the fibers in it are less pronounced. You can also take plywood with a thickness of 15 - 20 mm .
Tools you will need:
Where to start?
First of all, you need to think about the purpose and location of future shelves.
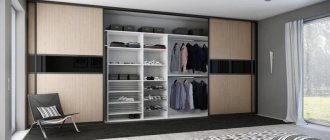
For small items, it makes sense to make neat, lightweight shelves or a modular system united by one style solution.
If it is necessary to store large or weighty items, it is important to correctly calculate the overall dimensions of the shelves and their strength. Bookshelves should be strong enough and securely fastened, for example.
The shelf is part of the interior and can be decorated in any style. In order for this simple piece of furniture to organically complement the design of the room, you need to think about the appearance of the shelf and the material from which it will be made.
A simple wooden structure will be a good addition to a kitchen interior and a room decorated in a folk style.
Peculiarities
The main function of the mirror remains to display your silhouette, since everyone wants to look great when going out, but besides this, you can put some things on the shelf, for example, put gloves or place a handbag while you get dressed.
In our country, given the rather small dimensions of apartments, the hallway is often the only place where such a product is installed, so hair styling products are often placed on the shelf, and you can also put styling tools there while creating your hairstyle.
Designers often use a mirror shelf when decorating a hallway.
To do this, place on it, for example, vases with flowers or figurines.
A mirror with shelves is the most commonly used furniture attribute in the hallway. Back in Soviet times, it was popular to install a dressing table or trellis in this room.
A mirror with a shelf comes in several options and can have different shapes. The simplest is a rectangular product, at the bottom of which there is a shelf for small items. The oval attribute is in second place in popularity. This item comes in various fantasy forms.
A mirror with a shelf can have different installation methods. It can be added. This design has small cabinets and shelves at the bottom and is placed on the floor. This item does not need to be attached to the wall; it is quite stable on its own.
The mirror can also be attached to the wall. To secure it, either glue or special devices are used. The shelf can be screwed directly to the mirror or look like a side table. It can also be hung separately just below the mirror or to the side of it. In the latter case, you can simply buy a mirror and choose the most convenient shelf for it.
A mirror with a shelf can also be built into the furniture set. Such products are quite often used in small hallways. Since the corridor is a rather dark room, a backlit mirror is often used here. It helps illuminate the reflection, allowing you to see it more clearly.
A mirror with a shelf is often framed with a frame made from various materials.
Some more creative ideas
An even simpler option for making shelves involves using cardboard. At the same time, in addition to saving effort and time, you also significantly save money. However, this cardboard model has a significant drawback - the fragility of the structure. However, in this case, you can replace the old shelf with a new one without any hassle. At the same time, you will update the interior of the hallway. After all, you can use new colors or shapes every time.
Shoe rack made of thick cardboard
All you need is fairly thick cardboard. An excellent option would be a box, for example, from under the refrigerator.
To make such a primitive “shoe rack”, take a pencil and a ruler and draw several rectangles measuring 30*75 cm on cardboard. Cut out these shapes with a sharp knife. Divide them into three parts with a pencil. Fold the sides so that they form triangles. You have obtained several blanks that should be placed one inside the other, like nesting dolls. At the same time, you should leave room for shoes. Record the result with tape.
We cover the edge of our shelf with colored tape
Advice! Use wire or metal staples to strengthen the structure.
We connect several shoe compartments with this solid cardboard
Install the resulting product vertically along the wall. Lock it in this position.
You can take another simple path. For example, you can only use the base for the shelves (wooden or metal, etc.). You will also need furniture fittings. Attach the shelves to the wall. In this case, they will take up minimal space. This is a great option for a compact hallway. However, this method of making shelves has one drawback. If you start a renovation in the future, you will have to fill up the holes from the shelves.
We get an unusual cardboard shoe rack from small triangles
Functionality of shoe racks
Despite the fact that the corridors in most apartments often have modest dimensions, it is still worth thinking about installing a shelf for shoes. This simple device, which can have different dimensions and all kinds of shapes, will help clean up the floor. After all, usually, when entering an apartment, everyone takes off their shoes on the threshold and throws them there if there is no more room for them. However, in the corridor, as in any room, everything should be in its place.
White shoe rack
The following aspects can be considered as the advantages of having a shoe rack in any apartment.
- The ability to create a specific place to store shoes, where they will not get too dusty and people passing by will not trip over them.
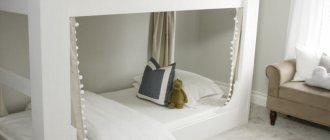
Banquette - Saving free floor space. The shelf will help you store shoes by arranging them in several tiers at once. Thus, the wardrobe items will still occupy their area, but will not take up the entire floor, since the space will be occupied in height.
- Ease of use. Using the shoe rack is easy and simple - it does not take up much space, you just need to install it on a selected area of the floor and simply put your shoes on the shelves when you come home from the street. Also, the shoe rack needs to be regularly cleaned of dirt, which will involuntarily accumulate inside it. You don’t need to know any more features of its operation. Easy to use shoe rack
- Some shelves are equipped with a seat in the upper part, which means that it will be much more convenient to put on your shoes by sitting on them than by standing on one leg and putting the shoe on the other. And again, this saves space, since you don’t have to put an additional ottoman in the corridor. This is especially true for older people and young children.
On a note! Not all shoe racks have space for sitting. Do not sit on plastic or seemingly fragile structures.
A small shoe rack
It will be easier to clean your apartment - you don’t need to endlessly rearrange all pairs of shoes from place to place in order to clean a certain area of the floor.
Where to place it?
A mirror with a shelf should be placed correctly in the hallway. This is especially true for small rooms. It is a widely known fact that using this attribute you can visually adjust the geometry of space. If your hallway is elongated, then by installing the item on a long wall, you can visually increase the width, but at the same time, the mirror should occupy almost the entire wall, and a small console table moved towards it can serve as a shelf.
If the color of the walls in the room is too bright, you can also mute it with the help of a mirror.
To do this, you should hang it on the brightest wall, and cover the bottom with an attached cabinet, which will also cover part of the wall.
There are also several options for how to equip a mirror with a shelf in your hallway. So, if there is a battery installed in your room, then a wall mirror can be hung above it. In this case, you need to cover the radiator with a box, then the top can be used as a shelf. You can also use the upper part of the shoe as a shelf. If your room is spacious enough and there is a place in it where you feel empty, then you can easily occupy it with a mirror with a shelf.