Finishing a bathroom with plastic panels is not the best method of solving the problem, but due to its cheapness and simplicity it is often used.
Bathroom finishing with panels
Today, there are panels for bathrooms that imitate ceramic tiles, with various patterns, etc. In cost, these materials are almost the same as tiles, and the savings are achieved due to the low cost of installation.
Panels with tile imitation
Plastic panels
Plastic panels can be mounted in various ways; the specific choice depends on the wishes and capabilities of the customer. In this article we will give step-by-step instructions for all options for finishing walls and ceilings.
Before starting work, you need to purchase materials, and this is where inexperienced builders make mistakes.
Equipment and additional elements
We will discuss how to calculate the number of panels and additional elements below, but now we will tell you what is included in the package for finishing walls with PVC panels. Select the appearance and specific dimensions taking into account the parameters of the panels.
| Name | Brief description and purpose |
| Universal corner | It looks like a plate bent at an angle of 90°. Used for finishing internal and external corners of the room. |
Ceiling and floor plinth | Complex profile, part is installed under the panels, the outer side hides uneven cuts or surfaces. |
| Outer corner | Consists of a corner, the inner part is wider than the outer. Hides unevenness of the outer corner. |
| Inner corner | Differs from the external one in the width of the sides. The wide one is installed under the slats, the outer narrow one hides the unevenness of the inner corner. |
Connecting profile | Allows you to connect lamellas without a lock, used if the length of the lamellas is insufficient for finishing the surface |
Start/finish profile | Installed first and last, sometimes can be used instead of a universal or special corner. |
| F-profile | Installed at junctions, can be used as a platband. |
Sheathing mounting strip | The supporting element of the frame can be plastic or made of metal profiles. |
| Klyammer | Made of metal, it presses the panel to the mounting plate. Allows you to dismantle panels without losing factory quality. |
pvc panels for bathroom
The panels are fixed with self-tapping screws with a press washer, staples using a stapler, clamps or liquid nails. The choice of method depends on the materials used to manufacture the supporting frame and the quality of the walls and ceilings.
Methods for installing PVC panels on walls
Lining
These panels look like thin boards. Their width can be in two options:
- 10 cm;
- 12.5 cm.
The length of the modules is 3 meters. Lining also has its own classification. So, panels 10 cm wide are:
- ordinary;
- with a wide lock;
- with a narrow lock.
The color of the lining is usually monochromatic (usually white). Colored is rare. Lining with a pattern is practically not produced. These panels can be seamed or seamless. The latter are mainly used for finishing ceilings.
How to process the material
One of the advantages of PVC panels is manufacturability. You can cut the material in one of three simple ways in two directions.
Method 1. Using a mounting knife. Use only new inserts, the tip should be as sharp as possible.
How to cut and bend PVC panels
| Cutting direction | Execution method |
| Along the panels | Place the panel on a flat place and mark the cut location. When cutting, you need to use a long, even blade. Press it firmly against the surface of the panel and use the end of a knife to cut the lamella on one side along the entire length. Then turn the panel over and bend the cut area. Cut the remaining plane in a bent position. |
| Across the panels | A more complex case requires certain skills. Mark the location of the cut. Using the tip of a knife, carefully cut the jumpers between the planes one by one. After the entire width has been passed under the ruler, make a continuous cut of one plane. Bend the cut part and cut the second plane from the opposite side. |
Method 2. Grinder. You need to work with a disk for cutting metals. The disc thickness is minimal. Cutting is very easy and quick; the only requirement is that you have minimal experience working with an angle grinder. Be sure to follow all safety rules; injuries from an angle grinder are very dangerous. The burrs on the opposite side of the cut break off easily after cooling.
Bulgarian
Method 3. Using a hacksaw. Undesirable option, work is difficult and long. But in extreme cases you can use it.
With a jigsaw you can make any cut on a plastic panel
It is worth using a file with a minimum tooth
Cutting a panel with a saw
The quality of the cut depends on practical skills. But don’t be upset if the cut edge is not very smooth; additional elements allow you to hide problems up to one centimeter in width. The cut can rarely be worse, the panel will be suitable for installation.
How to cut several PVC panels at once
Decoration of corners
When installing plastic panels in the bathroom with your own efforts, you need to correctly design the corners.
For this task, plastic corners are used for external and internal formations. They have two versions:
- Invoices. We install them on top of the laid covering.
- Integrated. Fasten before assembly.
Since plastic has good flexibility, we use another method. Step by step it looks like this:
- Cutting the canvas from the inside (we use a construction knife).
- A neat fold in the right place.
- Place the narrow panel element against the corner and bend it. Using the sample, we measure the bend area on the product. Alternative: using a hair dryer, we direct the air flow to this area, heat it and bend it. This creates a seamless transition. The main thing here is not to melt the panel and act extremely carefully.
How to calculate the number of panels and additional elements
The bathroom has a small area and many different transitions and corners. It is for this reason that professional builders are not very willing to finish these rooms; it takes a lot of time to take measurements, install sheathing and adjust panels, and the output is small. Builders are paid by the square footage, not by the time, so they choose large premises.
The more corners and transitions, the more unproductive waste there will be. Their number increases if panels with decorative patterns or asymmetrical patterns are selected. Such material does not allow the use of segments in other places. For ordinary panels, the quantity should be increased by 10% of the area of the surfaces to be finished. In bathrooms, the supply should increase to 15%. In addition, if there are complex patterns, the panels will have to be counted individually, taking into account the location of the pattern.
Measure the total length of the internal and external corners, the length of the baseboards on the floor and ceiling. Decide how much starting profile you will need, whether you need a connecting profile, and what elements you will use to finish the corners (simple or complex). If you have the skills to work with PVC panels, you can use simple corners; if not, buy complex ones. They allow you to hide errors during cutting or taking measurements. Take your time, think through everything carefully, and always buy with a reserve. It’s very annoying to go to the store again for a meter or two corner, and time is wasted in vain. Additional elements cost pennies, so don’t skimp on them.
Additional elements
When counting the number of slats or mounting strips, keep in mind that the distance between them should not exceed 50 cm. In addition, they must be mounted at the junction of the floor and the flow as close as possible to all corners, window and door openings. The slats in these places are installed regardless of the location of the last row. Measurements and calculations can take several hours, use them wisely. It will never be possible to accurately count the number of clamps or screws. Buy them in packs; the seller will tell you the approximate number of pieces, taking into account the width of the PVC panels.
PVC mounting plate
General requirements for surfaces
One of the advantages of the technology of finishing walls with plastic lining is low requirements for surfaces. There is no need to specially plaster or level the walls with putty; only large cracks are repaired. The height of the unevenness can be up to 1–1.5 centimeters; anything larger needs to be cut down.
Large potholes can be filled with cement mortar or putty.
Repair of major defects
Check the evenness of the walls using the rule
Important point. It is strongly recommended to treat the surfaces under the panels in bathrooms with antifungal compounds and use steam and moisture protection.
Mold Prevention Products
Wiping the walls with an antifungal agent
The climatic parameters between the wall and the cladding are the most favorable for the growth of fungi and other microorganisms; it is then impossible to destroy them. You will have to remove the casing, do disinfection and vapor protection. Only after such events can you begin to install plastic panels. No matter how carefully you remove the skin, you cannot do without damaging the materials. If you manage to buy the missing ones with the same characteristics, great. If not, you will have to buy new materials for the entire scope of work.
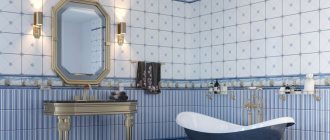
For which styles is plastic finishing suitable?
When deciding to cover the walls in the bathroom with panels, take into account the overall interior of the room. By definition, these products are completely unsuitable for the following styles:
- Classic.
- Country.
- Art Deco.
The most suitable ones are: modern and minimalism.
However, today the range of products is extensive. They imitate many materials and have original images
Often, owners have the opportunity to paint plastic panels to their liking in any colors.
Installation of panels on walls on wooden lathing
We will give step-by-step instructions for the vertical arrangement of the panels. In the future, we will talk about the technological differences between vertical and horizontal placement.
Step 1. Calculate the surface area of the walls minus window and door openings.
If necessary, the area of window and door openings is subtracted from the area of the walls.
How to calculate wall area
Make a reserve taking into account the above notes. We will fix the slats with a stapler and staples; this is the fastest and fairly reliable option. Self-tapping screws take a long time, self-tapping clamps take even longer, and liquid glue will not allow you to replace a damaged panel if necessary. The lathing is fixed to the wall with dowels. If you have special plastic mounting strips, then the slats are attached to them only with clamps; they are inserted into special grooves. The advantages of clamps are that the fixation area increases and the lower mounting plate of the panel is not damaged. Due to this, the strength of the fastening increases; it is recommended to use clamps when covering the ceiling with spot lighting. They allow you to withstand the increased weight of the structure.
Step 2. Clean the wall from large irregularities and seal the cracks.
How to repair a crack
To check the surface, use a large, flat rod, apply it in different places and check the clearance. At the same time, check the horizontal position; if the deviation is more than a centimeter, you will have to plaster. If the spread is smaller, then the position of the slats is adjusted by various pads.
Checking the flatness of a wall using a rule
Determining the evenness of walls using a two-meter strip
Step 3. Saturate the surface with an antiseptic, make vapor and waterproofing. You can use aluminum foil or plastic wrap. It is possible to impregnate walls with liquid insulators, just make sure that they are for indoor use. Wood slats also need to be treated with solutions.
Bathroom waterproofing
Antiseptic for wood
Step 4. To speed up the work, mark the position of the slats, using a rope with blue, beat off horizontal lines at the required distance.
Step 5. Fix the first rail at a distance of no more than 10 cm from the ceiling. Check its position carefully with a level. Use wedges if necessary. The rail is secured with dowels. First make a hole on one side and secure the dowel, and then on the other. Next, dowels are installed along the entire length, the distance between them is approximately 20–30 cm. Secure the rail near the floor in the same way.
Trimming strip
Lathing scheme for plastic panels
Step 6. Stretch ropes between them, two at the ends and one in the middle. The ropes serve as beacons; you use them to install all the other slats. Be sure to frame around window and door openings. Check the position of all slats again and make sure that the sheathing around the openings is installed correctly. If the slats are not in the same plane, this will have a negative impact on the panels; the backlight will reveal their incorrect position. To correct the defect, you will have to dismantle the slats and repeat the installation from the beginning.
Installation of sheathing
We fix the slats with dowels
Frame
Step 7. Secure the corner in the corner, start covering from the far corner of the room. Fix the corner with a stapler, staple length 6 mm. During fixation, carefully control its verticality along two edges. Not only the quality of work, but also the speed of installation depends on the correct position of the corner. If the angle is not 90°, then you will have to adjust the size of each panel, which will take a very long time.
Cutting the element to length
Fastening the inner corner
Installation of the starting rail
Mounting the rail at the bottom
Step 8. Measure the width and height of the wall in several places. The parameters must be the same. If the spread is less than a centimeter, then all workpieces can be cut to the same size. Count the number of panels, measure the required length and cut off the excess. This will be a template; use it to make marks on the remaining slats.
Panel cutting
Open the panels lengthwise
Step 9 . Insert one edge of the lamella into the corner and secure it to the sheathing on the back side. Don't forget to check the position. The first panel is installed - continue installation in the same way to the opposite corner of the room.
Installing the first panel
Installation of plastic wall panels
Panel installation
Step 10. The last panel needs to be cut to width depending on the remaining space. Make it about 1 cm narrower, this will make installation easier. First install the last lamella in the corner, and then move it towards the penultimate one until the lock snaps into place.
Installing the last panel
Snap the panel into the profile
Use the same algorithm to finish all wall surfaces. A little more work around the openings; in these places you need to measure and cut each element separately.
Installation of a metal frame
The advantage of a metal frame made of profiles is that it allows you to accurately align the position of the slats, regardless of the unevenness of the wall. How is it attached?
Step 1. On the wall, draw lines for the placement of U-shaped hangers. The algorithm of work is the same as for wooden slats.
Frame diagram on a wall with a door
Step 2. Secure the hangers with dowels, the distance between them is approximately fifty centimeters. If, while drilling a hole in a reinforced concrete slab, the drill bit hits the reinforcement, do not use excessive force. Firstly, building codes strictly prohibit damage to the reinforcement belt. Secondly, not every drill can withstand such efforts. Thirdly, the hole can be shifted slightly, this does not affect the quality of the sheathing.
Wall-mounted direct hanger
Direct hangers fixed to the wall
Installation of wall frame
Step 3. Cut the U-shaped supporting profiles to length, count their number.
Step 4. Begin installing the supporting profiles. The vertical position is adjusted using holes in the hangers or by slightly extending the profiles. If they do not allow you to accurately install the sheathing, then straighten the hangers. Such actions do not worsen the load-bearing performance of the elements. The loads from the lamellas act perpendicular to the bending. The elements are fixed together with self-tapping screws.
Attaching the profile to the wall
Further, the installation process does not differ from the usual one, only to fasten the panels instead of a stapler you need to use self-tapping screws with press washers.
Self-tapping screw with press washer
Important. If significant errors were made during the installation of the sheathing, they can only be corrected after dismantling the PVC panels. It is not only expensive, but also time-consuming. Do not forget to constantly monitor the position of the load-bearing elements. Remember that the most accurate instrument for measuring vertical position is an ordinary plumb line. You can buy it or make it yourself. The level can distort readings by up to 2 mm per meter. And if it fell from a great height, then it is impossible to install a sheathing on it.
What is the difference between vertical and horizontal laying
Example of vertical panel arrangement
The only difference is that for horizontal laying of panels, the frame must be vertical and vice versa. For bathrooms, horizontal laying of panels is strictly not recommended. Water easily gets into the locks and then penetrates into the space between the panels and the wall. If there is a lot of it there and it is constantly there, then no amount of steam or moisture protection will help. The appearance of mold and mildew cannot be avoided. To destroy them, you will have to completely dismantle the wall covering, carry out a set of special preventive and construction measures, and re-cover the walls. Such work costs approximately twice as much as proper wall cladding.
Installing panels horizontally
Practical advice. Don’t invent a bicycle, don’t create problems for yourself with your own money. In bathrooms, install PVC panels only in a vertical position.
Vertical and horizontal way of arranging PVC panels
Installation of panels on a rough ceiling
For example, let's take panels that imitate a slatted ceiling. The rough ceiling does not require any preparatory work.
Step 1. Saturate the rough ceiling with antiseptic agents, give them time to absorb and dry. It is advisable to make a vapor barrier with aluminum foil or plastic film. Fix the material with a stapler, and carefully seal the joints with tape.
Attaching foil to the ceiling
Tape the joints with tape
Step 2. Measure the distance between the opposite walls of the room and cut the baseboard, making a 45° connection in the corners.
Cutting off the baseboard
Practical advice. Do not attach the baseboard to the wall with self-tapping screws. Under the weight of the panels, it will sag a little, and gaps will form between it and the wall finishing. In addition, this method of fixation requires perfectly flat planes. Self-tapping screws press the baseboard against the depressions, it bends, and the appearance deteriorates significantly.
Attach the elements to the wall using liquid glue; remove excess material immediately. Fix only three skirting boards, the fourth is installed after laying the panels. To guarantee, you can additionally fix the back part of the element to the ceiling with a stapler. Wait 2-3 hours for the glue to dry completely.
Step 3. Ceiling panels should be a few millimeters thinner than wall panels. Keep in mind that the panel can extend two centimeters into each baseboard. Measure the length of the ceiling from edge to edge of the plinth and add 1.5 cm to this value, the remaining 0.5 cm is left to facilitate installation. It is better to measure and cut each panel separately, this minimizes the likelihood of error.
Step 4. Double-check the dimensions and geometry of the ceiling. If there are minor deviations, they will have to be gradually eliminated by changing the width of the gaps between the lamellas. The magnitude of the changes should not exceed two millimeters, otherwise the adjustment will become noticeable. If the architectural features of the ceiling allow, then align the panels in places that are invisible to the naked eye. Open areas will already have smooth joints.
Panels inserted into the baseboard tongue and groove
Step 5. Insert the end of the panel into one baseboard, bend it slightly and insert the other end into the opposite one. Align the panel and tuck the long edge into the third baseboard.
Plastic guides will help hide uneven edges of the panels
Practical advice. What to do if the ceiling plane resembles a rhombus? Such cases happen among hack builders, but this can be corrected. Install ceiling panels diagonally. There is nothing complicated, you just need to cut the end of each panel at an angle. We will tell you how this is done below. The negative consequences of a crooked ceiling are that the amount of panel waste increases significantly.
Step 6. Press the panels tightly together and secure them with a stapler. The closer the locks come together, the stronger the connection. If the ceiling is not very level, then when attaching the panel at the end, a gap may appear between it and the baseboard. To prevent this from happening, push plastic scraps into these places and only then fix them. Under force, the plastic will compress to the required thickness, and the gap will close. There are difficulties with bending short slats. In such cases, make them another centimeter shorter; the width of the skirting boards allows this. The best option is to immediately lay the panels on the wider side of the ceiling. During installation, do not use excessive force, do not damage the baseboard, scratch the walls, or break the panel.
Installation of plastic panels
Step 7. Once all the intact panels are installed, measure the width of the remaining uncovered ceiling. To these dimensions, cut the material using one of the possible methods.
Step 8. Using the method described above, insert the panel into two skirting boards, connecting one edge into a lock. The rest will have to be fixed separately. There are two options. The first is to lubricate the reverse side with liquid nails before installation and glue it. The second is to drill a hole in one plane to the diameter of the self-tapping screw and use it to screw the second plane to the ceiling.
Installation error
Step 9. Cut the base part from the fourth ceiling plinth. Spread the remaining surface with liquid glue and attach it to the wall in the right place.
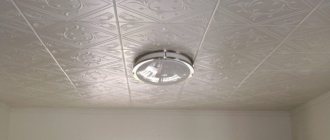
This completes the installation of the ceiling panels. Of course, during work you need to leave space for electrical wiring, ordinary or spotlights. If after installation there are visible gaps in some places, they can be sealed with sealant of the appropriate color.
Ceiling made of PVC panels
Ceiling made of plastic panels
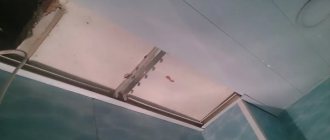
Installation of panels to the ceiling on a metal frame
This method is recommended for use on uneven ceilings; the ceiling can be reinforced concrete or wood.
Step 1. Mark a line for installing supporting profiles around the perimeter of the room, making sure that the ceiling is horizontal. At a distance of approximately 50–60 cm, fix the remaining profiles. If the ceiling is very uneven, then use hangers. They are fixed and adjusted in the same way as on the wall. The difference is that the ceiling frame is more difficult to check with a level: it is more difficult to work, your hands are raised up and you get tired quickly.
Frame for PVC panels
Frame
Step 2 . Glue three skirting boards with liquid nails and file them at 45° at the corners. If the ceiling plane does not have right angles, then each cut will have to be adjusted. Glue the plinth both to the wall and to the metal profile. When gluing, follow the technology. After the plinth is attached, remove it and wait 2-3 minutes, then press the element again. Check its position with a rule or level. The rule is applied to the lower edge of the baseboard. If there are gaps, then use your hand to carefully move the baseboard down until it stops with a straight edge. Give it time to harden. The cracks in the corners are sealed with liquid sealant, but for professionals the fit should be tight right away. The bathroom ceiling is very hot and humid. You can be sure that the sealant will peel off in 4-5 years and will have to be removed and the cracks re-sealed.
Attach the skirting board to the guide profile
Practical advice. Sometimes when the glue hardens, the baseboards move a little in the corners and they end up at different levels. To prevent this from happening, insert trimmings into the corners; they will constantly hold the two elements at the same level.
Step 3. Insert one end of the slats into the baseboard, bend it slightly and push the other end into the opposite baseboard. Align the panel and slide it into the third baseboard. We have already mentioned that you should check the exact dimensions of the ceiling before installation. If one side is longer than the other, then the difference must be gradually leveled by adjusting the gap between the lamellas. The method, of course, is not ideal, but there is no better one. Always install panels along the long side of the ceiling. Due to this, it will be possible to reduce the number of cuts and make it easier to bend the lamellas during installation.
Installation of plastic ceiling
Step 4. Each panel is fixed to the profiles with self-tapping screws and press washers. This is quite difficult; hardware often falls out of the drill or screwdriver.
PVC panels are attached to the metal frame with a self-tapping screw and a press washer.
Panel fastening
Constantly check the position of the slats. To prevent a screwdriver that comes off from damaging the end of the panel, place a clean, wide metal spatula between them while screwing; it serves as reliable protection. It is not necessary to twist the press washers into the tail of the panel, this is difficult and increases the risk of damage, the main thing is that the head presses it against the profile.
Installing panels on the ceiling
Step 5. The last panel needs to be cut to fit the remaining gap. To make installation easier, make a gap of about 1–1.5 cm; it will then hide in the baseboards.
Step 6. Cut off the back plate of the plinth, spread the remaining surfaces with glue and glue it to the wall. Do not forget that gluing must be done in two stages. If the plinth creeps down under its own weight, then hold it for a few minutes or come up with any temporary stop.
At this point the work is completed, you can begin installing the lighting fixtures. Before you start finishing, you should know the type of appliances and where they will be installed; cut holes of the appropriate diameters in the panels in advance.
How to position and connect lamps
The hole for the lamp can be cut with a knife
Drilling a hole with a crown
Lamp mount
Plastic ceiling
How to install panels when mounted on a ceiling diagonally
Let’s say right away that such work is much more complicated; you will have to lose more time on installing the sheathing and adjusting each individual lamella.
Step 1 . Calculate the ceiling area and determine the maximum panel length. Everything is clear with the ceiling area, but to determine the maximum length of the panel you need to use the formula A2 + B2 = C2. A and B are the length and width of the bathroom ceiling, C is the diagonal. Hence C = √ A2 + B2. Keep in mind that this method of finishing the ceiling increases the amount of waste, buy about 15% more materials.
Step 2. Attach three skirting boards to the ceiling, the method is described in the article above. Take measures to ensure that the baseboards do not diverge in height while the glue is drying in the corners.
Step 3. Cut a piece of lamella from one of the ends at an angle of 45°. From the intersection point, cut a second piece at the same angle. The result is a launch panel, the shortest one, installed in the corner.
Step 4. Insert it into place, measure the length of the larger part. This will be the size of the smaller edge of the second lamella. Apply these parameters to the new panel and cut both sides at a 45° angle.
Installation of suspended ceiling
Using the same method, cut and install all remaining slats. As we already mentioned, the amount of waste is increasing.
Diagonal arrangement of panels
Manufacturers
Currently, hundreds of large and small companies produce building materials. Which manufacturers of PVC panels for the bathroom are best to focus on when purchasing this type of product? Experts advise choosing products from well-known brands. Leading companies value their reputation, so they offer certified panels for sale. They are safe for health. Among domestic manufacturers, the following have proven themselves well:
- "Plast-Decor";
- AnV-Plast LLC;
- "Ural-Plast";
- LLC "Planet Plastic";
- "Decoplast";
- "Sadko"
- "Kronaplast";
- "Komplast";
- "Alta-Profile";
- Green Line LLC;
- Pareti LLC.
They offer quality material at a relatively low price. Among the leading foreign firms, the following should be highlighted:
- Forte (Italy). The company's product range is quite wide. Among the products produced are Le Murino plastic panels covered with stone chips.
- Deceuninck (France).
- Venta (Belgium). It also has production workshops in Russia. This allows us to produce products of European quality at affordable prices.
- Chinese products, as a rule, are not of high quality. However, this does not apply to Shanghai Zhuan. It produces certified panels at reasonable prices.
- Grossfilex (France). It also has its own factories in Russia for the production of plastic panels.
- Blancoplast (Germany).
- Vox (Poland).
- Wavin (Netherlands).
- Rolplast (Belgium).
Answers on questions
How to make a corner from a plastic panel? Wall cladding without purchased corners looks much better; professional builders often use this finishing method. Take a tape measure and measure the distance of the last panel to the corner, transfer this parameter to the panel that is planned to be installed at the corner, draw a line. Draw two more parallel lines from it to the left and right. Use a sharp knife along them and be sure to use a ruler to make cuts on the underside of the panel. Hold the edge of the knife at an angle of 45°, be careful not to damage the front edge of the panel. If you do everything correctly, when you bend it you will get a nice, smooth, rounded corner. There is no need to use additional corners, which can fall off over time. This method can be used to make both external and internal corners. Only for internal corners you will only need one longitudinal cut, not two. Bend the panel gradually along its entire length.
How to bend panels
Important. Not all types of lamellas can be bent; low-quality materials will crack. You can try warming up the area a little with a hair dryer before bending.
What to do if the corners of the bathroom ceiling are rounded? Such options for finishing flows are found in houses of old construction. There are two options to solve the problem.
- Lower the plastic casing to the bending distance. The option is simple, but not suitable for everyone. The fact is that in some rooms the height is reduced by 10 cm or more. If the bathroom is already low, then it is not worth reducing its volume. And one more disadvantage of this method is that the height of the rooms in one apartment will not be the same. And this immediately catches your eye.
- Align the ceiling angle. You will have to chisel the old plaster in the corners to the height of the new flow. Then use putty to level the corner. Of course, such work should be provided before the panels are laid on the walls.
Is it possible to drill a hole of any diameter in a plastic panel without a special crown? It is possible, it will not be ideal in shape, but it is quite suitable for subsequent installation of lamps. All lamps have a decorative body, the diameter of which is larger than the size of the mounting socket. To make a hole you will need a drill and an ordinary drill bit with a diameter of approximately 3-5 mm.
Making holes for spotlights
- Draw a hole of the required diameter on the panel and in the selected location.
- Insert the drill bit into the drill and adjust it to high speed.
- If you have an assistant, great, he will place the panel on its edge and hold it firmly. If you have to work yourself, then hold the panel with one hand and use the drill with the other. This is inconvenient and difficult, the hole will turn out uneven.
- Drill a hole on the circle line, press the drill against the line and move it around the circle. Friction will melt the plastic, and the drill will “cut” a hole in it.
That's it, remove the burrs and the hole is ready.
What are the features of installing panels on the ceiling under spotlights? No matter how light the lamps are, a large number of them creates additional load on the panels; over time, the ceiling may sag a little. To prevent such consequences, you need to install intermediate jumpers more often; professionals recommend making the distance between them no more than 30 cm. In addition, choose durable lamellas for the ceiling, pay special attention to the characteristics of the locks, they are the ones that hold the weight.
How to choose ceiling lights for a ceiling made of PVC panels
Can dismantled panels be reused? A lot depends on how you shoot them. Cheap materials can cause long longitudinal cracks when the fixation points are torn off. To prevent this phenomenon, use the sharp end of a mounting knife to cut the junction of the lamellas with the frame along the entire perimeter of the hardware. Before re-laying, you will have to move the supporting frame a few centimeters in any direction so that the fixation is done on undamaged areas. Read the step-by-step instructions for installing a bathtub yourself on the website.
Dismantling of PVC panels
Preparatory work
This stage of work is determined, first of all, by the method of fastening the decorative panels. If the frame installation method is chosen, then you can limit yourself to only cleaning the surface from dust and sealing cracks.
If the surface of the wall shows signs of destruction, for example, crumbling plaster, then it should be cleaned of this layer or try to strengthen it with the help of special primers. In the most difficult cases, even plastering may be required.
When choosing an adhesive installation method, higher requirements are imposed on the preparation of the base. Therefore, if there is an old finish, it is completely removed, and the surface is plastered or finished with plasterboard.
But, regardless of the chosen method of attaching the panels, the base underneath them must be treated with special antiseptic compounds.
Lumber that is planned to be used to create a frame must also undergo appropriate processing, protecting it from infection by microorganisms, deformation and increasing its fire resistance.
Before you cover the bathtub with plastic panels with your own hands, you need to buy the finishing material itself, not forgetting about the components and additional accessories, which include: starting strips, decorative moldings, corners, ceiling plinths and other products.
Cover the bathtub with plastic panels yourself
You should purchase the required number of panels only from one batch to avoid color mismatch. In this case, you need to take care of 5-10% of the reserve, which is necessary for trimming, finishing non-standard areas and, possibly, for repairs in the future, for example, if a small area is damaged.
The panels must be purchased in advance, at least 2-3 days before installation, and allowed to “rest” in a room whose temperature corresponds to the conditions of the bathroom.
If you decide to glue the panels to the base, you will need to buy glue and the necessary painting tools for applying it. To construct a frame, you cannot do without a drill and a screwdriver, the use of which is especially important if you decide to fasten the material with self-tapping screws - their number will be very large.
You will also need a fine-toothed hacksaw and/or a construction knife for cutting panels, a level, a tape measure or other measuring device.
It is possible that a sealant will also be needed, for example, to seal cracks to prevent water from getting under the skin.
Most often, slatted products are used for finishing, and their installation can be carried out in several options:
- vertically (most common);
- horizontally (in a bathroom, this method is very controversial, especially when using suture material, since water can accumulate at the junction of the panels);
- diagonal.