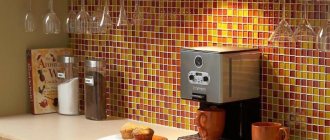
The final result is influenced by the quality of each stage of work. It all starts with surface preparation. You need to carefully remove the old decorative coating from the wall and knock down those areas of plaster that seem fragile. You should also smooth out any protrusions (for example, remnants of old glue) and putty any existing recesses. The result should be a flat surface that needs to be degreased and primed. The closer the result is to ideal, the easier the finishing will be.
When choosing a tile, you should focus not only on its appearance. It is important to remember that the apron is constantly exposed to intense contamination. Therefore, a good option would be ceramic tiles that are not too difficult to maintain—samples with a smooth, glazed surface are best. Size also matters, because stains are the most difficult to remove from seams. This means that the larger the format, the better. The color should be in harmony with the interior of the kitchen, if replacing the apron is not the beginning of a global renovation.
Porcelain tiles
Why not? Solidity and low moisture absorption coefficient will not allow this material to absorb dirt. In addition, porcelain tiles are produced in large formats, which will reduce the number of seams to a minimum. Rectification allows it to be laid with gaps of only 0.5-1 millimeter. Well, the choice of design is now very wide.
Those days when you bought the tiles that were available, and wallpaper, furniture and everything else were chosen in unison with it, are long gone. Now you can develop a kitchen design without limiting the flight of your imagination, and you will definitely find the right tile! Adherents of the traditional approach will choose a monochrome apron design: both the main surface and borders are made of single-color ceramics.
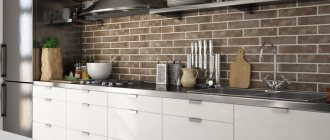
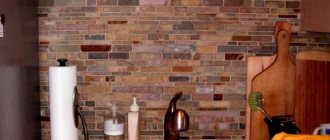
Modern tiles look completely different from how they looked in grandma’s kitchen as a child! Another good option is porcelain stoneware with imitation of natural stone. We choose a larger format, perform seamless installation and install suitable stone countertops. The work area will look like a very stylish monolith. However, you can try to play with contrasts, alternating, for example, light and dark tiles in a checkerboard pattern, or creating more complex patterns.
The functional purpose of an apron in the kitchen is to protect the wall in the work area from soot, splashes and other contaminants. To do this, it should, at a minimum, start 2-3 centimeters below the surface of the cutting tables, and end at the height of the hood. For electric stoves, the recommended installation height for the hood is at least 65 centimeters, for gas stoves - 75. If finances allow, you can start laying the apron from the floor and bring it to the ceiling. This way you can more clearly define the kitchen area in a studio apartment. Its length should cover all work surfaces, as well as the sink and stove.
From the beginning, that is, from calculating the amount of materials. The main thing is to buy tiles with a small margin. If you don’t have enough, you can, of course, buy more, but the batch in the store will be different, and the shade will be different. And the repair itself is a rather labor-intensive process. Why interrupt him in the middle and rush to the store? For an accurate calculation, you need to decide on the installation method. If you are going to lay tiles for the first time, it is better to choose the traditional method, when the tiles in each subsequent row are strictly above the tiles of the previous row. To get the number of tiles, you need to divide the area of the apron by the area of one tile - it’s logical, but that’s not all.
Now you need to decide how much stock you need. With the traditional method or offset installation (like a brick), 10% should be enough. This will cover the costs of material for trimming, manufacturing defects and damage to the tiles during installation. If we lay the tiles diagonally, then the required margin will be 10-15%, and in cases where we need to adjust the pattern - all 20%. All roundings are made upward!
The process itself is not as complicated as it seems. To ensure that the result does not disappoint, the main thing is not to rush and do everything as carefully as possible. For the first experience, it is better to choose a traditional layout scheme.
Varieties
The following materials are used in the manufacture of plastic aprons:
- PVC panels, the standard width of which is 25 cm and thickness - 0.8–1.2 cm. They are produced in lengths from 2.6 to 3 m. Their main feature is the presence of special locking fasteners on glossy or matte parts for seamless connections. Therefore, with proper installation, you can independently make a kitchen apron for the kitchen on the wall in the form of a monolithic surface from individual elements. The main thing is that there are no cracks, otherwise water and debris will get into them. PVC is used to make plain, thermo-film-coated or varnished aprons.
- ABS sheets are single-layer plastic materials decorated with photo printing or designs. A finished kitchen apron made of ABS plastic is usually produced in dimensions of 200 x 60 x 0.15 cm. Its main advantage is its high resistance to mechanical damage and the absence of deformation during bending. Aprons made of sheet plastic are produced in a wide variety of designs, since high-quality images are applied to the surface of the product. In addition, you can order an apron with an original design.
- Cast polycarbonate is a refractory plastic material that looks like ordinary glass. The surface can be glossy or matte. Kitchen aprons made from this material are sold ready-made. Images imitating tiles, decorative stone, brick and other materials are applied to the inner polycarbonate coating. In addition, such an apron can be equipped with lighting elements (for example, LEDs) that will highlight the product.
Taking into account the size of the kitchen wall that needs to be tiled, you need to calculate and select the appropriate model.
Material and tools for laying the apron
List of materials:
- reinforced tile adhesive;
- acrylic strengthening primer;
- crosses or tile leveling system;
- gypsum plaster;
- construction gypsum.
Tool list:
- perforator for removing old coating;
- screwdriver for installing sockets;
- mixer attachment for drill;
- container for mixing glue;
- spatulas: narrow, serrated and rubber;
- normal level;
- laser level;
- pencil.
Preparing the wall surface
This stage is the basics. The more thoroughly the surface is prepared, the easier installation will be and the more perfect the final result!
Removing the old coating
It all depends on what was on the wall before. To remove wallpaper, you can use a special product or prepare a solution of washing powder in warm water. Next, simply moisten the wallpaper with a rag or sponge, let it soak a little and carefully remove it with a spatula. To remove paint, it is most convenient to use the same spatula and a hair dryer: under a stream of hot air, it will begin to move away from the wall on its own; all you need to do is give it a little help.
Removing old coating is a more complex procedure. Perhaps part of it has almost fallen off, but there are always tiles that, despite their venerable age, sit firmly. There will also be traces of old glue or mortar on the wall, and all this needs to be removed. This is what you need a hammer drill for. They need to work carefully, trying not to damage the plaster. However, if in some place it is already barely holding on, this part should be removed.
Plastering the wall for laying the apron
After we have removed all excess from the wall, it needs to be wiped of dust with a damp cloth and primed. Apply the primer according to the instructions: in one or two layers. Then, if necessary, you need to plaster the wall, especially in those places where we knocked down the plaster accidentally or intentionally. You can also correct the mistakes of previous plasterers. After the mixture has dried, prime the wall again. That's it, the base is ready!
Marking
Another important step (they all are). Using a level, we outline the upper and lower boundaries. We draw the left and right lines, as well as additional auxiliary vertical lines, along a plumb line. Along the lower border we install a barrier made of a bar or aluminum profile. It will support the tile until the glue sets and will prevent it from slipping. After completing the marking, we evaluate it again by eye from a distance. If any lines are in doubt, they need to be double-checked for level and plumb, and, if necessary, corrected.
"Boar"
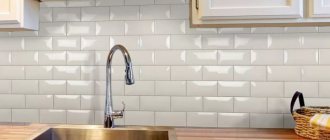
A relatively new type of ceramic tile. Its notable feature is its appearance - rectangular tiles with a small bevel. Depending on the manufacturing method, there are two types: one tile - one brick or several small “hogs” on a medium-sized tile.
More information and photos can be seen in our review of the “hog” tiles.
The result of laying such tiles is pleasing to the eye. A simultaneously classic, but at the same time very modern and original pattern is created from beveled decorative bricks, which has a pleasant aesthetic effect.
Laying this type of tile also requires professional skills, especially when it comes to forming external and internal corners.
The most common is the one-color “hog”. But there are examples with various kinds of inscriptions and patterns.
“Boar” is best suited for decorating small work areas in small and medium-sized kitchens.
Electrical wiring before laying the apron
If there is supposed to be wiring under the future apron, now is the time to do it. The grooves are made in the wall according to a pre-planned pattern. A hammer drill, angle grinder (angle grinder) or a hammer and chisel are suitable for this if the wiring length is short. Use a vacuum cleaner and a damp cloth to remove dust and prime the grooves themselves and the surface of the wall next to them. Now you can lay the wires. We fill the grooves with a solution of building plaster and level them flush with the wall.
How to secure a plastic apron in the kitchen with dowels: instructions
Installation using the mentioned fasteners should not cause any problems. This installation method is best used on panels that have a pattern on them, as the same adhesive may cause some damage to the image. It is not necessary to move the furniture set during the work. Installation should be carried out according to the following plan:
- Use a drill or hammer drill to make holes in the wall and apron for the dowels. At this stage, a building level will be useful, with which you can make accurate markings.
- Clean the surface from any dust that has formed.
- Place the prepared apron against the wall and secure it with dowels.
- Mask the caps with furniture plugs, the color of which should match the plastic.
An apron installed in this way can be easily dismantled: to do this, you need to unscrew the dowels and carefully remove the product. In addition, dowels (concrete screws) or anchor bolts can be used for fastening.
How to make holes for sockets
A regular concrete drill with a pobedit tip will not be enough here. The most important thing: the holes must be made before laying the tiles on the wall. Firstly, it’s more convenient to work this way, and secondly, if the tile does crack, you can simply take a spare one instead of removing the damaged one from the wall. Special diamond-coated drill bits are sold for drilling tiles. You need to drill at low speeds and be sure to turn off the impact mode.
Video review
The video below shows how to lay tiles on a backsplash. Detailed instructions allow you to do this yourself, without having much experience in repairs.
A high-quality kitchen apron allows you to create a truly stylish and beautiful dream kitchen. In addition, it reliably protects the kitchen from various types of mold and mildew, high humidity, and dirt. To assemble a kitchen apron, you don’t need much experience, just follow the instructions and carry out each step with care.
Tile cutting methods
Some craftsmen cope with the task with the help of a glass cutter, but this is the lot of a select few. The easiest way is to buy a lever manual tile cutter; it is quite inexpensive. However, if you plan to install according to a non-standard pattern, the kitchen has a complex shape, or you plan to lay the tiles somewhere else, you can also invest in a model with an electric drive. You can also find special frames on sale that can turn a simple grinder into something like an electric tile cutter. By the way, when cutting and drilling, to apply markings, you can stick masking tape on the tile and draw lines along it.
What is the difference between chipboard and analogues
It is necessary to distinguish chipboard from fiberboard - wood-fiber board, which has low mechanical stability, is fragile, breaks easily and is a dense cardboard of varying thickness. On one side, the fiberboard sheet has a flat and smooth structure, and on the other, it has a rough, loose and corrugated surface, with notches applied. Not used as a decorative material.
Boards made from chipboard, MDF and HDF are similar to each other both in production method and in quality characteristics. However there are a few differences:
- The chipboard structure is less dense than MDF and HDF;
- Chipboard boards are more susceptible to moisture than MDF and HDF;
- Chipboard boards are cheaper.
A common disadvantage of the products is poor resistance to high temperatures and susceptibility to fire.
Tile laying technology
Excessive haste is always harmful, but you shouldn’t hesitate when laying tiles. Before starting work, look at the glue packaging for how long it takes to set. This is exactly how much head start you have for leveling, tapping and other manipulations with the laid tiles. Everything should be at hand: enough crosses in your pocket, tiles for laying laid out nearby.
First we lay the whole tiles. After this, you can begin working with the outlets where the sockets emerge, and those areas where pruning is needed. The fact is that the marking of tiles for laying in these places must be done at the place of installation, without estimates or calculations. After marking, we use a tile cutter and a milling cutter. It is better to drill holes on a piece of drywall: the tool will not be damaged and the tile will not crack. After installation, all seams must be cleaned of excess mixture and dirt must be removed from the front side with a dry cloth.
After the glue has dried, you can proceed to grouting the joints. This process deserves a separate article. One thing needs to be mentioned now. If you are laying tiles for the first time, select a grout that matches the color of the tile as closely as possible. Despite efforts, crosses or tile leveling systems, discrepancies in the opening of seams are still possible. And this way they will be less noticeable.
Types of decorative coating for MDF panels
MDF is made by pressing wood chips with an adhesive composition. The resulting slab is subjected to further decorative finishing using various technologies. The result is: laminated, painted, laminated, veneered MDF boards.
Laminated coating is made by treating panels with PVC film or melamine paper. Laminated MDF panels can withstand various adverse influences without damage. They are used in furniture production, including for making kitchen facades.
MDF panels are also painted. And then they make furniture for bathrooms or kitchens. However, painted panels have a significant drawback: such a coating does not withstand temperature and mechanical factors.
Gluing plastic to a panel is called laminating. Such a panel becomes more moisture-resistant, wear-resistant and temperature-resistant. Due to their practicality, such panels are often used to make kitchen splashbacks and other kitchen elements.
By veneering MDF panels, they acquire the appearance of natural wood.
There is another way to decorate MDF panels. This is the application of various drawings and photographs to the surface using photo printing. Such panels are called skinali. Initially they were made of glass. Skinals are very popular and are used to decorate kitchen aprons.
