Kitchen flooring requirements
When choosing tiles with laminate for the kitchen, take into account that the coating will be subject to adverse factors, so its characteristics must meet certain requirements:
- Resistance to mechanical damage and scratches, for example, when moving furniture or falling dishes;
- Antiseptic properties, that is, resistance to the development of fungus, mold, pathogens;
- Resistant to liquids spilled on the floor. It is good if the material has a dense and at the same time smooth, non-porous structural surface;
- Minimum service life – 10 years;
- Abrasion resistance;
- No sliding effect;
- Resistance to treatment with special means, without losing the original color and quality.
Combination ideas in different interior styles
In the minimalist style, a more restrained finish is assumed with rather modest and laconic color schemes, in gray, black or white colors; for the high-tech direction, choose a combination of glossy ceramic tiles with laminate boards in dark gray, black, anthracite or wenge shade.
Scandinavian design can be decorated using light tile finishes or models with imitation wood, stone or marble, which, in combination with beige, white, limestone or ivory laminate, will have a pristine and natural appearance.
The photo shows a Scandinavian-style hallway with a floor lined with patterned hexagonal tiles combined with beige laminate boards.
In rustic country, they often use laminate fabric in walnut, red, rich brown or beige shades in combination with multi-colored mosaics or patterned ceramics in the patchwork style, and for an industrial loft they prefer laminate that has a shabby and aged look in combination with dark tile cladding or products that imitate brick.
The photo shows a laminate floor combined with patchwork tiles laid in the center in a country-style kitchen interior.
Advantages and disadvantages of combined flooring
Tiles with laminate in the kitchen are materials with suitable characteristics for use in kitchen conditions, the combination of which provides many advantages:
- Visual division of space into working and dining areas;
- Protection against premature wear of materials in areas where the maximum load is located;
- The opportunity to obtain a non-trivial design composition;
- If you tile the area next to the stove and kitchen units, you will get a sanitary area with a durable, wear-resistant floor covering;
- When water flows under the cabinets, the material will not swell, since the tile does not lose its properties during prolonged contact with the liquid;
- It is easier to install a kitchen set on tiles, since the legs of the furniture will not push through the coating. Over time, the laminate begins to sag and noticeable dents form on it;
- On the rest of the kitchen area, laminate looks better, which is suitable for almost any interior, maintaining a pleasant feeling when walking on the floor.
Disadvantages of combined flooring in the kitchen:
- Additional processing of joints;
- If the design is not well thought out and the parts are placed incorrectly, the coating will turn out to be asymmetrical.
Docking methods
Fastening with thresholds means that a special profile is inserted into the gap between the laminate and the tile.
Steel or aluminum strips are considered one of the most reliable and easiest to install. The appearance of such thresholds does not always fit into the design of the kitchen floor made of tiles and laminate. Wood planks have a more aesthetic appearance. The disadvantage of wooden planks is that they cannot hide the wavy joint line. To join seams between materials that have the same thickness, you can use construction foam, silicone or special mastic. Such materials will provide a tight connection; moisture or dirt will not get between the seams, but they have a short service life and require some experience in use.
To disguise a tortuous joint, use flexible Step Flex profiles. This profile can be given the desired shape, which will close any gap. Flexible profiles have a rich palette of colors, which allows them to be used to design any surface.
Fastening - threshold
The thickness of the materials that are laid on the floor surface can be different, and sometimes areas in the kitchen are made in the form of a podium or small steps. In this case, it is best to use fastening using thresholds. They can be straight, leveling or finishing.
If the floor is installed at the same level, straight thresholds are used, if the zones have different heights, leveling strips are used, and the podium and steps are finished with finishing thresholds. This application allows for a smooth transition from tile to laminate.
All thresholds have two types of fastenings. When hidden, all parts are covered with a decorative strip. If the type of fastening is open, then the heads of the screws or dowels will be visible. When attaching the thresholds, be sure to leave a gap to prevent deformation of the laminate, and the threshold itself is installed end-to-end with it.
Fastening - butt
When fastening butt joints, no additional materials are used. This type of installation is possible if the tiles and laminate have the same thickness and do not require additional leveling. Butt joints are also used to create wavy joints.
Installation of a wavy joint
The wavy joint is the most complex method of joining two types of material. Before starting work, a template is made according to which the tiles are laid. After this, lay the laminate so that part of it lies on the tile, mark the outline of the tile according to the template and cut it along the marked lines with a jigsaw.
At the next stage, the laminate is disassembled, and tiles are cut out along the marked contour using a grinder. Next, lay the substrate under the laminate at a distance of 100 mm from the tiles and install it. In those places where there is no backing, the laminate is fixed using silicone glue. The same glue is used to fill the joint seam and rub it in after drying.
Fastening with foam and sealant
Using construction foam, sealant or mastic, you can make sinuous seams of different widths or depths. With this method of fastening, all work must be done very carefully so as not to damage the floor covering. Excess foam or mastic is very difficult to remove from tiles or laminate, and an insufficient amount of installation material can cause the fastening to be unreliable and short-lived. Butt fastening with foam requires certain knowledge and experience from the master. The disadvantage of this method of fastening is that if part of the coating is damaged, it cannot be partially replaced and the entire joint will need to be dismantled.
Options for combining tiles and laminate in the kitchen
When combining two materials, designers recommend starting from tiles; its pattern and color will be the main ones when shaping the style of the kitchen. The tiles on the floor are always smaller; they are adjacent to the kitchen unit and can shade or enhance the decorative effect.
Tips for combining
There are several tips for effectively combining tiles and laminate in the kitchen:
- In rooms with high ceilings, you can choose dark flooring to achieve a stylish, aristocratic design;
- When choosing tiles with a bright, catchy design, pastel-colored laminate is laid on the kitchen floor;
- In kitchens with a reduced level of natural light penetration, it is better to choose light colors of flooring, which visually enlarge the space, making it lighter and airier;
- Warm tones are combined only with warm ones, cold ones - with cold ones, so as not to get an elaborate and tasteless kitchen interior. The combination looks beautiful when one of the colors in the decor of the laminate is present in the design of the tiles.
Seam separation
When choosing the design of kitchen floors, the texture and color of the laminate, the size and method of laying tiles, you need to solve two questions:
- Choose the right colors for flooring – either contrasting or similar;
- The method of sealing the joint should be such that it does not create the feeling that there are two different materials on the floor. The flooring looks like a single canvas with two sections of different colors or shades.
The easiest way to separate the border between tiles and laminate is a direct directrix.
When choosing the shape of the joint, the style of the kitchen is taken into account: if regular geometric shapes, rectangular cabinets, and a square table predominate in the interior, the seams are made in the form of a straight line or placed along the built-in kitchen unit.
Seam along the line of the kitchen unit
For a more unusual design of kitchen flooring, the separation of tiles and laminate is made with a curved joint - in the shape of an oval, semicircle, or any other shape. A straight arc can go quite deep into the laminated part of the board; optimally, the border should pass near the table standing in the middle of the kitchen.
Curved seam
An arc with reverse curvature reduces the floor area under the tiles to a minimum, while at the entrance to the kitchen, next to the refrigerator or sink, the size of the tiled area is doubled.
Some prefer a laminate and tile half arrangement where they occupy equal parts of the kitchen floor. If difficulties arise, you can use old linoleum, on which dents remain, to determine the main routes of movement around the kitchen.
Contrasting combination
When zoning a kitchen space using color, separate functional zones are created, each of which has its own functions. For example, the part of the floor adjacent to the set, covered with light tiles, is considered a cooking area, where only the housewife has access. The rest of the kitchen, finished with laminate, is the living area.
Contrasting design
The use of contrasting colors does not require design skills. The dark part of the floors is reserved for laminate, since it is mainly made in gray and brown colors. Light grades of material in the kitchen are used in rare cases. On the contrary, tiles are chosen in white, beige, or cream colors.
Combination with kitchen set
Tiles and laminate should be combined not only with each other, but also with the kitchen set. Light-colored cabinets combine well with any floor covering. A white or cream kitchen set looks beautiful in combination with beige or sand tiles. According to the contrast principle, the laminate is chosen in a rich dark or brown color.
A black kitchen set needs to be set off not only by the floor, but also by the walls. To get a less gloomy atmosphere, make a light apron and, if possible, remove wall cabinets. Light tiles on the wall and floor go well with each other and the dark set. The latter is complemented with a chocolate-colored laminate.
In kitchens with large windows, light walls and ceilings, dark kitchen units are complemented with brown laminated boards and light tiles. With this combination, the part of the floor covered with tiles looks wider, visually increasing the boundaries of the kitchen space.
Combination of tiles and laminate in the kitchen-living room
A combined tile and laminate floor provides an interesting opportunity to visually divide a spacious studio or a small kitchen-living room.
Design options
Strict minimalism, constructivism, Art Deco and classics use straight lines in floor decoration. In this case, figured laying of tiles is allowed. But modern, fusion and other romantic trends actively use smooth outlines and curvilinear forms.
In small rooms it is only permissible to outline the outline of the kitchen unit using ceramics.
However, zoning is not practical for 6 square meters. But already on the 12th floor you can highlight the dining area by laying carpet. At the same time, in such an area, sharp contrasts of shades should be avoided. But in the studio, such zoning looks good.
Where to place the joint
The bases of tiles and laminate have different rigidity and degree of expansion, so the joining line will appear in any case. There are several ways to solve the joint problem:
- The use of decorative aluminum strips used to secure linoleum near walls and thresholds;
- Masking the seam with a vinyl overlay;
- Arrangement of the podium at the junction.
When choosing a joining location, make sure that the seam line does not pose a danger and does not interfere with movement around the kitchen. The joint should be parallel to the movement of people or in a low-traffic area.
Often, tiles on the kitchen floor are laid in the shape of the letter L, with most of the material located under the set, and in front of it an area about one and a half steps wide is formed. This location of the joint allows you to move freely around the kitchen without fear of catching a seam or hitting the podium. The rest of the floor is laid out with laminated boards to create a more lively, cozy environment.
The joint between the laminate and the tile is sometimes designed in the same way as when laying linoleum in the kitchen. The seam is placed parallel to the kitchen unit, along the cabinets. When arranging the podium, the area with tiles is made 2-3 cm below the main surface.
Photos in real apartments: laminate + tiles
When performing mating, always carefully assess your abilities if you want to dispense with trim strips. Thresholds can hide possible defects and make the joint more attractive.
Apr 24, 2017Werri
Transition between tile and laminate in the kitchen
When combining tiles and laminate in the kitchen, a seam is formed between them, which is left free and cannot be filled with any materials. There are several ways to disguise the joint.
Cork tape
The cork tape serves as a kind of gasket that fills the seam between the two materials. It is used if the height of the floor coverings is the same, otherwise the joint will not look entirely aesthetically pleasing. The cork is installed together with the laminate to immediately fix the tape at the interface with the tile. Cork tape does not creak or sag, so it is often used in the design of expensive floor coverings. You can choose a cork whose top edge is treated with a protective varnish, painted or decorated with veneer.
Liquid plug
Liquid cork is a mixture consisting of cork chips and glue. Due to its well-thought-out composition, the joining point is not afraid of temperature changes and mechanical stress, therefore liquid cork is considered more preferable than cork tape. The prepared mixture is rubbed into the seam formed between the two types of flooring.
Grout
When laying tiles and laminate on the kitchen floor at the same height, with a minimum distance between the coverings, the materials can be joined joint to joint without foreign elements, using one of the types of grouting material:
- Transparent or colored sealant;
- Construction foam;
- Special paste;
- Fugue;
- Liquid plug.
On a note! To ensure high reliability, as well as long service life of the materials, the grout must have excellent adhesion to tiles and laminates.
When working with colored silicone, a polyvinyl chloride tube is placed into the joint to fill the seam, silicone mass is added on top and smoothed. The advantages of grouting include easy application and effective prevention of liquid exposure to the floor covering. The disadvantage is the low durability of silicone, which requires regular updating to maintain its original properties.
Using the Threshold
For those who do not want to bother with cork tape or liquid mixture, we have come up with special thresholds that simplify the installation process. There are several types of devices of different materials, widths, configurations:
- Aluminum threshold is considered the most reliable and stable option for the transition between tile and laminate in the kitchen. The only drawback is that it can only be used on straight joints. The aluminum threshold is made by cold-drawn blanks and looks like a mounting mushroom. It comes standard with holes for self-tapping screws, with hidden fasteners, and with self-adhesive. To disguise the aluminum threshold, it is covered with decorative film. To decorate the podium in the kitchen, a special profile is used;
- Flexible vinyl tape consists of a base and a decorative nozzle, it can be laid in any direction, therefore it is used for curved joints, joining single-level floor coverings, for making connections with different finishing heights, but not more than 0.8-0.9 cm. During installation, prepare joint, a special bridge is laid in depth, the width of which is cut to the laminate with tiles. Using dowels and plugs, the profile is fixed to the concrete base. Before using vinyl tape, it is treated in a hot liquid to soften it. A large selection of colors allows you to find a threshold for any kitchen design.
DIY installation features
Despite the apparent complexity, most of the finishing work in your home can be done on your own if desired. Laying a combined floor with your own hands is no exception. There are some installation features that you should familiarize yourself with in advance. This will allow you to avoid common mistakes and help you complete the planned amount of work efficiently.
To achieve a high-quality result, you should initially try to bring part of the floor surface, decorated with laminate, and the second part, covered with tiles, to the same level. To do this, before you start laying the tiles, you need to know exactly which laminated panels will be laid and how thick the backing will be.
If the difference is small and the tiles are thicker, the existing height difference can be compensated for using tile adhesive. Apply a layer of sufficient thickness and then lay the selected finishing material. Otherwise, you will need to fill the self-leveling unit to level the surface and compensate for the difference in height.
When starting to lay laminate flooring, you should pay special attention to the instructions provided by the manufacturer. It describes in detail the procedure and also indicates the need for compensating gaps between the wall and the floor surface to be laid. At the junction of the laminated panels and tiles, we cut off part of the backing and film, leaving about 10 cm of the base uncovered. We cut the laminated panels to size and check the quality of the joint. Remove the outermost row and put it aside.
We fix the outer row of the laminate using a plastic adhesive composition that has good adhesion to both types of flooring and has sufficient plasticity. Apply the prepared composition to the previously cleared substrate.
On the applied adhesive composition we lay the previously adjusted to size outer row. When laying laminated panels, we ensure the formation of an equal gap between the tiles and the laminate. To obtain the desired result and simplify the work, special devices are used.
After a day, after waiting for the adhesive composition to dry completely, the joint venture can be removed. As a result, a perfectly flat surface is formed between the tiles and the laminate.
We fill the gap between the tiles and the laminate with a sealing compound. It is advisable to choose a sealant whose color is close to the installed floor covering. We ensure high-quality filling of the space between layers.
We level the sealing compound and remove its excess using a special device. If desired, it can be placed at an angle and form a beautiful chamfer at the transition point of the laminate to the tile. We constantly dip a rubber spatula into the soap solution to prevent streaks from appearing on the floor surface.
This should be done as often as possible in order to get a quality result in the end.
If you decide to use a threshold to design the transition, the work will be performed slightly differently. In this case, it is not necessary to align the mating surfaces in the same plane. We invite you to watch a video that will help you get high-quality results without much effort:
The method for forming a non-standard joint is presented in the following video:
Ceramic tiles “under laminate”
For a long time, apartment owners and homeowners actively used laminate as the main flooring material. However, compared to tiles, it is much less durable and practical. What to do? Abandon many years of tradition? Manufacturers came up with a solution - they began to produce tiles stylized as laminate.
Externally, it is very difficult to distinguish - tile manufacturers are so meticulous in conveying the nuances of the texture of the popular flooring material.
It looks like a good laminate of at least class 33, but will last much longer - once again we are raising the topic of the durability of tiles as a flooring material.
You definitely won't be able to get this floor dirty. The somewhat dirty, deliberately careless texture creates a soulful and warm atmosphere in the room.
Possibility of installing heated floors
The laminate itself is warm, it is pleasant and cozy to walk on it barefoot, especially since most of the slats convey the roughness of natural wood.
But for those who like it hot, you can pre-install a heated floor system. You just need to choose a covering that shows the heated floor icon.
Method 3. Joint with cork expansion joint
The cork compensator is the most popular alternative to the threshold. They can be used to create a straight joint, and sometimes a radius one.
- Many designers prefer a cork expansion joint. And there are those who consider it as much a relic of the past as aluminum profiles.
Pros: Looks good, the joints are very neat. Pressed cork is soft and elastic, so it can provide natural expansion to laminate/parquet flooring. Due to its naturalness and plasticity, cork expansion joint is especially suitable for the joint between tiles and parquet/parquet boards/engineered boards.
Cons: higher price, not suitable for shaped joints, limited choice of shades, theoretically it could begin to crumble due to shrinkage of the house or even fly out of the seam (but, as practice shows, this is unlikely). Another significant drawback is that the elasticity of cork is not enough to compensate for the expansion of the laminate in spacious rooms (more than 25 sq. m).
Adviсe:
- When laying laminate flooring, you can buy a cork expansion joint to match it and already with varnish. If you are laying parquet/parquet boards, then you can buy a cork expansion joint without any treatment (pictured) and sand and varnish it at the same time as the parquet.
View this post on Instagram
Cork expansion joint available in natural color. Easy to paint. Used to fill joints where parquet joins. Chistopolskaya 20b, “Cork Gallery”. #CORGALLERY #parquetkazan #floors made of corkkazan #cork compensator #cork compensator #wooden parquet
Posted by Eduard Nechaev (@edouard_netchaev) Sep 25, 2022 at 3:42 PDT
- Cork expansion joints with veneer are available for sale - this is an excellent choice for wooden floors.
Installation: the compensator is glued with parquet glue. The work is carried out as follows:
- First we lay the tiles. We grind the edge, level it, and clean it from dust and dirt using a vacuum cleaner.
- We apply the compensator and, if necessary, trim it.
- We treat the edge of the laid tile with glue.
- We insert the compensator into the seam and press it firmly against the edge of the tile, for example, using a building level.
- We fill the micro-gap between the tile and the expansion joint with sealant (to match the expansion joint/floor covering), for this you can slightly bend it. Next, firmly press the compensator again. Wipe off excess sealant.
- We lay the laminate close to the compensator.
Criterias of choice
What should the choice of kitchen flooring be based on? First, think about what kind of floor you want in your kitchen. The choice of material largely depends on the personal preferences of the apartment owner. There is no need for a beautiful floor in the kitchen; its surface should be practical and pleasant to the touch - only then will your feet feel comfortable. In the photo you can see options for combining different floor coverings with the rest of the kitchen interior.
The material for finishing the floor should match the overall design of the kitchen, as well as your financial capabilities. The kitchen is a room where there is a lot of walking, spilling liquids, dropping pieces of food, and using various chemical cleaning products.
It is important to plan the costs not only for the purchase of the coating and its installation, but also for the care of the new floor
Linoleum is a budget option for the kitchen floor.
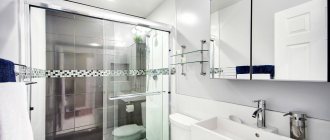
The floor in the kitchen must meet special requirements, have a high level of moisture resistance and hygiene. The photo of the types of kitchen floor finishing shows that linoleum is usually used for these purposes. The kitchen ranks second among the areas of the apartment that are exposed to water; the bathroom floor should have an even higher level of resistance to humidity.
The finishing of the kitchen floor must take into account the increased accumulation of dirt and grease stains on its surface. In photos of kitchens that have been in use for some time, it is noticeable that areas of the material near the stove are covered with a grease film. Not every housewife has the opportunity to constantly clean, so grease will inevitably accumulate on the floor, and cleaning old dirt with aggressive chemical and mechanical means can damage the surface of the floor material.
Often design projects involve laying a combined floor in the kitchen: the area surrounding the food preparation area is made of a material that is resistant to water, dirt and grease stains.
The floor covering must withstand standard mechanical stress for a kitchen, that is, be impact-resistant and wear-resistant. Broken plates and dropped pots can easily leave cracks and scratches on poor-quality material. And increased traffic in the room will lead to bald spots on the surface of the coating. Such a floor will definitely not please the owner’s eye.
The floor in the kitchen should have a durable and easy-to-clean coating.
The building materials market offers many options for covering kitchen floors, but not each of them meets all the listed requirements. Carpets and other similar decor in the kitchen will look completely out of place: they will absorb all the spilled liquid and collect most of the crumbs, dust and other small debris. Floors in the kitchen should be made taking into account the possibility of dry and wet cleaning on a regular basis. The photo shows common flooring options suitable for the kitchen: linoleum, laminate and tiles.
Color range of floor tiles
White tiles will make the kitchen more spacious and bright. It is ideal for small rooms and spacious areas. At the same time, it is not at all necessary to choose boring snow-white tiles; the shades will look much more advantageous:
- Milk;
- Cream;
- Silvery frost;
- Ivory.
In a large room, you can use a dark floor, which gives the room a special elegance. But such a coating will need to be “diluted” with light furniture or wall decoration.
The floor looks unusual:
- White and blue tones, creating a mood of freshness;
- Fashionable mint, calming nerves;
- Elegant burgundy.
Natural tones of tiles continue to be popular: brown and beige colors will bring a mood of confidence to the room.
For the south side, cool-colored tiles are perfect, while the north and west sides will get more coziness with a warm range of colors.
For modern styles, plain tiles or a subtle pattern are used. Kitchens with a rustic or ethnic design will benefit from antique patterned tiles. The classic design will be complemented by marble tiles.