Polishing
Over time, glossy tiles can lose their shine. If the damage and abrasions are minor, a tile polishing and protecting product (Sidolux Expert, Keraseal) will help you. It creates a thin polymer film on the surface that smoothes out all irregularities. After application, the tiles will be as glossy as new or even better.
You need to wear rubber gloves when working with the protective agent. It is easy to apply and absorbs quite quickly. Your actions:
- Clean the tiles and degrease them with detergent;
- Apply the liquid with a microfiber cloth;
- Once absorbed, remove any residue with a lint-free cloth;
- Repeat the process if you are not happy with the effect.
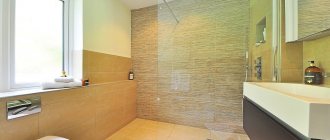
Floor tiles are most often polished, as they lose their gloss faster. But if you need to add shine to wall tiles, polishing is what you need.
Floor tiles before and after polishing.
Plastic skirting board
The main advantages of modern high-quality plastic are affordable cost, ease of installation, and attractive appearance. It can be attached over any finish: various panels, tiled cladding, painted base. To perform installation work, you need to prepare: adhesive sealant, masking adhesive tape, a ruler, and a stationery knife.
Procedure:
- Clean and thoroughly degrease the surface.
- Stepping back the width of the curb, stick paper tape to the wall and the outer part of the bathtub.
- Seal the joint with a sealant and leave until completely dry.
- Cut the skirting boards to the required sizes and attach them with the same sealing compound.
- Install plugs.
Inexpensive plastic plinth is especially convenient to use when finishing a joint is necessary. Source vodatyt.ru
Painting
This is a rather radical and labor-intensive method. But it will help completely transform the bathroom. You can choose one color for the entire tile, paint only one wall, part of it, or use several colors. It all depends on your imagination and free time.
We recommend articles:
How to paint bathroom tiles.
16 ideas: How to update a bathroom without renovation with minimal investment.
Partial painting of tiles
Mirror tiles
An interesting way to update your bathroom interior is to use small mirrors. There are ready-made mirror tiles that can be glued over existing ones. You can order several mirrors according to the size of your tiles and stick them on.
The disadvantage of mirror tiles is that they need to be glued in place of the existing one. But a small mirror can be glued on top of the old tile. This can be done within 10 minutes. Any moisture-resistant glue for mirrors is suitable for gluing, for example:
- Tytan;
- Soudal;
- Mir-O-Bond;
- Intertool.
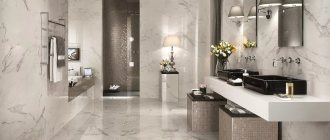
Color spectrum
It is worth moving away from standard white and blue tones when decorating sanitary facilities. They can be perfectly replaced by beige and turquoise shades. To create a warm design, it is recommended to use light brown and pink colors. They combine well with each other and create harmonious zoning of space. For small rooms it is worth choosing pastel and other light colors. For example, shades of lavender, pale green and light yellow will help make the space larger and carry out competent styling. For spacious rooms, it is permissible to use a dark blue or purple shade. The combination of black and gold will be exquisite. But it is not recommended to add silver to the black finish: the finished design will be cold and uncomfortable. The presence of decorations will help make the room original. But there shouldn’t be a lot of it, otherwise the space will be visually reduced. Installing bright lighting will help highlight some parts of the room and emphasize decorations.
Updating seams (3 options)
This method is especially good if the seams between the tiles have changed color, turned yellow or blackened. If the seams turn black, it means the grout is not of the best quality and there is mold or mildew in it. If they have turned yellow or changed color (faded, become a different shade), this is a sign of poor-quality grout.
In the first case, you will have to remove the old grout completely. You can do this in three ways:
- Manually, using a special scraper for cleaning seams or a knife with teeth;
- Use a cement and tile adhesive remover that effectively removes grout;
- Use a special tool, a seam stitcher (they come in different types and greatly simplify the work).
Various types of seam extenders.
If the grout is not moldy and you just want to update it, there is no need to remove the old one. You can simply update it - paint it. There are two options:
- Use moisture-resistant paint (acrylic, latex, oil or enamel);
- Color the seams with an acrylic marker.
Painting the joints between tiles
The third option is to apply new grout over the old one. It is suitable if the old grout is recessed into the seams and does not go flush with the surface of the tile. To do this, use plastic grout or sealant (preferably silicone or latex). There are special sanitary sealants that contain substances that prevent the appearance of mold.
Advice
If you had grout to match the tiles, choose a contrasting color. Conversely, if the seams stand out against the background of the tiles, choose grout to match the tiles. This will completely transform your bathroom.
Corner
When arranging the connection of the bathtub to the wall, you can immediately purchase a special insert - a plastic or aluminum inner corner. It is tightly attached above the main piece of plumbing, and the tiles are already laid on top of it.
The main advantages of the described method are hygiene, reliable sealing, and attractive appearance. But it is possible to install such an element only during repair work. For this you will additionally need: a stationery knife, tile adhesive, grout, tiles.
Step-by-step instruction:
- Mark and then cut the strips to the required size.
- Apply adhesive to the wall.
- Install prepared corners.
- Place the tile products into the grooves of the attached elements, then glue them.
- Lay out the remaining rows of tiles.
A day later, when the glue has completely dried, the joints should be sealed with grout.
In a finished bathroom, installing an internal corner under the tiles will no longer be possible. Source design-homes.ru
Varnish coating
A simple but effective way to update old tiles in the bathroom without renovation. Especially if the tile has lost its gloss, become matte or cloudy. You can varnish only the tiles themselves, or you can also apply varnish to the seams. It all depends on your preferences.
Ceramic tiles after varnishing. The shine is uneven because there are three layers of paint of different colors.
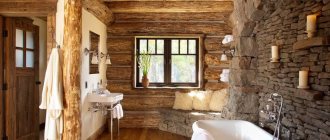
Volumetric decor
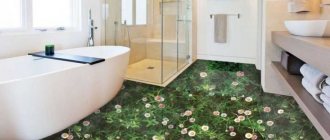
You can decorate individual tiles or entire areas yourself. Anything that is not afraid of moisture is suitable for this. Pebbles and shells are considered classics. Some tile manufacturers sell ready-made solutions - tiles made to look like natural pebbles. But it looks slightly unnatural, since the decor is repeated.
Ideally, it is better to cut the pebbles in half before gluing. This way you will save on glue, and the stones will not protrude too much from the wall. For good long-lasting fixation, use a special adhesive-putty for stone or MS-sealant (hybrid sealant). Before applying, sand the surface of the tiles with coarse sandpaper. This will improve the adhesion of the glue to the tile.
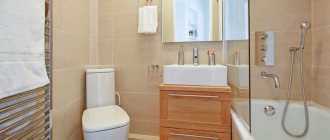
Full or partial overlap
There are plastic panels designed for installation in the bathroom. According to the connection principle, they are similar to lining and are installed on top of old tiles. Installation is simple, you can do it yourself. The only thing you need is special glue for installation.
Some cover the tiles with other materials - plasterboard, MDF, magnesite boards, etc. This is impractical, since installing guides takes away the useful volume of the bathroom. And water-repellent panels are what you need. They can cover the tiles completely, or in a certain area. If desired, you can paint the panels or decorate them.
Installation of overlay panels.
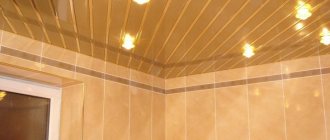
Use panels
Old tiles can also be covered with plastic panels without removal. The labor intensity option is approximately the same as painting, but it looks much better and neater. The panels will make it easy to completely change the design of the room.
To decorate the bathroom with panels, first assemble a frame of wooden slats, onto which the panels are attached one by one. The slats are fixed mainly with liquid nails.
Attention! Installation of a slatted frame will definitely “steal” at least 5-10 cm of free space on each wall. Therefore, this finishing option is recommended for use in spacious bathrooms.
Here you can read how to use panels that imitate ceramic mosaic wall decoration.
Painting through a stencil
There are special stencils for painting tiles. They are made of plastic or silicone and are reusable. With their help you can decorate any surface and tiles in the bathroom, in particular.
If you haven't found a suitable option, it doesn't matter. You can find a suitable pattern or ornament on the Internet and download it. Then:
- Print the image;
- Rub the paper with paraffin on both sides;
- Cut out the parts that will be painted.
This stencil is not very durable, but it will last for several dozen uses. It won't be difficult to make a new one. For work it is better to use acrylic, oil paint or enamel.
Applying patterns
A talented artist can imagine a wall with his canvas and depict something special there. The drawing skills of ordinary people are much more modest. Fortunately, applying a design makes using stencils much easier.
You can buy them ready-made, download the ones you like from the Internet, or make them yourself. Stencils are special sheets of cardboard or paper with holes with the outlines of figures of animals, birds, people, fruits and the like.
Using several interconnected stencils you can create a complete picture. You can make a stencil from thick cardboard, paper, or a plastic binder.
For painting, it is better to use car paint; it has strong adhesion (adhesion), and it is also not necessary to prime the surface before painting.
It is enough to clean and degrease well. Using stencils and beautiful patterns, you can create unique themed paintings, turning your bathroom into a fabulous place.
After the paint has dried, treat all patterns with a water-repellent compound.
Stickers and Stickers
This is probably the easiest way to update your bathroom tiles. There are many options in size, pattern, color. The only problem is to choose a sticker that matches the height and width of your tile. The stickers already have adhesive applied, they are made of vinyl and are not afraid of moisture.
In addition to the usual ornament or pattern, it is easy to find large format stickers. As a rule, they are glued to a flat, smooth surface, but they are also suitable for tiles. The largest assortment of such stickers is on the AliExpress website, but if you don’t want to wait for delivery, you can choose options in your city.
Let's summarize: 11 ways to update old tiles in the bathroom without renovation
- Polish the tiles with a special compound;
- Paint the tiles completely or partially;
- Glue several small mirrors the same size as the tile;
- Cover the surface with pearlescent varnish;
- Replace or paint the grout;
- Coat the tile with varnish;
- Make voluminous decor;
- Conceal the tiles with overlay plastic panels;
- Paint the tiles by hand;
- Apply an ornament or design with paint through a stencil;
- Use large or small stickers.
In the article, we tried to provide as many simple and inexpensive options as possible on how to update old tiles in a bathroom without renovation. All methods do not require large expenses or special skills. We hope the article was useful to you. Don't forget to share the post with your friends!
more
Preparation
Before the renovation procedure, prepare the walls:
- Grade. Inspect the tiled walls carefully, noting any defects identified. Select solutions. Imagine a new room design.
- Cleaning seams. The intertile surface becomes dirty and darkens over time. Clean - remove accumulated dirt, dark spots, and remove fungus. Remove the top layer of old grout.
- Removing dirt. After cleaning, greasy stains, stains and dirt remain. Wash it off naturally.
- Degreasing. Take thinner or rubbing alcohol. Treat the surface, removing invisible greasy film.
- Grinding. Its need is assessed individually. You clean off the old top layer from the surface of the tile, removing uneven spots and old stains.
- Primer. The last preparatory procedure before painting.
Act consistently, having prepared the necessary compounds and tools in advance.