The whole story was complicated by a difficult modernization, the desire to build a shower stall instead of a bathtub, and to customize the room as much as possible to suit our own understanding of amenities. It took a long time, with certain losses of funds that were originally planned to be saved, but everything worked out.
The beginning was made after evaluating the many finishing and design options that were studied on design and renovation sites. Perhaps dozens of options were discarded before they decided to get something like this... not strictly this format, but to get closer to forming an area according to this example - combining a bathroom, building a large and comfortable shower, making it beautiful and functional!
Of course, along the way, some details were even more lost, other points were completely reworked, but after reading this material you will understand that the whole process was not meaningless!
Dismantling work in the bathroom
I always wanted to have a combined bathroom, more than two separate rooms with a bath and toilet. This has both advantages and disadvantages, but it was decided that the combination was still a plus.
Fortunately, when purchasing an apartment, we paid attention to this requirement. The work was made somewhat easier by the presence of an already combined bathroom. But his condition was simply terrible. And the first thing I had to do was demolish, cut out part of the wall to move the door, from the side segment of the partition to the central one!
The reason is simple - convenience, plus the desire to get compartment doors that slide in a cassette or fit into a homemade partition. So we got to work:
- The wall was pre-marked to the standard 2000x800 mm with a paint cord, checked by level and plumb;
- After transferring the markings to the wall plane, a cut was made using a grinder with a diamond blade on concrete and 240 mm reinforcement. We started working with a small 125 angle grinder, but it gave a bad result. Therefore, we took a larger and more powerful tool from familiar craftsmen;
- The cut piece of concrete wall was carefully placed inside the bathroom!
During all the work, meetings were held with the foremen. There was also a team that intended to do the work, but the approach and the bill presented were not satisfactory. Therefore, do it all yourself, with your own hands!
First of all, before we started laying and distributing utility networks, we needed to make a decision about the plumbing cabin. In high-rise panel buildings of many series, which were built decades ago, like ours, a concrete cube was placed in the room of the future bathroom - a sanitary cubicle. Therefore, we understood that it was possible to increase the bathroom area by 60-80 mm on each side, plus remove the floor and knock down the ceiling. This work is extremely unsafe, dusty and difficult, and it requires resources and time. Therefore, they did not pursue such a small additional area, and worked only with the floor. It was necessary to remove the floor slab in order to be able to level it with a new screed, and lay a warm floor here to warm the surface and heat the room. The slab was cut and punched in the standard way - an angle grinder + a hammer drill!
Advice to all newcomers for the future - be sure to remove garbage from the premises being repaired on time. In theory, construction waste should not be placed in common trash cans in the yard. You can also get a fine. But if you do it little by little, and without accumulating the norm for Gazelle, then nothing bad will happen. We didn’t take out the trash, thinking that the concrete wall and floor from the bathroom were just a few bags. But no, enough had accumulated, and I had to take the garbage into the yard for a whole week, a couple of bags a day, and then order removal.
Finishing work
It's nice to look at photos of bathroom and toilet renovations if everything has already been done. To make your bathroom look no worse, start laying out the floor with tiles. To do this, you will need a mixer, a drill, a bucket, spatulas (regular and serrated), as well as a tile cutter and crosses. The tiles should be laid out in such a way that all cut edges are under the sink and bathtub, and then only solid tiles will be visible. Also, do not forget to use crosses and a building level. Wall tiles should be laid from the floor under the bathtub. After this, you can lay 1 row of wall tiles under the bathtub - this is required to create waterproofing. If you use small tiles, then 0.3 meters from the floor will be enough.
After this, you can grout the tiles under the bathtub and proceed directly to installation. Bring the bathtub into the room and set it strictly level, and then you can start expanding it. Now all that’s left to do is lay the wall tiles. You need to start from the bath itself, from a visible corner, and then drive it in a circle. Slats should be attached to the sides of the bathroom so that the tiles are level. When the top is finished, remove the slats and fold them down, and let the tile dry, and you can remove the crosses.
All that remains is to clean and sand the seams, and you can start working on the ceiling. This is where you decide what you plan to do with it. If there are several ways, you can plaster and paint, or make a tension/suspended structure. Each option is good in its own way, it’s up to you to choose. And the last thing is installing the door. First, install everything that you didn’t have time to do - the washing machine, sink, faucets, toilet and faucet under the bathroom, and then hang the mirror, install sockets and install the door.
This order of work will prevent you from making mistakes that could affect the quality of the work. Good luck with the renovation!
Work on laying communications
The next stage is the correct introduction of water supply, sewerage and electricity into the bathroom. Here it is worth calculating everything down to 1 millimeter, since any mistake will lead to the fact that the bathtub will not fit, the washbasin will have to be re-hung, or after the repair, a flexible connection will be added to install the mixer at the desired point.
We did not cope with this task the first time. They drew, erased, measured again. It took about 3-4 days until I was 100% confident in the accuracy of all the markings.
After that, we started gating - cutting grooves in the concrete for laying pipes and electricity cables.
The cutting was done roughly, not very smoothly, but free of charge!
The advice that we followed without fail was high dimensional accuracy, plus additional expansion of the grooves and their elongation according to the requirements of working with a certain material. Hot water and heating pipes are subject to linear expansion due to temperature changes, so it is impossible to do everything one to one. It is necessary to widen the grooves by 3-5 mm, lengthen them by 15-20 mm.
A very important topic is not to forget about the size of the couplings. In our case, polypropylene pipes with couplings that are installed at transitions and corners. They are somewhat wider, as they are put on and soldered over the pipe. Therefore, immediately take measurements correctly so that you don’t have to cut the concrete again!
- Replacement of risers. We decided to change the risers, because in the future this is a certain guarantee of trouble-free operation, simple repairs in case of problems, as well as the opportunity to additionally cut in and add a pipe. But they didn’t install risers in the bathroom, they simply crashed into the neighbors below (above the technical floor... an apartment on the 9th floor of a nine-story building), and two taps were brought out for further distribution. Also, the heated towel rail was removed and hot water was thrown across the floor to the neighbors downstairs.
- Soldering pipes. The first time, nothing good happened, and this can be seen in the photographs. They soldered and soldered... and did everything wrong - bevel at the seams, intersection of pipes, several lines in one groove, confusion in the direction.
Therefore, we started again according to the scheme that professional plumbers helped to draw up. They suggested that the pipe should not be led to the right, left, bent, or crossed with another. There are corner couplings for everything, with which everything turned out to be simpler, more practical, better quality and more beautiful.
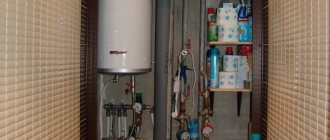
For the correct input and installation of wiring for emergency taps, installation of filters and pressure regulators on the water supply system, this unit was placed in a niche in the kitchen.
Recommendation from my own experience: do not skimp on high-quality fittings, shut-off valves, and mounting strips. They make the work much easier and improve the quality of the result. The photo shows the usual mounting strip for the outlet under the mixer, which many craftsmen save on.
Down with everything old!
Plumbing. So, the first step is to take out all the old plumbing, namely the sink, bathtub, toilet - in general, everything that lies, hangs and stands. After this, you can proceed to the next step - using a grinder, cut off the old pipes to the tap, which is located on the riser. Using a hammer drill it will be easier to knock off the old tile covering, and it is important: if the plaster that is under the tile comes away from the wall, it should also be beaten off.
Now the door . Surely during a major renovation you will change everything, including the doors. Remove the old sample along with the door frame. Sewage is also important, so you should pay attention to the sewer and water riser. Such parts should be replaced during repairs in any case, since low-quality pipes can ruin expensive repairs. In addition, after the completion of the repair work, changing the risers will be problematic.
If you are not a specialist in plumbing work, then in order to replace the risers, you should invite a good, highly qualified craftsman, and anyone can do the internal plumbing without outside help.
Don't forget about the hood . If you don't want your bathroom to feel stuffy, you should check how well the ventilation system works. To do this, bring a burning candle to the hood and evaluate its performance by the movement of the flame - the better the exhaust system functions, the stronger the flame will be sucked into the chimney. If the hood does not work properly, it should be cleaned additionally, or a fan can be installed.
Fan ventilation from sewer pipes
This terminology is incomprehensible to many, just as it was to us at the stage of sewer installation. The fact is that in the bathroom, since it is a combined bathroom, there were two sewer risers: the first was a toilet, the second was a washbasin and a bathtub. We installed drains into the same risers, but we almost missed a very important point - the installation of vent ventilation. This element, a piece of a thinner pipe for air from the main sewer riser, is a connection with the atmosphere, in our case, the technical floor, where similar pipes protrude from each sewer riser. The installation of a drain pipe is necessary to eliminate vacuum in the system, prevent water hammer, as well as suction of water seals from washbasin and shower siphons. Otherwise, the water will leave, and all the odors that rise up through the pipes will noticeably spoil the internal microclimate of this room, and subsequently, the entire apartment.
Fan ventilation was installed and brought to the technical floor, where special caps were placed on the pipe sections to prevent debris and various objects from falling down.
Similarities in style
The most correct answer to the question of how to arrange a small bathroom without creating visual clutter is to purchase products that are identical in appearance. The corresponding similarity lies primarily in the color palette.
Moreover, items made in the same style can come in pairs or threes:
- Wooden doors, windows and washbasin;
- Stone sink and window sill;
- Acrylic toilet and bathtub;
- Silver washing machine and heated towel rail.
If the corresponding products affect the form and functionality of the thematic space, then the background and accessories are mainly responsible for its diversity and idleness.
Bathroom floor
Many nuances were concentrated on this plane, since they removed the sanitary slab and decided to pour a screed, install a film heated floor, build a shower partition, and install a drain with a water seal to drain water from the shower. There are many problems - leveling, waterproofing, thermal insulation, installation of infrared floor film. But all issues were resolved as they were received, and often some stages overlapped with others!
Preparing and leveling the floor:
- Preparation of concrete without a concrete mixer, on the concrete floor of the corridor by conventional mixing with a shovel;
- Installation of beacons. We froze it onto drywall glue – a universal material for quick work. Setting within an hour and a half;
- Pouring concrete and leveling the screed along the beacons. The primary screed is about 35 mm thick, reinforced with steel mesh!
Laying heated floors:
- Rolling out and fixing the insulating film on the floor;
- Installation of a temperature sensor;
- Connecting and checking the heated floor via a thermostat;
- High-quality insulation of all connections and ends with bitumen tape!
The main question is shower or bath
When planning a design, you can use non-standard solutions. In spacious rooms you can install both types of equipment for hygiene procedures.
Using one color will create the impression of cohesion
The choice is determined by preference. The indisputable advantage of a bath is its relaxing effect and low cost. The downside is water consumption, splashes on the floor.
The main advantage of a shower cabin is saving space, water, time, and the presence of modern devices - hydromassage, thermostat, filter, pressure compensator. The disadvantage is the price.
The main thing is that it turns out cozy
It is more profitable and convenient to place it along the wall opposite the entrance.
Installing a threshold for forming a shower tray
With the start of construction of the shower partition, which we will return to a little later, a threshold was laid, which is necessary to limit the flow of water into the common room from the shower. To do this, reinforcement was installed in the first rows of bricks from which they decided to assemble the shower partition, as well as in the wall opposite, around which formwork was made from a steel profile for plasterboard, and filled with a cement mixture!
Pouring additional screed onto a heated floor:
- Preparation and pouring of the solution, leveling;
- Surface waterproofing. Mixing the dry waterproofing mixture Ceresit CR 65 with water;
- Plastering the floor and walls to a height of about 250-300 mm around the perimeter in 2 layers, crosswise!
We tried waterproofing with liquid glass, while mixing it into the screed solution. The resulting mixture is minimally suitable for work and quite complex. Therefore, it was decided to carry out plaster waterproofing, especially since the mixture, according to the instructions of sales consultants, is compatible with low-temperature heated floors!
Construction of a shower partition
There were many options - plasterboard on a galvanized steel frame, glass blocks, foam blocks, and other materials. But all of them were discarded due to cost, inconvenience in operation, and inadequacy for wet areas. But the brick was perfect for this. Small thickness, excellent operating speed, low cost, good strength indicators. In addition, the ceramic trim tiles were installed very simply on the brick partition!
How to decorate walls and ceilings
Traditional ceramic tiles, mosaics, washable wallpaper on the walls in a fashionable design can be replaced with the original:
- porcelain stoneware with low water absorption;
- cork lining, resistant to mold and chemical attack;
- plastic panels that are easy to maintain;
- agglomerate with a high level of moisture resistance;
- wooden paneling impregnated with special compounds.
We use non-standard solutions
Matte porcelain stoneware slabs are highly wear-resistant, while polished ones are more susceptible to scratches.
Fashionable animal design
Fashionable multi-level ceiling surfaces in a small room look bulky and archaic. The simplest option for finishing the ceiling surface, but not the best, is painting. More practical decor:
- plastic panels;
- drywall;
- slats.
Minimalism is always in trend
These materials are moisture resistant. This is the main thing. Wear resistance for ceiling cladding is a secondary parameter, because there is no mechanical impact on it. At the same time, they do not interfere with the proper lighting of the room.
Classic design technique
Bathroom wall decoration
Combined wall decoration - ceramic tiles and wallpaper. It took us a long time to make decisions about wallpaper, as there were a lot of doubts about it in a damp room. But we decided to try it because it saved time and money!
Plastering walls to level them. Working with two types of Knauf dry mixtures - starting at the beacons, and then finishing on the section of the plane where wallpapering was meant.
Installation of a shower drain
A shower drain in the shower stall is necessary to drain the water. It is selected based on beauty, price, and throughput. But there are also drains on the market with dry and wet seals, or combined ones. We chose a combined one because it is more practical and will definitely not allow unpleasant sewage odors from the riser into the room.
We worked with Viega products, made in Germany. High quality, but also an impressive price, about 4 times more expensive than domestic samples!
The shower drain was installed at the stage of pouring the primary and main screed:
- Installation of a tee on a sewer riser;
- Installing a drain pipe into it, as well as connecting the adjusting pipe of the shower drain;
- Installation of the base of the shower drain;
- Pouring concrete and adjusting the level of the ladder location;
- Pouring leveling screed and producing waterproofing;
- Laying tiles on the floor;
- Installation of decorative elements of the ladder!
Where to go to make a quality design project
Before you start choosing plumbing, furniture and decoration for your new space, it is important to have an overall picture of what we are aiming for. They can help you with a design project in a design studio or furniture showroom where you are a customer.
And although there is not a lot of work here, given the small area of the room, you still need to take into account all the rules for arranging plumbing fixtures and furniture so that it not only looks harmonious, but also complies with established standards.
It can be difficult to cope with this task at the proper level on your own if you do not have basic knowledge. In addition, the project still needs to be visualized; often a drawing on paper is not enough to represent the entire situation.
Completion of the shower partition
- An aluminum profile for glass fastening was installed on the finished base of the partition;
- We installed the same U-shaped profile on the wall - marking, partial fastening, coating with sealant, pressing it to the wall. The installation was carried out precisely along the border of the wallpaper and ceramic tiles on the wall;
- Installation of the seal in the profile;
- Installation of a mounting fixing chrome-plated steel pipe above the glass, between the walls of the bathroom;
- Installation of glass with fastening to a profile with a seal, as well as to a pipe using special holders!
They wanted frosted glass for the shower cabin. To do this, it was possible to sandblast it, apply a drawing, graphics, relief. But again, due to many mistakes and changes in decisions, the budget dropped significantly, and we ordered 10 mm tempered glass with a frosted film on the side opposite the shower space. Here, too, there was the possibility of problems - the film on the glass often comes off in a humid environment. But after a couple of years of use, everything is strictly in place!
Plumbing options
You can take a sink, bathtub, oval or rectangular bidet. They are compactly installed along the walls without cluttering up the space.
Rich design using mosaics
You can install an oval-shaped console sink with sufficient depth so that splashes do not fall on the floor. It can be connected to the wall with brackets. This design is airy. In addition, it allows you to install a washing machine underneath.
We arrange it practically
An alternative option is a tulip sink, which perfectly masks areas of water pipes. A popular design is a sink on a cabinet, in which it is convenient to store a variety of cleaning and hygiene products.
Cheer up with bright tiles
Any type of plumbing fixture copes well with its functions and provides the room with the necessary balance if installed in the right place.
Cozy shades for different styles
The sink should be installed in the opposite corner from the shower stall to balance the interior. You can install a washing machine nearby to leave the middle free.
Doors to the bathroom
A preliminary solution is to cut off a piece of the curtain wall and seal the former doorway with a partition to place a compartment door inside. The thickness of the wall did not allow the installation of standard doors, and custom cassette doors were very expensive. Options were even considered on exhibition sites. We couldn't find anything that was the right size or price. Then we did it simpler - we ordered doors like for a sliding wardrobe, glass in a light aluminum profile!
- The partition in the former doorway was built along the boundaries of the wall thickness from a steel profile and plasterboard;
- Sewn and puttied;
- Wallpapered from the inside and finished with decorative brick-like plaster on the corridor side;
- The compartment doors are installed inside before the internal lining and finishing are installed, since the work is delicate and required accuracy of up to 1 mm;
- Mounting the door on a system screwed to the top of the doorway, as well as to the floor - runners for running the wheels of the sliding door!
Bathroom interior: interior
The main mistake in interior design was made at the very beginning - purchasing furniture for the bathroom. In one of the salons we saw a glass washbasin, which in the subconscious immediately “stood up cool” in the middle of the bathroom. Without even thinking about the choice of tiles and wallpaper, colors, patterns and other visual aspects, we bought a decorative washbasin. Photos from the salon:
I considered this decision a mistake, and will continue to consider it for one simple reason - now we were not doing renovations and decoration in the bathroom, which was more beautiful, cheaper and more practical... but renovations in the bathroom around this washbasin. Everything depended on its size, color, design. But, although buying it caused a lot of problems, today it occupies the center of the bathroom and looks very good there!
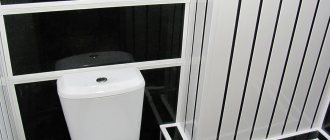
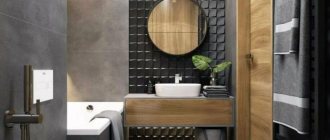
A black toilet was also purchased for the washbasin - original plumbing fixtures with their own advantages and disadvantages:
- The advantages include ease of use, interesting appearance and shape, quality of production;
- The downside is the black color itself. Dust on the lid of the tank is visible every day, although the house is cleaned 2-3 times a week. The streaks of water that continue to flow from the ceramic body for another minute or two when draining are very noticeable - limescale deposits, which are quite difficult to deal with!
In addition to the washbasin and toilet, it was necessary to provide a shower stall with amenities:
- Expensive antique gold faucet (like the washbasin faucet);
- Set of shelves and rails in color;
- A hanger for a shower head straight from China (I had to order it because the mixer, although expensive, did not come with a hanger for the shower head)!
At the moment, the bathroom remains in almost new condition, although it has been actively used for more than two years. As follows:
DIY bathroom renovation from scratch! Long, painful, with making non-standard decisions, but with proof to yourself and others that even such a complex idea can be realized!
Deciding on the choice of plumbing fixtures
Plumbing is the most important component of any bathroom interior in an apartment. And a lot depends on its quality and convenience, so to purchase it you need not to skimp on funds. After all, why do you need a toilet whose tank will constantly break or the button will stick?
Or cranes that, after six months of service, will tell you, even in French, “au revoir et je suis désolé” (“farewell and farewell”). After all, it is important to pay attention not only to the country of manufacture, but also to the company, its reputation, and reviews. You should not rush to the first German shower or French toilet, it can be expensive.
Interesting points and additional recommendations
I would like to add a lot of things, but all my own tips, as well as some interesting points, should be placed in an additional list. I hope this section of the article will be useful and interesting:
- You must have a work plan, with calculations for materials, their quantity, prices, mandatory diagrams, sketches, indicative photographs or renderings;
- Dismantling work is carried out strictly with an understanding of the process. It is important not to touch load-bearing walls, to work with partitions after preliminary calculations, to remove and dispose of the resulting construction waste in a timely manner;
- Find out about the requirements for the sequence of work depending on the premises. For example, dismantling work is immediately carried out, then preparatory and rough work, installation of communications, finishing preparation, repair of walls, ceilings, floors, installation and connection of plumbing;
- It is important to follow not only the instructions of professionals, but also common sense. Perhaps the individual characteristics of the room will not make it possible to adhere to the list of tips or the classic established algorithm;
- Try not to deviate from the initial work plan!
Plus, I would like to say a few interesting and necessary things about bathroom renovations:
- Ventilation is something that is extremely necessary here. Mold, mildew, condensation on the walls - all this will not be scary if you ventilate a small damp room in a timely manner and use an installed hood;
- Experts do not recommend installing switches and sockets inside the bathroom. But if this is absolutely necessary, for example, for subsequent connection of a washing machine or for the possibility of turning on a hair dryer, all electrical appliances are selected strictly according to the safety class for use in wet rooms. Average standard – IP 54;
- Wallpaper in the bathroom is not a problem. Proven by this repair, as well as several other similar projects completed by us... and hundreds of similar solutions from other craftsmen. The main thing is not to glue wallpaper on the working walls near the bathtub or in the shower itself, choose vinyl or non-woven wallpaper, and use recommendations for ventilation and ventilation of the room;
- As for building a shower cabin with your own hands, this is an interesting experience. In addition, the advantages relate to the price tag, which is much lower, and the convenience of the shower space itself. The shower cabin described in the article is quite large in size - 850x1500 mm!
TOP 15 tips for design
1Rectangular tiles on walls with a low ceiling will visually “stretch” the room.
2A beautiful pattern or ornament at eye level will visually expand the space.
3With the help of glass and mirror surfaces, the room visually becomes more spacious.
4 Frosted glass doors increase the space and let more light into the room.
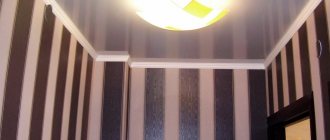
5To raise the ceiling, vertical stripes or patterns are applied to the walls.
6One vertical matte tile not only zones the space, but also adds originality and charm to the atmosphere.
7A lot of space is freed up when installing a sit-down or corner bathtub.
8Sliding doors allow you to save space.
9Pastel shades of decorative tiles add volume to the room.
10You can install pull-out cabinets on wheels under the bathroom.
11It is better to avoid complex patterns in the decor, because pretentious details visually reduce the size of the room.
12Mosaic makes the design more voluminous.
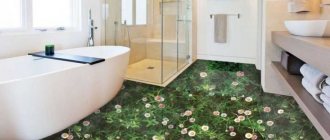
13Wall decoration and bright accents in the form of floor tiles can play a decorative role.
14Moving all the shelves higher to the ceiling is an excellent option for the functionality and convenience of a narrow bathroom.
15Mirrored racks and shelves visually expand the walls of the room.
