A shower stall is an excellent replacement for a traditional bathtub, allowing you to save space in the room and increase the comfort of showering. You can buy it ready for assembly and with a bowl. But recently, a shower tray made of tiles is often chosen. The tiled base looks impressive and lasts longer than structures made from most other materials. But before choosing a pallet, you should get acquainted with the advantages and features of its design.
Tile shower tray Source ytimg.com
Types and features of pallets
The main purpose of the design at the bottom of the shower stall is to protect against water getting onto the bathroom floor. Among the standard options are the following types of pallets:
- acrylic - inexpensive and lightweight, but scratchy and quickly turn yellow;
- steel structures are durable, affordable, but noisy and slippery, and sometimes even covered with rust;
- ceramic or made from natural stone - durable and beautiful, but heavy, expensive and practically impossible to repair.
Metal shower tray Source gidroguru.com
Ready-made kits are chosen for their high level of tightness, short installation time, and minimum “wet” work. But a homemade shower cabin without a tray is becoming increasingly popular. The reasons for choosing a tiled floor over an acrylic, ceramic or metal structure are the many advantages of the latter option.
Bathroom with shower - photos of real interiors
Installing a shower cabin instead of a massive bathtub significantly expands the possibilities for arranging a bathroom. You can see this clearly with our selection of photographs!
Advantages of tiles
Shower stalls with tiled floors provide homeowners with the following options:
- creating pallets of any size and shape - large and compact, square, rectangular and corner;
- reducing costs and saving time on installation;
- choosing tiles in accordance with other details of the bathroom interior - including tiles on the walls;
- increasing the service life of the structure, the strength of which is higher than that of acrylic and ceramic sanitary ware;
- changing the height of the shower fence in accordance with the preferences of homeowners - or eliminating the sides;
Tile tray without threshold Source stroypomochnik.ru
- manufacturing not only a tray, but also a shower cabin from tiles, characterized by the same durability and aesthetics;
- easy maintenance - ceramics are easy to clean using ordinary household chemicals.
One of the disadvantages is that it is very labor intensive. When taking into account the time required to complete the work, it is worth taking into account several tens of hours for the drying of first the screed, and then the glue on which the tile is installed. And when installing a shower tray, you should take a responsible approach to the choice of materials, the quality of which determines the service life and ease of use of the shower stall.
Design of a small bathroom with shower
For small bathrooms, shower cabins are a real find, especially corner ones. Massive closed structures with all four walls are not suitable because they take up too much space. But partitions that are adjacent directly to the wall will be just right.
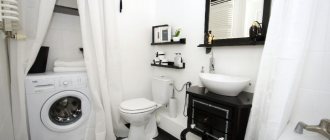
Some of the shelves and hooks for bath accessories can be moved inside the shower room. This means saving space outside so that the small bath is less cluttered. Hide household chemicals in a cabinet behind the installation, and install the sink on a cabinet or combine it with a washing machine.
Design of a narrow bathroom: 65 photos of beautiful solutions
Dimensions and shape
Tile pallets can have almost any shape - in the form of a circle, oval, square, rectangle, sector or complex figure. The length and width of the structure are usually selected according to the size of the bathroom and start from 70 cm. When choosing, you can focus on a ready-made booth - or vice versa, buy or order plumbing fixtures that are suitable for a tiled tray.
One of the popular options for a small bathroom is a corner shape and large tiles. The tiles are selected in the same color scheme as those used for finishing the walls and floors. The color of the pallet makes the interior of the room more harmonious, and the design allows you to save space.
Corner design with tile trim Source ligastroygroup.ru
The depth of the pan can be small - only sufficient to drain liquid with a slope of 0.03-0.05. If there is a side around it, the design performs almost the same functions as a shallow bathtub. The pallet is laid out with small tiles (mosaics), and the walls with large tiles, preferably made in a similar color scheme. The same material can be used to decorate shower partitions.
Rules for successful planning
Bathroom interior 3 sq. m. must be carefully thought out. What design rules should you use when planning it:
- Designers do not recommend using a wide range of colors for bathroom decoration and accessories. The basis should be 1-2 colors that complement each other. Light pastel colors will help visually expand a small bathroom. Dark, rich shades will reduce the space, placing emphasis on its small area.
- The entrance door should not open into the room. The swing design can be replaced with a sliding one. Such a door will not take up space either inside the room or in the corridor.
- A small room should be well lit.
In order to provide sufficient light in the bathroom, designers advise using spotlights.
- Neat, not bulky shelves for storing necessary small items are placed above the bathtub or above the sink.
The main rule when drawing up the layout of a 3 sq. m bathroom. m. is to ensure that every meter is used profitably.
Pallet design
Before you make a shower without a tray with a drain in the floor, you should decide on the appearance of its base. The easiest way is to plaster and prime the surface, painting it with moisture-resistant paint. But the best option would still be a tile shower tray. The choice of tiles is so large that you can choose it to suit any interior - or, if the walls are also decorated with ceramics, you can decorate the floor of the booth in a similar style.
Different types of shower tray designs Source gidpoplitke.ru
The tiles can be matte or glossy, plain or patterned. Design with a combination of different colors is allowed. Mosaic could be an interesting option - especially if it is already present in the decoration of other interior elements. Small details allow you to lay out a complex-shaped pallet - round, oval or in the form of a sector.
Tile shower design
To create a bright, attractive and stylish shower room, you can use several ideas, including:
- The combination of tiles and mosaics is a classic solution that allows you to create a thoughtful and complete look for a space.
- With imitation of natural wood - an attractive and cozy option in which the surface captivates with its beauty, but at the same time retains the advantages of ceramic tiles.
- With imitation of natural stone - thanks to special technologies, manufacturers produce slabs that imitate the irregularities, cracks and overflows characteristic of stone.
- Concrete is a modern and aesthetically attractive solution, which is most often used by owners of loft or high-tech apartments.
- Fish scales visually enlarge the space, making it more voluminous.
- Tiles with a pattern allow you to bring any idea to life, because the image may contain what the homeowner wants.
Other Features
When choosing a shower without a tray with a tiled base, you should pay attention to the degree of wear resistance of the materials. It determines how long such a tile will last and what it will look like some time after use. Therefore, even in a shower in a country house, for which a small budget is usually allocated, it is not recommended to skimp on finishing. The cost of tiles will be recouped due to the increased service life. Water absorption of tiles for the cabin should be minimal - class BI or BII (up to 3% or 3-6% of weight gain due to water absorption, respectively).
The “warm floor” system allows you to increase the comfort of using the shower. When choosing this option, pay special attention to safety. For heating, you should choose not a water floor, but a cable floor with good insulation and a protective screen. The moisture resistance class of the heating element must be at least IP44. The system controls are placed outside the room to avoid the influence of water and humid air.
“Warm” floors under the base of a tile shower stall Source moydomik.net
See also: Construction companies that specialize in heating, water supply, sewerage and gasification
Which tile is best for a shower stall?
Ceramic tiles are simply the ideal facing material for a shower. Depending on the surface, it can be:
- glossy;
- matte;
- embossed;
- rough.
Options with a glossy finish will look great on the walls. They shine very effectively and shimmer in the light. Tile with various relief designs (depicting animals, flowers, butterflies, fish, birds, etc.) can be an excellent decoration for walls. The drawings can be either small or in the form of large bright panels consisting of several elements.
The tiles create a fairly aesthetic and elegant design, both in a city apartment and in a country house.
You can opt for a mosaic. It is very often used in combination with regular tiles. Using mosaics, they lay out unusual colorful panels or bright floral patterns that will help turn an ordinary shower into a unique masterpiece.
To cover the pallet, it is better to use tiles with a matte and rough surface. It will help prevent slipping on wet floors.
The choice of colors, prints and textures is purely a matter of personal taste.
When purchasing tiles, special attention should be paid to moisture absorption and wear resistance. It’s better not to save money and choose high wear resistance. Another very important addition: it is better to cover the shower tray with tiles with the least moisture absorption. All information about the product is indicated on the packaging.
The finishing must not only be beautiful, but also meet certain requirements.
Stages of work
If you have a concrete covering, which is usually found in modern apartment buildings, or a ready-made concrete screed, the work is simplified. In this case, you can immediately erect the sides of the pallet and waterproof the previously cleaned surface. But, if the base is uneven or wooden, you should screed before making a shower stall.
Preparatory work
A rough screed is often made using a regular mortar made from M400 cement and mixed with sand in a 2:1 ratio. You can immediately buy a ready-made building mixture such as M200 or M150, which will take several times less time to dry.
The process looks like this:
- A diversion is made for drainage into the sewerage system. It is recommended to complete the work in advance to avoid crumbling the concrete due to installation errors.
- The formwork is placed in the form of a pallet. When marking, take into account the height of the side, the width of the brick, the thickness of the tile and the adhesive. You can do without formwork if the screed is poured for the entire bathroom (for example, when installing a “warm floor” or major renovation).
- When the base height is up to 70 mm, the structure is reinforced using a metal mesh installed at a height of 30 mm above the floor level. If the height is more than 100 mm, it is not necessary to strengthen the structure.
Reinforcement of the shower tray screed Source userapi.com
- The solution is mixed using a drill with a special attachment. To reduce the weight of the structure, it is worth diluting the screed with expanded clay.
- Marks are placed on the walls of the formwork according to the height of the screed.
- The solution is poured and leveled using a rule or trowel.
The main part of the work on preparing the floor for installation of the pallet takes no more than one working day. It will take a few more days for the screed to dry. You can proceed to the next stage of work only after the solution has completely hardened.
Waterproofing and drain installation
To waterproof a shower cabin without a tray, two types of materials are usually used - polyethylene film and roofing felt. Bitumen or special fill is used less often. All options provide fairly effective protection, so you can choose any one.
. Waterproofing of rough screed Source izoler.ru
The process of installing a ladder requires the following steps:
- Drain installation . The drain funnel should be located high enough to ensure a pipe slope of 0.03 to 0.05.
- Insulation of the base for the pallet . The recommended option is rigid polystyrene foam, laid on top of the rough screed along the perimeter of the side.
- Assembly and installation of the ladder . When using insulation, the drainage device can be immersed in polystyrene foam.
- Adjusting the edges of the ladder funnel according to the level and securing it to the alabaster to avoid accidental movement in the future.
Leveling the ladder Source ytimg.com
The ladder should be assembled carefully, without making mistakes. After completing the installation of a floor shower drain without a tray, the problem can only be solved by disassembling the entire structure. A damaged drain device usually has to be replaced with a new one.
Creating sides
Tiled shower thresholds, which protect bathroom floors from flooding and limit heat and waterproofing, are made immediately after installing the screed and drain. Before installation, it is worth determining the height above the top of the pallet. For one brick it will be approximately 5 cm - taking into account the immersion of 8 cm, the thickness of the glue, mortar and tiles. The threshold can be increased by adding a new layer of the desired height. These can be whole bricks or parts cut with a grinder.
Brick thresholds for shower tray Source stroy-okey.ru
Reasons when a bath is not needed
There are a number of other life circumstances in which there is no need for such an item as a bathtub in the room:
- In any capital of Europe there is such a problem in a small apartment with a cramped bathroom. The old foundation is often equipped with an elongated narrow room for toileting. In this case, placing a standard bathtub causes a lot of trouble, so the issue of a shower room is resolved by itself;
- With a fast-paced lifestyle, there is usually not enough time or energy for long water procedures, either in the morning or in the evening. That is why for many businessmen, design without a bathroom in a city is a business approach to solving such a problem;
- Families where babies have just entered life cannot live without a bath, at least a sitz bath. But when they reach the age of secondary school, the decision to convert the room into a shower room and place the necessary equipment becomes more rational;
- As people age, it becomes more difficult for them to get in and out of the bathtub. That is why, having secured their consent, you can get busy with a major overhaul of the plumbing unit with the organization of a comfortable shower compartment with a bench and a non-slip mat;
- Water bills are significantly lower than with a full bath;
- Ancient wooden houses are a certain risk area due to old wooden floors that may not withstand the weight of a filled bath;
- The presence of two bathrooms makes a bath in one of them completely unnecessary.
Video description
Watch the video on how to make a shower tray in a bathroom from tiles:
To increase the accuracy of constructing the side, it is worth making preliminary markings by drawing vertical and horizontal lines on the floor and walls. Bricks must be moisture resistant - for example, M-125. For installation, a mixture of water, cement and sand with a ratio of 1 to 1 to 3 is used; a special mesh is needed to reinforce the structure.
When constructing a reinforced concrete threshold in a shower room without a tray, it is advisable to follow these recommendations:
- it is worthwhile to provide for the installation of the side at the stage of pouring the rough screed - the formwork for the mortar is immediately made high so that it can also be used for the threshold;
- a round-shaped reinforced concrete threshold increases the safety of using the booth, makes it more compact and more aesthetically pleasing;
Semicircular reinforced concrete side Source sovety-vannoy.ru
- Along the perimeter of the sides it is worth laying 4-5 pieces of reinforcement with a cross-section of 10 square meters. mm, which will act as stiffening ribs - it is recommended to immediately cut them below the side;
- after the screed has hardened, new rods with a cross-section of 8 square meters are attached to the already installed reinforcement with knitting wire. mm, curved around the circumference;
- The formwork material for a reinforced concrete threshold can be fiberboard, which bends well, and when reinforced with spacers (corners made of bars), it is no less durable than boards.
After installing the formwork and pouring the cement-sand mixture, you will have to wait for it to completely harden for at least 2 days. After this, you can proceed to the installation of the top layer - the screed on which the tiles will be glued.
Filling the screed
When installing a shower from tiles, it is worth considering that the funnel of the drainage device should be higher than the tray by the thickness of the layer of glue and tiles. The result of leaving such a reserve is that the top of the drain coincides with the floor of the shower stall. The top of the drain grate may be slightly lower than the tiles after finishing the pallet, but it will still rise above the screed.
Finishing screed Source izhevsk.ru
Markings on the sides will help to fill the solution correctly, ensuring the required slope. The beacons along which the finishing screed will be aligned should tilt towards the drain. No formwork is required - its role is played by the already installed sides of the pallet. The average drying time, depending on the chosen material, is from 2 to 3-4 days.
Re-waterproofing
The hardened finishing screed should be re-waterproofed and leveled. To do this you need to do the following:
- Treat the surface of the screed with a waterproofing compound - a polymer-cement composition, bitumen-rubber or bitumen-polymer mastic.
- Lubricate the inside of the thresholds with the same waterproofing material.
- Wait for the coating insulation to dry.
- Apply self-leveling mixture to the dry surface.
- Round off the drainage area by increasing the flow rate of water.
Re-waterproofing a tile shower stall with a floor drain will increase the time it takes to complete the job. But due to its design, the risk of leaks is reduced - an important advantage for bathrooms that are not on the ground floor. Properly performed waterproofing allows you to avoid the accumulation of moisture, which causes fungus and mold to appear in the bathroom.
Where to place the washing machine?
Let's look at the options for placing equipment:
- Place the machine under the countertop next to the sink. Saving space and good access to water pipes make this option a universal solution that can be implemented in a room with a shower. Small shelves and drawers for small items are placed above the washing machine.
- If there is no cabinet under the sink, you can place a washing machine there. To ensure that the open door of the machine does not interfere with washing, the equipment can be moved to the right or left.
- Near the shower stall.
- Provided that in a small bathroom it was possible to place the machine in a special niche, then its height should be used to the maximum. You can hang a cabinet above the appliances to store body care products and household chemicals.
In a 3 sq. m bathroom there are few options for placing a washing machine. Especially if the owner of the room preferred a massive cast iron bathtub, which occupies half the space.
Video description
In this video you will see how to make a drainage channel for a pallet:
The adhesive can be applied to the inner surface of the tile or to the pallet. The first method allows you to reduce the number of possible errors, the second increases productivity. There should be enough glue so that there is no empty space left under the tile.
Many designers choose mosaic for finishing cheap pallets, which improves the decorative properties of the booth and is quite simple to install due to its increased flexibility. The standard size of elements is 5x5 cm, sheets are 30x30 cm. Installation is almost no different from finishing with ordinary tiles, however, glue is applied only to the surface of the material, and not to the pallet. After installing the mosaic, smooth it out, leveling it in one plane, and after 24-48 hours, grout the joints.
Shower tray finished with mosaic tiles Source remontspravka.com
Final stage
The shower enclosure is installed after all work is completed and the finish has completely hardened. This process can be accelerated by ensuring the room temperature is 25-30 degrees, effective ventilation and acceptable humidity (about 60%). Bathroom doors must remain open throughout the drying period.
If these conditions are met, the fence can be installed just 2 days after installing the pallet. The cabin frame can be assembled from metal profiles and moisture-resistant plywood, and finished with tiles or mosaics. The last step is the installation of swing doors, instead of which it is possible to install a plastic screen or curtain.
Shower, completely decorated with tiles Source stroyka-ug.ru
Interior on an area of 4 sq. m
When arranging a small bathroom, high-quality plumbing fixtures and furniture are required. The photos of the best interior designs reflect the simplicity of forms, clarity of lines, and play of details. Styles appropriate for small spaces are minimalism, retro.
White and blue bathroom without toilet
Antique style bathroom without toilet
Modern beige and brown bathroom without toilet
The main task in planning a small bathroom is to visually enlarge the room and create areas for storing things (except for installing the necessary plumbing without a toilet).
Modern brown and white bathroom without toilet
Bathroom without toilet with cabinet
Spot lighting in a white bathroom without a toilet
Some deceptive techniques affect perception, visually increasing the space:
- placing mirrors opposite, for example, on the wall and cabinet;
- installation of different light sources;
- diagonal laying of tiles on the floor.
Bright bathroom without toilet
Bathroom without toilet in the house
Beige bathroom without toilet
With corner furniture it is easier to rationally arrange a bathroom. Glass shelves will fit original into any interior. The niche under the bathroom can be used as a drawer for storing household items. Washing machines are placed under the sink.
Plain glossy facades look beautiful and emphasize the style of the entire room
Small bathroom plan without toilet
Mint white bathroom without toilet
