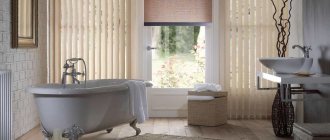
The question of what the ceiling will look like after renovating the bathroom is one of the mandatory questions. The availability of a variety of building materials paradoxically makes it difficult to choose the right material. In order for the bathroom ceiling design to be stylish and of high quality, you will need to carefully study the properties of the candidates for finishing.
Original color scheme Source stretch-ceiling.ru
Material requirements
Modern bathrooms rarely have a well-thought-out ventilation system and are of sufficient size. The ceiling covering is exposed to increased exposure to warm, humid air, which shortens its service life. The material to be used is suitable for a bathroom if it meets the following requirements:
- Resistance to changes in humidity and temperature, condensation and splashes are the main qualities of the future ceiling.
With photo printing Source design-homes.ru
- Adequate cost. It must meet the expected quality and fit within the budget.
In two shades Source sdelaipotolok.com
- Environmentally friendly. As temperatures rise, some materials release compounds into the air that are hazardous to human health and are not suitable for interior decoration.
Metal siding Source nwhistorycourse.org
- Minimal height reduction. The higher the ceiling ends up being, the better.
Colored PVC film Source i0.wp.com
- Easy care. Complete cleaning of the bathroom is a troublesome task. Limited space, slippery sides of the bathroom, appliances and shelves put the room in the category of traumatic ones. The optimal solution would be to choose a finish that does not require frequent and complex maintenance.
Aesthetics of plastic panels Source laoye.me
- Aesthetics. It is important that the ceiling in the bathroom, the design of which the owners liked, is in harmony with the overall style. If you ignore this requirement, the discrepancy will be obvious, and the repair will not bring the expected satisfaction.
With mirror inserts Source dekormyhome.ru
- Simple installation and possibility of modification. The ceiling finish should not impede subsequent modifications (for example, if additional light sources are required).
Acrylic structure (plexiglass) Source design-homes.ru
Installation of slatted ceiling in the bathroom
Installation of the slatted ceiling is the final stage of finishing the bathroom. Beforehand, the rough ceiling must be cleaned of dust, peeling plaster, paint, all existing cracks must be embroidered and sealed with putty. Areas affected by the fungus must be cleaned and treated with antiseptic agents. Finally, the surface is covered with a waterproof primer with antifungal additives to prevent the appearance of mold in the future.
Advice. Before installation, you should carry out the wiring for lighting fixtures and secure the wires to the ceiling using dowel nails and plastic clamps.
During the work you will need:
- decorative slats made of plastic or aluminum;
- aluminum profiles;
- stringers (carrying tires);
- pendants;
- screws and dowels;
- metal scissors;
- level; drill with a set of drills.
Step 1. A straight horizontal line is drawn along the perimeter of the room on the walls at a distance of 15 cm from the rough base. It is very convenient to use a laser level for marking, but in the absence of this, an ordinary construction level will do.
Step 2. On the marking line, points for holes for fasteners are marked every 40-50 cm, and the same marks are placed on the profile. Drill holes in the guides, then in the walls, using the appropriate drill. The diameter of the holes should be 6 mm.
Marking on the wall and drilling a hole
Step 3. Dowels are inserted into the holes on the walls, driven flush with the surface, the profile is applied and the screws are screwed in.
Insert dowels into the holes
The profile must be positioned strictly along the line; horizontal deviations will lead to distortion of the structure. For joining in corners, the ends of the profiles are cut at an angle of 45 degrees.
Angle connection option
Fixing a profile
Step 4. Support rails - stringers - are installed between two opposite walls. There should be a gap of about 10 mm between the ends of the stringers and the profile wall to compensate for thermal expansion. In this case, the elements are located strictly perpendicular to each other.
Advice. To connect two stringers together, you need to put one on top of the other, align the perforated holes and fix them on both sides with self-tapping screws.
Step 5 . The location of fasteners for stringers is marked on the ceiling at a distance of 20 cm from the walls and about 0.7-1 m between each other. Drill holes, insert dowels and screw stringers. The screws are not screwed in completely, leaving the opportunity to adjust the height of the slats during installation.
Slat ceiling assembly diagram
Stringers
Step 6. Attach the first rail: apply it to the starting profile, insert it into the grooves of the stringers and press until it clicks. There should be 5 mm gaps between the ends of the rail and the profile wall.
Rail profile (plastic)
The rail is inserted end-on into the profile
The rail snaps into the stringer and the opposite profile on the wall
Installation of plastic slats
Step 7. In the same way, attach all the other slats to the location of the lamp. To make a hole for it, mark the center of the cutout on the panel with a pencil and drill it out using a crown of the required diameter. Next, insert the body of the lighting fixture into the hole, holding it, attach the panel to the stringers, insert the wire inside and connect the light bulb.
Drilling bits
Future hole for the lamp in the rail
Mounting the lamp
Wiring assembly
Step 8. Install all other lamps in the same way, check their operation, and complete the installation of entire slats. If the last plank is wider than necessary, it is cut to width using metal scissors. The material is thin enough so cutting it is easy.
Connected luminaire (example of installation on a ceiling with a mirror effect)
Advice. For convenience, you need to draw a cut line on the rail, then make perpendicular cuts on the same side at a distance of 4-5 cm from each other and slightly bend the material. After this, cutting off the excess is much easier and faster.
Step 9. Having secured the last strip, check the horizontality of the covering and, if necessary, tighten the screws in the stringers. The holes between the slats make this easy to do.
First, the last rail sawn lengthwise is installed, after which the solid penultimate one is installed.
Step 10. Now all that remains is to close the gaps with special inserts, if they are provided for by the design. They are cut to the required length, inserted between the slats, and pressed tightly until they click.
An example of a decorative strip for a ceiling, simply clicked into the grooves
The finished coating should not have any gaps or cracks between the elements; all slats should be in the same plane. If the ceiling has waves, it means that you have not tightened the fastenings on the stringers enough. To fix the problem, you need to carefully pry off the inserts in the problem areas, tighten the screws and return the inserts to their place. Which is better, a shower cabin or a bathtub, read the link.
What should not be used for finishing
Not every material meets the criteria, and therefore is not suitable for use in a damp room. In order not to negate all your efforts and spoil the repair, you should discard the following materials:
- Whitewashing, plaster. Categorically not suitable for use in the bathroom: it reacts poorly to dampness, needs periodic updating (otherwise it becomes a haven for mold).
Plaster Source design-homes.ru
- Chipboards. They are sensitive to dampness, which is why they become deformed and lose their appearance. Some species have noticeable emissions (they release formaldehyde, which is toxic to humans).
With oriental notes Source i.pinimg.com
- Paper wallpaper. Inevitably they begin to absorb moisture, swell and peel off. If you don’t want to give up wallpaper, choose the option with a non-woven base.
Panel finishing (siding) Source rtl-indizajn.cdn.sysbee.net
- Oil paints, enamels. The highest quality composition will not tolerate excess moisture; over time it will begin to fade, become cracked and crumble.
Ceiling of complex shape Source cdn.archilovers.com
See also: Catalog of companies that specialize in interior redevelopment
Budget finishing options
Inexpensive finishing methods legitimately raise concerns about their durability. But accessibility does not always mean poor quality results. If your budget is limited, you can choose from several options.
The glossy surface expands the space Source img2.gorod.lv
The easiest to implement is painting with acrylic, water-dispersed or latex paint. An inexpensive option, especially if the ceiling has no defects and does not require preliminary leveling.
For connoisseurs of antiquity Source italstroy.ru
The advantages of staining are simple aftercare and long service life. It’s nice that refreshing such a ceiling is quite simple. Force majeure in the form of a burst pipe in the upstairs neighbors can ruin the finish.
Cassette ceiling Source www.akp66.ru
Vinyl wallpaper is an inexpensive design option sometimes chosen for a room containing a bathtub. The ceiling, the design of which is usually made as cheap as possible, is covered with a material that suits the style.
Complex lighting system Source img.aviarydecor.com
Many types of wallpaper covered with PVC film (non-woven backing) are resistant to moisture. They are produced under the sign “washable” or with the possibility of painting.
Plasterboard construction Source design-homes.ru
The disadvantages include the subtleties of the process. If you overdo it with glue, after drying, gaps will form between the canvases, a suitable place for the development of mold.
Multi-level ceiling Source d1gc6ba1r4599p.cloudfront.net
Expanded polystyrene tiles are not so original, but they allow you to hide surface defects. The material is easy to work with and is attached using universal glue; imitates a plaster surface well and therefore looks harmonious in many styles.
Two-level design Source i1.wp.com
See also: Catalog of companies that specialize in the selection and installation of any electrical appliances or electrical equipment in general
Ceiling panels
One of the modern methods is finishing with PVC panels. Although all panels belong to the class of moisture-resistant materials, glossy seamless panels are chosen for the bathroom as the most resistant to moisture.
From plastic panels Source homeli.ru
The advantages of PVC panels are long service life, low weight and variety of designs. The ceiling, decorated with white panels, looks much higher, and it can be wiped with regular soapy water.
Two-color PVC ceiling Source vannajainfo.ru
PVC strips are attached to the frame, so it is convenient to install lamps in them. The method of fastening can be considered as a disadvantage - in its finished form, the structure reduces the height of the room. Other types of panels are also used in design:
- Wooden. Suitable for rooms with a powerful hood, they require additional moisture protection treatment. For finishing, lining, laminate, MDF panels and different types of boards are suitable. They look luxurious and fit well into Provence, country, modern and Scandinavian styles.
Wood trim Source images.squarespace-cdn.com
- Ceramic tile. Tile and porcelain tiles are popular ways to decorate a bathroom ceiling. They are valued for their ability to maintain attractiveness for a long time and easy care.
Tiling in Art Nouveau style Source i0.wp.com
- Mirror or glass panels. An effective design option that is resistant to temperature changes and is not afraid of mold. A mirrored ceiling expands the space well, but it can hardly be called budget. Fits into classic, modern, loft styles.
Mirror finish Source artultra.ru
See also: Catalog of companies that specialize in extensions to existing houses
No. 2. Drywall
When the ceiling has significant unevenness, it is better not to paint, but to mount sheets of plasterboard, which will help create an interesting interior. You need to choose a moisture-resistant material that can be recognized even visually: it has a green tint. Among the advantages of this coating :
- the ability to create an original design , for example, a multi-level ceiling;
- hide all communications under drywall , and as a result the bathroom will look stylish and neat. Moreover, you can also use built-in lamps , creating spectacular lighting;
- strength and relative durability.
Some disadvantages should also be noted
- the need to create a frame for attaching drywall sheets , which means additional time and expense. By the way, it is better to install a metal rather than a wooden frame in the bathroom;
- the top slab of drywall will have to be primed and painted to obtain a pleasant-looking coating;
- periodically renew the paint , as dirt may accumulate in some places. To do this, however, even on your own, is not so difficult.
Suspended ceiling structures
In a limited bathroom space, it is not customary to use complex design techniques. But, if the area, wall height and budget allow, more complex options for ceilings in the bathroom are used:
- Slatted ceiling. A good solution, especially if you choose aluminum with its anti-corrosion properties; Chrome and gold plated slatted designs are also popular. The ceiling looks stylish, lasts a long time, but quickly becomes dirty due to condensation, so the seams need regular wiping. To avoid mold, the bathroom is equipped with ventilation.
Brilliant solution Source mebel-go.ru
- Based on plasterboard. Sheets marked GKV (moisture-resistant), which contain water-repellent and antifungal additives, are suitable for finishing. The finish is durable and affordable, allowing the use of built-in lighting. If exhaust ventilation is not installed, the surface will lose its appearance over time.
Drywall in finishing a non-standard surface Source www.marchitecturalphotography.com
- Stretch ceiling. The coating can protect the house from possible flooding. The material retains a significant amount of water (up to 100 l), after draining it it is restored without compromising its appearance. You can choose a coating for any interior - matte or glossy, plain or patterned, with imitation texture or any image. The main thing to take care of later is to protect it from sharp objects.
Stretch ceiling in a classic bath Source clemencerichard.by
Which ceiling to choose
Each of the described options is attractive in its own way, but if you take into account the optimal ratio of cost, decorativeness and ease of installation, then the best option is a plastic or slatted ceiling. Thanks to the wide selection of panels, you can find an interesting and unusual combination of color and texture, or, conversely, choose a discreet classic option. If the bathroom is decorated in a high-tech or loft style, panels with a mirror finish, as well as chrome and metallic colors, are ideal. This is a great opportunity to show your imagination and feel a little like a designer.
Wavy slatted ceiling
Ceiling design
The ceiling serves as the background of the interior, so it is decorated in accordance with the style chosen for the bathroom. Depending on this, the ceiling is given the following appearance:
- Classical. White or similar light shades are preferred. Decorative details with imitation gypsum stucco, baguettes with gilding, and moldings are selected. For lighting, a central lamp with inserts imitating crystal is used; highlighting is possible with backlighting.
Modern classics Source i.pinimg.com
A little luxury won't hurt Source roomadness.com
- Modern. Laconic appearance, no decoration, but Art Nouveau (Art Deco) requires an element of elegance. It can be a combination of glossy and matte textures, mirror or glass inserts. Lamps with a chrome surface are suitable for decoration.
On the attic floor Source i0.wp.com
- Ethno. Any directions related to traditions (including village ones). Different materials are used for decoration, but the emphasis is on the inclusion of characteristic decorative elements in the form of an ornament or wooden texture.
In ethno style Source design-homes.ru
- Vintage. Provence and crushed chic love milky and beige tones; mother-of-pearl or pearl shimmer is allowed. The decoration is laconic, but with the inclusion of a baguette, it is better to choose a central lamp.
In Provence style Source roomester.ru
In vintage style Source www.classic-bathrooms.de
- Creative. The imitation of an industrial zone is expressed in rough decor: pipes remain visible, fans and lamps of simple shapes are used. The color of the finish is gray, reminiscent of concrete.
In the loft style Source 1.bp.blogspot.com Dark ceiling - for high rooms Source happymodern.ru