SHARE ON SOCIAL NETWORKS
FacebookTwitterOkGoogle+PinterestVk
Tile is the undisputed leader when it comes to the need to purchase cladding material for finishing a bathroom. It is ideal for both walls and floors, providing the surface with the characteristics required for demanding environments. Let's look at how to lay tiles in the bathroom: how to properly prepare the surface and lay the material.
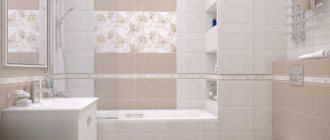
Ceramic tiles are the best material option for finishing the bathroom and toilet
Advantages and disadvantages of laying tiles in the bathroom
The advantages of using tiles as floor and wall coverings for the bathroom include the following characteristics of this material:
- resistance to water and steam;
Tile laying carried out in accordance with the rules and recommendations can not only decorate the interior, but also last for many years.
- high strength of the material to mechanical stress;
- relatively simple installation procedure, accessible even to a beginner;
- aesthetic appearance of the surface;
- hygiene and ease of care.
If we compare ceramic tiles with other materials that are used to decorate bathrooms, then there is practically no option that could surpass its characteristics.
Although it is worth noting that this solution also has some disadvantages, for example, installing tiles will be quite expensive, given the cost of the tiles themselves, as well as auxiliary materials. And before you lay tiles in the bathroom on the floor or walls, you will have to pay attention to preparing the surface.
Due to their high performance characteristics, ceramic tiles are the best solution for finishing bathroom walls and floors.
How to lay tiles in the bathroom correctly: necessary tools and materials
In order to lay tiles on the surface efficiently, you need to take care in advance of having certain tools and materials. The list of necessary items consists of the following items:
- ceramic tiles based on: surface area + 10-15% depending on the chosen installation method. It is highly not recommended to purchase the material end-to-end, since part of the tile may be damaged during transportation or during the work. In addition, it is useful to leave a few intact tiles in case the cladding needs to be repaired in the future;
- a suitable adhesive composition, which is intended for this type of work and is able to cope with the upcoming loads;
- grout for joints of a suitable color (usually chosen in the same tone as the coating or a little lighter);
- a large container in which it will be convenient to mix glue;
- smooth and serrated spatulas, with which you can apply and distribute the adhesive composition over the surface of the tile;
- tile cutter or grinder for cutting individual elements that do not fit;
- foam sponge or rags to clean the surface from excess glue;
- special crosses designed to form seams of equal size.
When laying ceramic tiles, do not neglect the specialist’s recommendations on the choice of tools for the work.
Stylistic direction
The finishing option also depends on the chosen style. Each direction has its own characteristics. So, for style:
- Art Nouveau is characterized by bright colors and bold contrasts. This is a suitable option for a bathroom of any size;
- Provence is characterized by the use of tiles in restrained pastel colors. Thanks to this, it is possible to create a special romantic atmosphere in the bathroom. The best option is soft pink, lavender, sky blue tones. You can choose tiles decorated with small patterns of plant origin;
- Loft is characterized by sand and beige tones. Chocolate shade and brick color are quite popular;
- For classics, it is preferable to use high-quality expensive materials in soothing colors. The chosen finishing option should be in harmony with the furniture installed in the bathroom. A set made of expensive wood is preferred;
- High tech prefers to use facing material with a glossy surface. the desired effect is achieved by laying elements at different angles;
- Baroque prefers to lay tiles in the classical way. The finishing material should be in restrained pastel colors. With this approach, the bathroom will become the highlight of the house;
- Scandinavian people choose tiles of harmonious light shades. Elements with small ornaments look especially advantageous.
Thus, there are various options for finishing a bathroom with tiles. Designers actively vary the size, color and spatial arrangement of each element. As a result, it is possible to achieve a unique effect in a bathroom of any size. You just need to initially correctly place the emphasis and highlight goals for implementation.
How to lay tiles in the bathroom: popular installation methods
Before you begin choosing and purchasing the required amount of material, you need to decide on how the tiles will be laid. Laying tiles in the bathroom can be done in several ways. At the same time, experts recommend choosing an option that will contribute to the visual expansion of the space.
Consider some of the most popular examples:
- Straight layout. The simplest and therefore widely used method, which can be used even by a completely unprepared person who does not have any experience in this field.
- Diagonal layout. An aesthetic and sometimes more complex option. It is believed that this method is ideal for square-shaped rooms, as well as if the walls have serious unevenness. An inexperienced master may encounter certain difficulties during the work process, but if we are talking about renovating a small bathroom, then there is simply no better way to find it. Moreover, you can always practice layout without applying glue.
- Chess pattern. This method is suitable for laying tiles of several colors. As with diagonal laying, this method is recommended for implementation in small square rooms. The main advantage of this method is that it fits perfectly with both classic and any modern interior.
- Offset installation. In this case, each next row of tiles is laid offset relative to the previous one. In this case, the seams do not join, which makes the design of the room unique. Unlike previous methods, this option is more suitable for rectangular rooms. This applies to both wall coverings and laying tiles on the bathtub floor.
Laying a complex pattern on a wall requires experience working with ceramic tiles and precise markings
You can decide how to lay tiles in the bathroom by looking at photo examples or at least a schematic arrangement of tiles in each method. But we should not forget that to implement each method, the tile must be correctly selected. For example, for diagonal installation, only square-shaped elements are suitable, but for offset installation, it is better to take rectangular tiles.
Interesting! The question often arises as to how to correctly say “lay” or “lay” tiles on the floor or walls. The second option is vernacular, which is acceptable, although not considered correct, from the point of view of literary language.
Gap between bathtub and wall
The most airtight option for the bathtub side/wall interface is to overlap the first row of cladding onto the sanitary bowl - “laying from the side.” The decorative value of the interior in this case is maximum.
Laying tiles from the side of the bathtub.
If the joint is sealed with sealant, any layout options are allowed - the bottom row is trimmed, a narrow frieze or decor is used.
Narrow tiles of the bottom row above the edge of the bathtub.
When used to protect the joint of a border, corner, or baseboard from leakage, a narrow frieze or protruding top of the tile will be partially covered by a decorative element. The quality of the interior will decrease.
Error in laying out tiles over the side of the bathtub.
For small tiles and mosaics, this requirement is not relevant. You can glue plinths, corners, and profiles of any width onto them.
How to lay tiles in the bathroom: mortar preparation technology
Obviously, the process of choosing the right tile and how to install it will take time and attention. But many do not even suspect that choosing and mixing the adhesive composition is no less important task. Let's consider what you should pay attention to, and whether it makes a difference which solution will be used during the work process.
The process of preparing adhesive solution for ceramic tiles
Tile adhesive can be purchased in one of two forms: a dry mixture or a ready-made solution, which just needs to be applied to the surface. In principle, it is permissible to use any option, although the ready-made mixture is usually used only for working with small surfaces. In addition, it does not tolerate storage well. So if you just have to lay tiles in the bathroom, it is better to purchase a dry mixture.
The choice of adhesive compositions for tiles on the modern market is quite large. They may differ in cost, quality and, in some cases, preparation technology. So the first thing you need to do before diluting the purchased mixture with water is to carefully read the instructions provided by the manufacturer. But you should also consider the following recommendations:
- mixing the glue should only be done when all surface preparation work has been completed;
- when adding water to the mixture, you must follow the manufacturer’s recommendations, as well as your own feelings, avoiding excessive fluidity or density of the solution;
- the adhesive composition obtained in the toga must be uniform;
- For mixing, it is best to use a hammer drill with a special attachment, since doing everything necessary by hand may not be easy.
When preparing tile adhesive, follow the instructions on the package.
Helpful advice! Before laying the tiles, you need to make sure that the adhesive will adhere to the surface on which it will be laid.
How to lay tiles in the bathroom: preparatory work
Before you begin laying tiles on the surface, it is necessary to carry out some preparatory procedures that will make the surface as susceptible to the adhesive as possible and ensure reliable fixation of the elements. So, you need to clear the room of all unnecessary pieces of furniture and elements that may interfere with the work. And before gluing the tiles to the walls and floor, if possible, the plumbing is also dismantled.
If there is old cladding material on the walls, it must be dismantled and then the surface must be thoroughly cleaned from dust and dirt. The option of laying tiles on tiles is also possible. Then you need to measure the area of the room.
Important! If wooden elements were used to lay out the walls, at the preparatory stage it is necessary to open them with an antiseptic agent in order to prevent rotting processes. Then a layer of plaster is applied on top.
The main stage of surface preparation before laying tiles is leveling the surface using plaster
How to remove tiles in the bathroom with your own hands
In most cases, you have to deal with the presence of old tiles on the surface, unless we are talking about renovations in a new building. And in this case, you will have to eliminate it before you begin laying new tiles. Let's look at each stage of this process in detail.
First of all, using a hammer drill that is set to impact mode, the old tile covering is removed. This process is, of course, dusty and unpleasant, but given the small area of the room, everything necessary can be done quite quickly.
Important! When dismantling the old coating, be sure to use protective clothing and glasses, as small particles of tiles can fly off and cause serious injuries.
Using a hammer drill you can quickly remove old tiles from the surface
If we are talking about the need to remove paint from a surface, then it is best to use solvent compounds and special tools that facilitate its mechanical removal.
After the coating has been dismantled, all that remains is to carry out cleaning, removing all residues from the surface and thoroughly cleaning the base. At the same stage, it is worth assessing the surface level and taking the necessary leveling measures.
How to level the walls in the bathroom: instructions and recommendations
Immediately after the surface of the floor or walls has been cleaned, it is necessary to make an assessment to determine whether leveling is necessary.
To level the concrete surface of the wall, it is necessary to install beacons and apply an even layer of plaster
A perfectly flat surface is not a prerequisite for tiles, but when it comes to serious deviations, it is better to eliminate them in advance to avoid possible problems in the future. Regardless of how the walls in the bathroom are lined with tiles, the algorithm for the sequence of actions is as follows:
- A layer of primer is applied to the surface.
- Beacons are set using a level.
- A layer of plaster is laid and distributed between the beacons.
This method is used to level walls. When working with the floor surface, the procedure is even simpler and involves the use of a self-leveling mixture, which can solve existing problems, is also easy to prepare and dries quickly.
Related article:
Bathroom tiles: design, photos and recommendations for choosing
Photos of interesting room ideas. Advantages and disadvantages of using bathroom tiles. Recommendations for laying tiles.
Waterproofing a bathroom under tiles: which material is better
Ensuring high-quality waterproofing of the bathroom floor under the tiles and even on the walls is another important task. There are a large number of methods and materials for this. Consider some types and their advantages over others:
- bitumen-polymer composition is a plastic mass that is characterized by high resistance to temperature changes, as well as to the effects of chemically active substances. The material is applied in a thin layer before laying the tiles. The composition has no pungent odor and is completely safe for human health;
High-quality waterproofing of the bathroom before finishing work will help not only to avoid the growth of fungi and mold, but also to prevent flooding of neighbors in the event of a water breakthrough
- bitumen-latex waterproofing is a liquid composition that is widely popular. Among the positive aspects of using this option are the solidity of the layer, the absence of seams and joints;
- cement-polymer mixture is one of the best options for waterproofing bathroom walls and floors. Apply the composition using a paint brush to a previously primed and prepared surface;
- acrylic enamel is a budget-friendly way to solve the problem of waterproofing in the bathroom. The resulting coating is quite capable of coping with its main task for some time, but over time it is susceptible to cracks, so if you have the opportunity to give preference to another, more reliable option, it is better to do it right away.
In some cases, roll waterproofing is used, which is made from polyester and fiberglass fabric. In this case, the back side of the material is coated with a special adhesive, and the top side is treated with a substance that promotes adhesion and allows the tiles to be better secured with glue. In addition, this option does not require additional drying time and is quite affordable.
Rolled waterproofing made of polyester and fiberglass fabric is often used for finishing large rooms
Thus, it is impossible to say unequivocally what is better, waterproofing a bathroom under tiles with rolled materials or using special compounds. Everyone choose the option that suits you, based on its cost and characteristics.
Important! Before laying rolled waterproofing material, you need to pay attention to how smooth the surface is. Differences are permissible, but they should not exceed 2 mm.
How to properly lay tiles on walls and floors: where is the best place to start?
When wondering how to lay tiles in a bathroom with your own hands, many people want to understand where is the best place to start. After all, this is what determines how to glue tiles in the bathroom and how comfortable this process will be.
An important step in laying tiles is applying or installing markings
First of all, it is worth noting that you need to start laying tiles from the walls. If possible, the floor should always be done last to avoid staining or damaging the finish.
With rare exceptions, laying tiles on walls begins from the bottom up, but with flooring the situation is somewhat more complicated. You can lay tiles on the floor starting from several places:
- from the farthest visible angle;
- from the threshold;
- from the center of the room.
Which option will be chosen depends on the wishes of the master, and in some cases also on the installation method, since in some cases it is more convenient to start installation from the center in order to lay out the pattern or place the patterns correctly.
The quality of the adhesive determines the lifespan of the tile covering, so it is best to prepare the mixture immediately before laying
What disadvantages can you encounter?
Despite the obvious advantages of the material, it also has disadvantages:
- Laying tiles requires special skills and tools. If you do not have experience, then it is better to entrust such work to a team of professional builders;
- Additional costs will be required for glue and cement;
- The price for high-quality tiles with a smooth surface without bends, chips, or microcracks may be above average;
- Over time, the space between the joints becomes dirty, can crumble, and fungus and mold form. Regular cleaning and chemical treatment are required.
How to lay tiles: the nuances of do-it-yourself installation
In order to understand how to lay tiles in the bathroom, you need to pay attention to the algorithm for carrying out the work, as well as the features and nuances. Let's look at the most complex and interesting aspects of this process, which can cause difficulties for an inexperienced master:
- dry laying tiles on the surface is the best way to practice laying out the pattern and make sure that the material is cut and laid out properly;
- To facilitate the installation process, markings must be applied to the surface. This will significantly reduce the likelihood of making a mistake and will allow you not to be distracted from styling;
- if laying is done on a concrete base, then it is best to work gradually and in small areas;
- Each laid section of tile must be checked for evenness using a building level. You can adjust the height of individual elements by adding or removing adhesive;
When working with tiles, you must use special crosses that will help control the width of the seams and the height of installation of each element.
- It is imperative to use special crosses, since only they can ensure truly equal distance between elements and make the seams as aesthetically pleasing as possible;
- the adhesive is usually applied directly to the walls and floors, as this ensures that the laid material will hold tightly and for a long time;
- if installation is carried out on walls, then a special adhesive is selected that is characterized by quick setting;
- protruding glue is quickly removed with a plastic spatula;
- if you have to lay tiles in the bathroom in hard-to-reach and complex areas, for example, going around the toilet, then it is cut with a tile cutter or other suitable tool;
- After creating the coating, the threshold in the bathroom is installed.
Thus, laying tiles in the bathroom on the floor or walls is quite simple. Moreover, by adhering to technology, you can cope with the task quite quickly, ultimately installing a beautiful and reliable coating.
When finishing a large bathroom, glue is applied to small areas and gradually filled with tiles
What to pay attention to
When laying floor tiles in the bathroom with your own hands, pay special attention to the location of pipe valves and water meters. Access to them must be maintained.
You can install a screen made of moisture-resistant plasterboard under the bathroom. It can be painted or laid out with beautiful tiles with a pattern.
How to lay tiles on walls and floors: methods for cutting tiles
Having decided to lay tiles yourself, you will also have to familiarize yourself with the methods of cutting them, since situations where the tile fits perfectly in size and fits without adjustment are extremely rare. The most common tools used for this purpose are:
- An electric tile cutter is a quick and easy way to make a quality cut. The tool is designed in such a way that water gets into the place that is subject to cutting. This allows you to improve the quality of the resulting elements;
- A manual tile cutter is the most popular option because it is much easier and cheaper to purchase than any other. In order to cut off part of an element, appropriate markings are made on the tile, after which, using a tile cutter and physical effort, the unnecessary part is cut off;
- A roller glass cutter is not a very popular option, which, however, can sometimes still be found. This tool is much more suitable for working with gypsum tiles, but often simply cannot cope with ceramics;
- A grinder is another way to cut tiles. The advantage of this option is accessibility, but the disadvantage is that the cut is not very smooth and clean.
In order to cut ceramic tiles efficiently, you should use a tile cutter or grinder
Of course, when choosing a method for cutting tiles, you have to build on the available tools and capabilities. It is not always possible to purchase a special tool, but it is important to understand that in some cases it is better to spend additional money in advance than to later receive an unaesthetic coating, which will be difficult to notice from a financial point of view.
A few tricks from the experts
Initially, it is recommended to think through several important details that will make it easier to finish vertical and horizontal planes with ceramic tiles. This list includes:
- It is recommended to first make a three-dimensional image of the bathroom after renovation. To do this, you can use computer programs or draw a design on a sheet of paper yourself.
- Check out the installation diagrams. They are divided into several categories:
- Traditional. In this case, the tiles are fixed in the form of clear parallel rows;
- Bias. This technique allows you to accurately imitate a brick wall. The top rows of tiles will be located in the middle of the subsequent element. The photo of finishing the bathroom with tiles shows an option for decorating the interior space;
- Along a diagonal line. I consider this option a complex method that can be performed by professional craftsmen. The tile must be placed at a certain angle to subsequent parts;
- Herringbone pattern. In this case, ceramic tiles are laid in the form of parquet boards;
- Modular type. This technique involves the use of tiles of different shapes and widths. In this way, it is possible to create an unusual pattern that harmoniously matches the design of the room.
All methods except the traditional one will require the greatest financial costs. By about 20%. During the work, the master will create a huge amount of ceramic waste, which may not be used for installation.
Pay special attention to plumbing equipment. It should be in perfect harmony with the color palette of the ceramic tiles.
Before purchasing, you should inquire about the documentation for this product. In some cases, batches may vary slightly in color and texture.
How to grout tile seams in the bathroom: video instructions
The quality of the grout largely determines the beauty, as well as the service life of the coating, since it affects how resistant the tile will be to water and steam. Therefore, special attention should be paid to the issue of choosing and applying grout, choosing the most suitable color and applying the composition with high quality.
Apply the grout using a rubber spatula in such a way as to fill all the voids and cracks as thoroughly as possible. Immediately after this, all excess must be removed to avoid drying on the surface of the tile. Installation of the threshold and other similar elements is carried out only after the composition has completely dried.
Important! The consumption of grout for tile joints per 1 m2 can vary quite a lot depending on the manufacturer and range from 0.25 kg to 0.5 kg.

