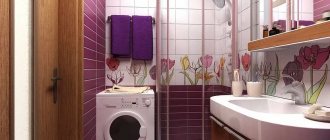
Repairing a combined bathroom with your own hands is twice as difficult as repairing a toilet and a bathroom combined. Restrictions and additional conditions for both premises have to be applied in conjunction, and, in addition, specific requirements are added.
Recently, in the renovation and redevelopment of apartments, there has been a strong tendency to install a shared bathroom instead of a separate one. It is difficult to find any technical or simply common sense justification for this, so on the issues of combining a bathroom and a toilet, we recommend reading articles devoted to this. Here we will only touch on the features of repairing an initially existing bathroom.
Methods for renovating a combined bathroom are determined primarily by its layout: the consolidation of office premises is due to the requirements to provide quicker and more cheap housing, and no extra square footage was put into the “necessary room”. Often, however, there are luxury housing projects with a combined bathroom with an area of 26 or even 40 square meters, but their customers are unlikely to undertake independent repairs, so the figure shows only plans for the most common typical combined bathrooms:
Layout of typical combined bathrooms
Stumbling blocks
Difficulties and mistakes when renovating a combined bathroom are the rule rather than the exception. The reason is primarily the cramped space; then – the coincidence of sharp fluctuations in temperature and humidity, characteristic of a bath, with the flow of biologically active substances and caustic volatile chemical compounds from the toilet into the room. Therefore, ideas for renovating a bathroom with a combined bathroom, which arise when examining it on plan and in kind, should be carefully adjusted to the existing conditions.
For example, look at position G in the figure. The size of the room does not allow you to turn around without catching something, and how can you work in such a cage? Will the favorite washbasin somehow fit there? And what will remain of the internal volume if you also hang a boiler with a cabinet for toiletries? Will it be possible to breathe there after such a renovation by turning on the shower for 10 minutes? So, to begin with, it is better to understand what kind of problems we will have to face during repairs, then clearly imagine the procedure for carrying out the work, and only then get down to preparation and the repair itself.
Subjective-psychological
Errors of this kind occur due to the lack of designer and builder skills. There is a whole science - ergonomics - that deals with how to avoid inconvenience and create convenience in the smallest possible volume. It would take too long to describe at least its basics, so let’s explain it with an example. Let us just point out that the basis of ergonomic design is accurate measurements.
Now look at position A in the figure. At first glance, it seems that if you move the toilet 7 centimeters towards the window, and rotate the washbasin 90 degrees clockwise and hang it on the adjacent wall, then instead of a shower stall you can install a corner bath. Let's sit on the toilet and measure - yes, there is still 2-3 cm left from the shoulder and hip to the wall.
We decided, we did it, and then what? It turned out that a man leaning over the washbasin, brushing his teeth, touched the face of the person lying in the bathtub with his fifth point. But lying in the bath is the opposite – there’s nothing at all from head to toilet, and suddenly someone in the family just has an urge? You can’t put up a screen: there won’t be enough room to sit.
Therefore, the first recommendation: familiarize yourself with the basics of ergonomics and together, together, on the spot, in the bathroom itself, carefully consider possible repair options. Two or three of us because, firstly, the mind is good, but somewhat better; secondly, you need to feel the tightness, corners and walls with your sides, so that later everything turns out better, and not as always.
Technical
In addition to the above problems of a combined bathroom, the likelihood of flooding is twice as high here. Therefore, when installing the floor, you need to make the thickness of the screed smaller (“the tub” will be deeper), but the waterproofing will be more reliable. An increased intake of unwanted impurities into the air requires increased ventilation and careful selection of materials.
Technical difficulties, as we know, entail unnecessary costs. You can and should save money, but not at the expense of quality and convenience. We will look at some opportunities to reduce repair costs, but keep in mind: any savings will entail an increase in labor costs.
Design-aesthetic
The toilet is an absolutely functional room; its decoration must be precisely linked to the physiological characteristics of a person. The bathroom should be relaxing and give you the opportunity to pamper yourself. Design requirements in both respects are not always compatible, and finally, you have your own taste!
Two ways to combine incompatible things in a cramped, cluttered room are actually applicable: dividing the space and imaginary enlarging it. We will touch on both, but keep in mind once again: “stretching” space is more effective, but more difficult and expensive.
Wall decoration
Walls most often occupy the largest area of the room, while at the same time being in the visual zone, therefore, it is worth paying due attention to their appearance and technical parameters. The cheapest and most short-lived solution would be to leave the plaster walls and cover them with paint - every two to three years you will have to change the top layer, there is a high probability of fungus and moisture damage to the wall
The cheapest and most short-lived solution would be to leave the plaster walls and cover them with paint - every two to three years you will have to change the top layer, there is a high probability of fungus and moisture damage to the wall.
The most optimal and popular material is ceramic tiles. There are many variations in both the shape and size of the tiles, as well as in their colors. By size, large tile blocks, standard and small (brick) masonry can be distinguished. The advantage of large blocks is the minimum number of joining seams, and therefore the risk of them yellowing or becoming covered with fungus; entire paintings or compositions can be placed on such “canvases”.
The average masonry varies in size, but usually these are square or rectangular pieces with an area of about 0.5 square meters, such tiles are easier to lay, color combinations are easy to make: vertical and horizontal stripes of a different structure or color, randomly scattered blocks of different colors.
Small tiles look vintage and impressive, especially with a matte color background; their installation takes longer and requires more painstaking work, but the result is worth the effort; thanks to the size of the fragments, smooth color transitions and gradients are possible.
Another unusual option for arranging tiles is to combine fragments of different sizes; geometric correctness looks interesting, but requires accurate calculation of the size and location of the tiles.
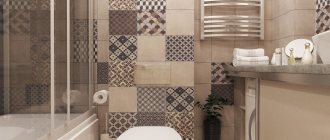
In terms of material, the most practical is a glossy, smooth coating that can be easily removed from dirt. You can bring fresh breath without pretentious and impractical materials - by means of a relief surface, symmetrical geometric lines, a combination of patterns or a formed picture - there are many ways of inspiration.
Repair stages
Renovating a bathroom combined with a toilet differs from renovating them separately in that the initial stages are interconnected: having stumbled into an insoluble contradiction, you have to return to the previous stage. Therefore, be prepared to spend most of your time on planning, design, selection of plumbing and materials. The actual stages of repair are as follows:
- connection to the premises;
- layout of plumbing fixtures;
- selection of a range of plumbing fixtures;
- development of a communication scheme;
- ventilation design;
- design development and selection of finishing materials;
- determination of time and labor costs for repairs;
- adjustment according to paragraphs. 2-5;
- upon achieving an acceptable result - cleaning the premises;
- floor repair;
- repairing walls and laying communications;
- arrangement of sanitary cabinets and built-in furniture;
- ceiling repair;
- ventilation device;
- room decoration;
- plumbing installation;
- installing a new front door or modifying the old one.
As for paragraphs. 9-17, then the technology for performing work on them is described in articles on bathroom renovation and on the features of toilet design and renovation. Next, we will touch only on individual details, and will take a closer look at what relates specifically to the renovation of combined bathrooms.
Successful interior examples
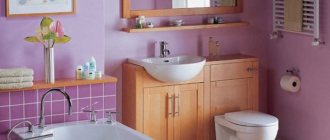
Beige and brown colors can be truly luxurious. Sparkling mosaics and golden patterns make the classic interior sophisticated and “expensive.”
Here is another example of a beige bathroom design. Everything here is modern and concise. Original plumbing and imitation wood create a stylish and cozy environment.
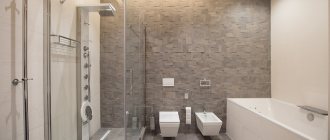
If the room is spacious, it is permissible to use dark shades. Pastel golden colors combined with black look very impressive.
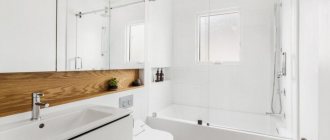
Whiteness, abundance of light and space are features of Scandinavian comfort. The combination of glass, chromed metal and wood forms an expressive composition. A bathtub on the podium, a double washbasin - everything here is created for relaxation.
Another example of incorporating black into a finish. The cabinet under the sink and the glass fence do not prevent the atmosphere from being airy, but become expressive touches that emphasize the designer’s idea.
Binding
The purpose of this stage is to determine what is convenient and what is not, and then what to leave in place and what to move. Already at this stage, you can estimate the future distribution of communications, the complexity and cost of the work. What almost always remains in place is the toilet: its 100 mm outlet must fit directly into the riser cross. Exceptions are possible in very rare cases, see below.
Take a look at pos. B and C in the picture at the beginning of the page. This is the same bathroom in the brick Khrushchev-era buildings of the first projects before the “bulldozer exhibition”. They differ only in the arrangement of plumbing fixtures relative to the door. But pos. B – “impenetrable”: in order to place a washing machine here, you will have to replace the bathtub with a shower stall. And the bathtubs in such houses were cast iron and of excellent quality: go through an active detergent, replace the siphon - and they will last for another hundred years.
But here at pos. The washbasin can be hung on the opposite wall. Then you will have to thoroughly tinker with the pipes, but space for the washing machine will be freed up without any problems. Also, for example, for pos. The space for the washing machine is freed up if the bathtub is replaced with a reclining one and turned 90 degrees, and the washbasin is placed on a long wall. In general - create, invent, try. But with mandatory consideration of the rules for sewerage installation.
Features for different houses
The procedure for combining bathroom premises does not differ from the type and time of construction of the house. External bulkheads are not load-bearing (with the exception of panel houses); the owner can use any building material.
"Stalinka"
In residential buildings built according to designs from the 30s to the 50s. last century, in the bathrooms there was a dividing bulkhead made of wooden beams with light cladding. When re-building, you can use brick or plasterboard sheets; the structure is not load-bearing. It is necessary to provide cutouts in the partition for water pipes and sewer lines.
Sample of a Stalinist wall.
"Khrushchevka"
Most houses are from the 50s and 60s. In the last century, bathrooms were combined, but there are projects with separate toilets and bathtubs. Any material can be used to restore the wall. The situation gets worse in panel houses, in which the bathroom is made in the form of a single reinforced concrete capsule. It is prohibited to destroy the structure due to the violation of the strength of the building.
New building
When purchasing housing in a new building, the premises are often left unfinished. If the bathroom does not have a bulkhead, then the owner can erect it during the renovation, having previously received approval from the supervisory authorities and making adjustments to the technical passport.
Some developers offer separation of the bathroom at the stage of building a house; in this case, the buyer of the apartment immediately receives documents that contain a wall between the toilet and the bathroom.
Placement of plumbing fixtures
When planning new plumbing, you need to consider the following:
Linearly zoned bathroom design
- the toilet outlet must mate with a 100 mm pipe, and its narrowing to the cross is unacceptable, otherwise you will flood yourself;
- the toilet bowl can be moved no more than 1.5 mm away from the crosspiece with a pipe slope of 100 mm/m;
- Horizontal corners of solid rigid sewer pipes are not permitted.
What might this mean in practice? Take a look at the picture on the right. This is a good example of a linear-zonal bathroom design (see right). But in order to comply with the rules and not drown ourselves, the crosspiece probably had to be half-sunk into the floor. And this means, in addition to extra work, an agreement with the neighbors, and, possibly, compensation to them for damage - after all, their ceiling had to be affected, and thoroughly.
Selection of plumbing
Not only appearance, size and price matter here. For example, a corner toilet (see picture) can solve many planning problems; Let's say the door can open in any direction without touching the knees of the person sitting on it.
Corner toilet
But you can simply install it only with a riser in the corner, or you will have to buy an expensive cross with a side 40-mm pipe at 45 degrees. If you are renovating a combined bathroom in a block-type Khrushchev-era building, then you don’t have to think about a corner toilet: the riser runs in a niche in the main wall, which cannot be touched in order to turn it around.
What's really worth thinking about is whether it's a pear or stepped bathtub. Look at the picture below on the right: it’s quite comfortable to lie in the bathtub, and the washing machine fits into place “like it belongs to it.” And most importantly, the washing machine spout hose can be connected to the bathtub, and a lot of time and money are saved on connecting it to the sewer.
Step bath
The choice of washbasin is also ambiguous: a tulip saves space along the wall, while a wide and narrow one saves space across the room. That is, the tulip will fit well in pose. B and C in the first figure in the text (square), and the “trough” is in pos. D (narrow and long). In other cases - depending on the design and size of the device. The recommendation here is not to limit yourself to the Internet, go shopping, look and measure on the spot.
More about the washbasin: most often it is on it that you can gain additional space. To avoid splashing, you need to choose a rather narrow “trough” with a spout at the corner and a round bowl.
Ventilation
Ventilation in a combined bathroom should be enhanced for the reasons described above. If funds allow, purchase a robotic fan that is triggered by temperature and/or humidity. When purchasing, pay attention first of all to productivity: based on the fact that the area of typical bathrooms is 3–5 sq.m., it should be at least 2500 l/hour.
Better performance at the same power consumption and lower noise levels are provided by low-speed fans with saber-shaped blades, but their diameter is larger, so you will have to widen the ventilation duct at the installation site. If the box is open and suspended, this is easier to do by placing a fan on its end.
Ventilation also requires air flow. There are two options here:
- Place a ventilation grille at the bottom of the door. It is quite labor-intensive and requires careful design. In addition, in many Khrushchev buildings, the bathroom door opens into the hallway, and cold air will flow into the bathroom.
- When replacing the sewer system, place a 32-40 mm piece of pipe into the opening leading to the kitchen. Everyone would be fine, but the bathroom might smell like kitchen fumes.
Design of a small bathroom combined with a toilet: stylish solutions
There are several simple rules that will make the room look not only comfortable, but also beautiful:
- visually expand the space by highlighting zones - they can be emphasized with the help of multi-colored tiles;
- When planning the sewer system, take into account the slope and cross-section of the pipes.
- installation of a wall-hung toilet - such models are more expensive, but they allow you to win space;
- apply at least two lighting options;
- replace the bathtub with a shower stall.
When preparing a project, it is advisable to immediately take into account that many small things are stored in the bathroom. To do this, install cabinets and drawers. The laconic design looks good in the picture; in everyday life, assorted bottles and jars on open shelves create a feeling of disorder.
A few more tips to help create comfort without sacrificing practicality:
- A corner cabinet can be multifunctional and will also help designate zones.
- Light colors are suitable for a small room; they not only increase the appearance of volume, but are also more practical - traces of splashes will not be so noticeable on them. Dark tiles are only appropriate near the toilet.
- Instead of a mirror, you can place a mirrored cabinet above the sink to store various small items.
- The heated towel rail can be placed in the niche behind the toilet. This is not very practical, but it will facilitate engineering solutions with water drainage.
- In a tiny room, an abundance of finishing details looks bad. Therefore, when thinking about how to equip it, it is better to refuse complex decisions.
- A bowl sink is stylish, and the countertop will provide an additional work surface.
- When purchasing finishing materials and furniture, take into account functional features - temperature changes and high humidity.
A large number of mirrors, glossy surfaces and glass parts will make the room visually more voluminous, but moderation is important here too. If you overdo it, you will feel uncomfortable. Multiple images violate intimacy.
Design and materials
Aesthetics
Expanding the visible volume with mirrors
Since the design of the bathroom is not so tied to physiology, it is advisable to “tighten” it to the design of the toilet (see the article on toilet renovation). An option is to divide the volume with a screen, but in an already small room this is not very attractive. Another option, expensive but aesthetically magnificent, is to visually increase the volume of the room. This can be easily achieved by tiling with mirror tiles, see fig. The best and most expensive tile is acrylic.
Functionality
The functional interior design of a combined bathroom is based on the principle of zoning: washroom, latrine and bathing areas. The location of the zones can be linear (drawings in previous sections) and radial, see fig. on right. The first is recommended for elongated rooms; the second is for roughly square ones, but ultimately it's a matter of taste.
When zoning linearly, it is preferable to arrange zones in order of frequency of use: the washbasin is closer to the entrance, then the toilet and bathtub. But this means the work becomes more complicated and more expensive, since you will have to recess the cross into the floor and pull a 100-mm pipe to the toilet.
Radially zoned bathroom design
In any case, design options must be continuously checked for communications layout as they are developed. Unspeakable beauty and extraordinary convenience can result in a monstrous “cuttlefish” made of solid soldered propylene, which will be impossible to hide in the walls.
Materials
Materials for a combined bathroom must be selected based on the quality criteria for the bathroom (see the article on its renovation). It will not be possible to save money, since in a combined bathroom the working conditions are even more difficult.
Small combined bathroom
It often happens that even the area of the combined bathroom leaves much to be desired. It is not surprising that when you combine a 3 square meter bathtub and a miniature toilet, you still have nowhere to turn around and have to give up many amenities. And unfortunately, in a small bathroom, this is inevitable. But there are design techniques that help to visually enlarge the space, make the ceilings higher, and the room as cozy and comfortable as possible, even with the necessary minimum.
The more glossy surfaces there are in the bathroom, the more spacious it will seem.
Visually expand the space:
- Glossy coatings, mirrors;
- Diagonal layout of tiles with a longitudinal stripe at a height of about 80 cm from the floor or slightly below the ceiling;
- Laying flooring also diagonally;
- The tiles are selected slightly smaller than average or medium size. Other finishing should have a small ornament or pattern. Separate elements laid out in mosaics will look good.
Using vertical patterns on the walls, you can visually “raise” the ceiling
Make the ceiling visually higher:
- Vertical lines on the walls or imitation “columns” in the corners;
- Laying rectangular tiles vertically;
- Wall decorative elements, the bottom edge of which is at least 150 cm from the floor.
The color scheme should only be light. And the lighting in a small room needs to be bright and uniform.
Advice! It is not necessary to follow one chosen layout throughout the room. Tiles can be glued in different ways in different areas. For example, in the area of the bathroom and sink it is horizontal, and near the toilet – vertically.
Technical nuances
Here we should proceed from what has already been indicated: the “tub” of the floor must hold a double spill, and there is a double amount of water vapor and impurities in the air. Therefore, you will have to combine the most reliable one used in a separate bathroom and toilet. We will only touch on points that differ from the repair of a separate bathroom.
Floor
It is better to make a floor screed using a combined self-leveling screed: a coarse viscous self-leveling floor on a cement base and a liquid plastic insulation layer over it. The cement-sand screed for the bathroom will be too thick.
You can make the work cheaper (but also more difficult) by raising the door threshold next to bricks laid flat. To avoid stumbling, you can take a small (25 cm wide is enough) ramp outside, but this means, in addition to redoing the door with a jamb, and working on the floor in the corridor or hallway. But in the case when the bathroom renovation is carried out as a general renovation, this is the best option: little work is added, and the floor in the bathroom can be done as you like.
Communications
Both linear and radial functional designs make it possible to run hydraulic communications in a bundle under the wall, covering it with a slope, as in a separate bathroom. As for the electrics, no concessions here, as in a separate toilet, are allowed: the switch and sockets are only outside; lamps and fan are waterproof.
Walls and ceiling
Here you should also abandon the moisture-resistant plasterboard suitable for a separate toilet (it is not so moisture-resistant; gypsum is gypsum) and consider only the options of tiling and finishing the ceiling with solid laminate boards without lathing. Insulation - glass-magnesite slabs, also without sheathing; They are strong enough to be installed with glue.
Plumbing cabinet
Combined wardrobe in the bathroom
There is also most likely no place for it, and you will only have to cover the niche of the riser with a removable shield made of plastic lining. Therefore, when designing pipe routing, try to hide as much as possible in a niche.
You can somehow get out, but not always, with the help of a linear-zonal design: leaving the toilet in place (possibly a wall-hung one), we extend the cabinet to the washbasin, combining the technical with the toilet, see the picture.
Conclusion
You should undertake independent repairs of a combined bathroom, having thought everything through thoroughly, having solid professional skills and working ingenuity. Particular attention should be paid to ergonomics and communications layout. The choice of plumbing fixtures must be made primarily based on their functionality: there is no room for aesthetic delights in a combined bathroom.
Summary
As you can see, renovating or creating a combined bathroom can be a troublesome task, especially if we are talking about Khrushchev. Particular attention should be paid to the ceiling of the bathroom in Khrushchev. It is rarely even, so the plane will have to be brought out. Before making a decision regarding a combined bathroom, you should definitely consult with your family members to take into account all their needs. In large apartments, the main bathroom can be combined, and the additional one, which is used for guests, can be separate.
Recommended Posts
Joint of bathtub and tiles
Finishing the toilet with plastic panels
Lighting a small bathroom
Design of a combined bathroom with shower
Interior of a small toilet
Wallpaper for toilet design
Kinds
The first thing that comes to mind for a significant number of people when they think about renovating a toilet is to use so-called washable wallpaper. It's inexpensive and practical. The printed paper base has a protective waterproof layer. Moisture-proof wallpaper does not delaminate or swell. Dust and various stains are easily removed from them.
Another option is to use synthetic-based fabrics for work. They use textile fabric glued to a foam base.
Thanks to this, all extraneous sounds are muffled in the toilet, which is very important for many apartment residents
Another thing is that the width of standard canvases is 1 meter, and this is not always convenient when renovating in such a small space as a toilet room. In addition, such wallpaper is thick, so it is unlikely that it will be possible to make the joints between the stripes completely invisible.
Vinyl wallpapers tolerate high air humidity well. Their backing can be paper, non-woven or fabric, and the top layer is polyvinyl chloride, which has a protective function. He is not afraid of even direct contact with water.
This coating is easy to clean. It does not change appearance and does not deform for years. The wallpaper sticks well to the walls. Some of their varieties are self-adhesive. So the glue is applied only to the wall, and the prepared pieces remain to be applied to the surface treated with the adhesive so that the materials quickly set. True, you will have to pay big for all the delights of such decor.
Also in the toilet they use so-called liquid wallpaper. It's something like plaster. The material is sold in the form of a powder of one color or another. It may contain various fillers:
- cotton or cellulose fibers;
- dry seaweed;
- crushed tree bark;
- mica grains.
This decor:
- lasts a very long time;
- not susceptible to moisture;
- masks the imperfections of the wall itself;
- with proper selection of shade, it visually “pushes” the walls apart.
You can also use such interesting material as glass wallpaper. They are made of glass threads, making them very durable. It is no coincidence that such finishing is also used for public restrooms with high traffic, where the mechanical impact on the walls is much greater than in an apartment toilet.
Another advantage of glass wallpaper is that not only do they not deteriorate from water, but they are also not affected by various chemicals. So you can wash fiberglass surfaces using household detergents. Considering that this material is sold in a white version, after sticking it is painted in any color (or several). In this sense, there is great scope for creativity.
Another way is to use bamboo wallpaper. The advantages of this material are that it is natural, resistant to high humidity and easy to clean. Another thing is that it is not distinguished by a variety of colors, and its texture “steals” space from a small room.
Cork wallpaper is also natural. There are materials only in wood shades - plain or with specks of different colors. For the toilet, it is better to choose a waxed finish. Thanks to this, odors are not absorbed into the cork base. It is possible to wipe this wall covering with a damp cloth.
Ceramic wallpaper is also suitable for the toilet. They are used quite rarely, since they have been on the market not so long ago and not everyone knows about them. The material combines the advantages of wallpaper and ceramics. Ceramic particles are applied to a polymer sheet. The decorative material is resistant to moisture and mechanical stress, and is distinguished by a variety of colors and textures.
Interesting decoration of the toilet room can be obtained through the use of photo wallpaper
As for their composition, it is important to choose materials that are resistant to moisture. When it comes to images, there's a huge selection to choose from, including 3D options.
Many companies offer services for printing the image that the buyer needs. Modern photo wallpapers are significantly superior in print quality to those that were presented on the market in the old days.
Completed projects
View our portfolio with photos of completed projects and customer reviews.
Project 1
Project 2
Project 3
Project 4
