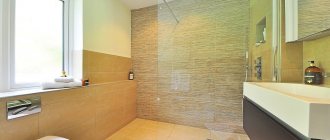
There is an opinion that the choice of finishing materials for the bathroom is limited to plastic panels, painting and tiles. New developments annually bring new moisture-resistant coatings to the market, which have become an excellent alternative to traditional tiles. Sanitizing decorative plaster in the bathroom is one of the finishing methods that “breathes” and normalizes the microclimate of wet rooms. Some varieties require additional protection from destruction by moisture, but this does not exclude plaster from the list of recommended cladding for bathrooms or toilets.
Bathroom interior with decorative plaster and decorative brick
Decorating the bathroom walls with green decorative plaster
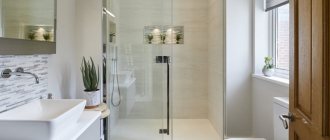
Combination of mosaic tiles in the bathroom
Types and photos
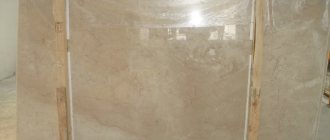
Depending on the composition, there are several types of plaster; they can be seen in the photo.
- Mineral products have sufficient strength and wear resistance. Condensation does not accumulate on the walls, since the material has sufficient vapor permeability. Mineral plaster contains cement and lime. Its disadvantage lies in its low ductility.
- In the production of acrylic plaster, small fractions of marble and glass are used. Synthetic resins are used as a binding component.
- Silicone plaster is easily applied to the surface of a concrete base. The material does not fade under the influence of ultraviolet radiation. Silicone resins provide good air exchange and protect against moisture.
Attention: On sale you can find silicate plaster that contains liquid glass. The finishing material does not allow water to pass through and prevents the formation of mold fungi
The characteristics of materials depend on the type and filler and structure.
Venetian
Multilayer coating allows you to visually enlarge the room. Venetian plaster has water-repellent properties. Natural ingredients are used in the production of the mixture. To avoid cracks, polymer additives are added to the plaster. Buyers appreciate the material for its shine, which emphasizes the luxurious appearance of the bathroom. The material can withstand significant temperature changes.
The disadvantage of Venetian plaster is the high labor intensity of finishing. The material is made on the basis of slaked lime. Microcalcite, acrylic and polymer additives are added to the mixture. The presence of ground marble in the composition creates an imitation of natural stone. The finishing material is most suitable for rooms with a small area.
Structural
The material used to make structural plaster has a granular structure. Acrylic or silicate is added to the composition as a base. When hardened, the finishing material forms a durable layer that is sufficiently waterproof.
Textured
Textured plaster has a viscous structure. Marble or granite chips are used as filler. The material contains mica and wood. Long fibers make it possible to hide large defects on the surface of the walls.
Important To apply the composition you do not need to have high qualifications.
There are several types of textured plaster:
- To create a finishing material in the “lamb” style, pebbles are added to the composition.
- “Shuba” is distinguished by a rough surface, which gives a unique look to the bathroom.
- If desired, you can create an imitation of a wooden wall eaten away by pests (“Bark beetle”). To do this, uneven grooves are created along all surfaces.
Features of decorating a toilet with your own hands
The process of plastering in a toilet is practically no different from standard technology. The difference in use is only at the final stage of work (when applying a leveling layer with waterproofing properties).
The plastering method depends on the type of decorative mixture and the design goal:
- Rough surface
. To create the necessary structure, use a foam sponge, a special roller, crumpled paper and other devices.
- Grooved texture
. The plaster base is diluted using special components that create large grooves on the wall.
- Venetian pattern
. It is one of the most complex finishing options. Several layers of high-quality plaster are applied to the wall; they can have different shades. After completion of the work, the surface is sanded and scraped. Thanks to various application methods, you can create an imitation of masonry from natural stone and other materials.
During work, you need to pay attention to the following details:
- Before applying plaster, the wall surface must be thoroughly primed. This will prevent moisture penetration and increase the strength of the material. After the first coating, allow the mixture to dry; another layer is applied immediately before finishing with plaster.
- Many experts recommend using a primer with quartz sand (at the final stage). This will increase the adhesion of the surface to the decorative mixture.
At the dacha and in a country house
The abundance of modern finishing materials allows you to create a calm, comfortable and stylish environment in a small room.
To decorate the toilet, various design options are used:
- Light colors (beige, pastel, white)
. Such plasters are well suited for small rooms. The laconic and minimalist interior can be complemented with various fittings and accessories.
- Eco-style or country
. Often used in private houses and apartments. For spacious rooms, you can use imitation wood; this design will create a feeling of warmth and comfort.
In the apartment
For small rooms, it is advisable to use plaster in light and calm tones. If desired, you can also use dark shades (for example, only on one wall). An original atmosphere in the toilet can be achieved with the help of delicate drawings; they create coziness, comfort and space. Using special tools, you can create a smooth or textured surface.
In public toilets
Various design ideas are used to decorate a room: you can visually expand the space in a room using colors, ornaments and patterns. Using bright plaster helps to visually enlarge the toilet. Horizontal patterns also visually expand the room, while vertical patterns make it visually taller.
For a public toilet, you can use various design options:
- Rich plasters (red, lemon, purple) will add a little positivity and joy, and they also visually expand the space a little. Blue and light green shades are often used to decorate a toilet: they calm and slightly refresh the room.
- For spacious rooms, you can choose bold and unusual colors (gray plaster, black elements, etc.).
- Mosaic surface in ethnic style. Gives a small room a little sparkle and chic.
To decorate the walls of the toilet, you can use various options:
- grainy texture, stains, etc.;
- glossy or matte finish;
- imitation of marble, quartz, wood, etc.
Color selection and design
When choosing a color scheme for finishing a toilet, you must proceed from the overall design of the apartment. In principle, the design of the toilet should not fall out of the overall concept. But no one will definitely change the tiles in the toilet every time after the wallpaper has been re-pasted. Therefore, neutral tones are often used - white, beige, gray. They are diluted with accessories to match the main design of the apartment. It turns out to be a universal option.
Toilet design in neutral colors is the best choice
When choosing a tone - light or dark - first of all they look at the size of the room. In most apartments the toilet is small - 2 square meters. m, maximum - 3 sq. m. This does not complicate the situation too much - such a situation occurs often, the solutions are known and worked out.
For a small toilet, light or combined tiles are more suitable. It is advisable to do the combination like this: dark bottom, light top. This division is not fashionable, but it visually makes the room much wider and more spacious. Look at the photo. The red and white toilet seems much wider than the beige ones, although in fact they are the same.
Different toilet designs of the same size
Horizontal division gives another effect: a clear edge seems to “fall apart” the walls to the sides, lowering the ceiling. In a narrow and tall room this is the desired effect. If you don’t like this toilet design - with a clear division - at all, do something similar, modifying the idea. For example, as in the photo below.
Black and beige toilet design
The idea is the same, the execution is different. The combination of black and beige is not as bright as with white, but it is more pleasing to the eye
The division is also horizontal, but it is not at the same level, and besides, the zebra tiles on the sides distract attention, also optically “pushing” the walls to the sides
Two more photo examples. In the right picture, the wall farthest from the entrance has a dark color and there is a dark stripe on the sides. Visually, the strip pushes the walls apart, but the dark far wall seems to be even further away. In this case, this is not the right decision. It will look better if this wall is lighter than the side ones.
Ways to visually make the toilet wider
The design of the toilet in a standard apartment in the photo on the left was made using several techniques. The first is a horizontal division of the far wall, which visually brings it closer. The second is vertical stripes on the side walls, which serve the same purpose: to make the room more square, at least visually.
Another way to visually make the room not so high is to lay several rows of tiles that were used on the floor on the walls. It looks good, creating the illusion of lower ceilings.
Several rows of tiles below are the same color as the floor
The vertical stripes are interesting. Manufacturers of ceramic tiles also began to produce them in collections (like wallpaper) to make it easier to combine. All of their elements go well together, you just need to decide how many different types you will use - two, three or four. Some options for finishing the toilet with ceramic tiles can be seen in the photo.
As you understand, it is impossible to imagine all the toilet design options. There are too many options and variations, but we have outlined the main trends and methods.
Types of decorative plaster
Among the main types of plaster for bathrooms there are several types:
- sanitizing - mixtures that do not require waterproofing of walls, they are based exclusively on environmentally friendly components, by the way, the composition is also applied without the help of reinforced mesh, and therefore this type of plaster is an almost ideal option, ready to compete with traditional tiles;
- • “Rotband” mixtures – created specifically for rooms with high moisture, they provide reliable protection from both humidity and fungus, in addition, this option seems to be the cheapest compared to others;
- facade - this type of plaster is based on a cement-sand mixture; in addition to water-repellent properties, it has high mechanical strength of surfaces, and therefore is recommended for finishing bathrooms and shower rooms that are visited by a large number of people
Thus, we can summarize that for finishing a bathroom it is necessary to use only moisture-resistant mixtures, the basis of which is cement or gypsum, since another type of plaster will simply begin to peel off from the walls, and immediately after using the room for its intended purpose.
Main advantages
In addition to the fact that this type of finishing creates spectacular relief surfaces, it also has a number of other equally important advantages:
- vapor permeability is one of the most important advantages, especially in relation to bathrooms, where humidity is significantly increased;
- a favorable microclimate that prevents the development of fungus - this occurs due to good vapor permeability;
- no fogging of mirrors and glass - this effect is achieved due to the good absorbent properties of the finish, i.e. excess moisture is absorbed
Plastic for the bathroom
Economical toilet repair options involve the use of plastic or PVC panels. The main advantages of this method include the durability of the coating, moisture resistance, light weight, and ease of installation. The disadvantage is that plastic panels break very easily, so the walls must be protected from impacts.
Plastic colors can be varied. When starting to install it, you need to decide whether you will attach the panels using screws, glue, or make a grille that is attached to the wall.
The installation process of plastic or PVC panels is simple and looks like this:
- They begin to be attached from the far corner.
- Install horizontal guides or drill holes for self-tapping screws.
- Now the panels can be fastened using one of the selected methods.
- Corner gaps are masked using profile edging or corners.
If there is a heating radiator in the room, it is necessary to provide a gap of at least 3-4 cm between it and the panel.
Finishing methods
The technology for finishing bathroom walls using plastering is practically no different from conventional finishing of interior walls, with perhaps some exceptions. And these differences exist only at the final stage, at the moment when the final decorative layer of plaster is applied to the rough layer and waterproofing. And to form this layer, the following methods of applying the mixture are used:
- uniformly rough - the method is carried out using a broom sponge or using a crumpled newspaper placed in a plastic bag, using these items to create a relief reminiscent of “goose bumps” on the surface of wet plaster;
- grooved-rough - the technique is carried out thanks to a special “bark beetle” finish, as well as a regular grater in order to smooth the finishing layer, the direct process of forming a grooved relief is realized after applying a special plaster with coarse-grained elements that form grooves after horizontal or vertical smoothing with a grater;
- grooved - the method is carried out using a special template or the most ordinary spatula by pressing the relief on the surface of the wet layer, the method allows you to create an imitation of brick or stone masonry;
- Venetian - the technique is carried out by layer-by-layer application of special mixtures with different shades, after which repeated grouting is performed, as well as scraping off the layers, this method helps to create an excellent imitation of natural stone masonry, however, it is worth noting that this is the most difficult option
In addition to all the listed technologies for creating relief, there is another option - the plastered wall can simply be painted using commercially available “store stencils” and, thus, create a unique decorative plaster in the bathroom.
Design ideas
This method is used to create antique and ethno-styles. Thanks to its elasticity, plaster allows you to create any relief that will highlight any style. Also, with this coating you can rub over the walls in some places, creating the characteristic features of the Provence and shabby chic trends.
The smooth type is also widely known to be used. It is characteristic of both modern and antique styles. It can be used to successfully imitate granite or marble. This allows you to significantly save money and create a beautiful design.
Using decorative plaster you can create any relief
Decorative plaster goes well with many interior styles
Decorative plaster goes well with other materials. It can be used to create wall decor together with tiles, wood or natural stone.
So, today we found out that decorative plaster is quite suitable for use in the bathroom. There are many varieties of it and you need to be careful when choosing. Don’t forget about proper care: periodically wipe damp walls with a dry cloth and clean with special products.
Ceramics for the bathroom
The classic method is to finish the toilet with tiles, for example, ceramic. This method has always been the most popular and acceptable. This is not surprising; tiles have many advantages over other materials. During operation, it is quite hygienic; dirt does not accumulate on its surface. And it can be cleaned very easily by treating the walls with disinfectants.
Ceramic tiles are very durable, especially compared to other finishing materials, which will deteriorate much faster and require replacement. The options for tiles in the toilet are varied. It can have different sizes and colors. Tiles with patterns and borders, as well as ready-made panels, are available for sale.
Laying tiles is a labor-intensive process, and sometimes you can’t do it without the help of a professional. This requires experience and a well-trained hand. Accuracy in this matter is key, especially when working with expensive types of tiles. If you still decide to lay the tiles yourself, then you need to do this in several stages:
- The walls are leveled using plaster.
- Prime with a moisture-resistant composition.
- The adhesive is applied and the tiles are fixed to the wall; the evenness of the laying is controlled by a level.
Using different options for laying tiles in the toilet, you can expand a narrow room, making it wider, or raise the ceiling if it is low. To get the desired effect, tiles are laid in different directions.
How to make a rough “bark beetle” coating yourself
In order to give the plaster unevenness and grooves, you need to add hard small granules, 1.5-2.5 mm in size, to the composition. The application process is as follows:
- A base layer of plaster is applied to a flat wall, leveling it well.
- Then a mixture with granules is applied on top of it in a thin layer. Creating a “bark beetle” relief
- After the solution begins to dry, it is leveled with a construction float. In this case, the granules scratch the surface, forming chaotic grooves. The movement of the hands creates a certain pattern. By changing directions, you get a completely different pattern.
Advice! If you did not add color to the plaster in advance, then after drying the finished wall can be coated with paint.
How to choose?
A large assortment of dry compositions for plastering bathrooms makes it difficult to choose
To buy a quality product with optimal performance characteristics, it is important to consider several nuances
Experienced finishers advise giving preference to cement-sand mortars. It is best that they do not contain lime. This component increases the drying speed and plasticity of the finished solution, but at the same time reduces the waterproofing properties.
It is advisable to avoid using gypsum plasters. The fact is that gypsum is able to quickly absorb moisture, and even various additives are not able to solve this problem. Gypsum plaster in a bathroom will deteriorate faster during use than sand-cement plaster.
You also need to pay attention to the information from the manufacturer indicated on the product packaging. The dry mixture must be moisture resistant
You should study what substrates the composition is suitable for and whether it can be used for subsequent installation of tiles
It is important to check the expiration dates of products. There are times when there is an expired product on the shelves or the expiration date is coming to an end.
You should purchase fresh mixtures, since old ones lose their performance qualities.
Advantages and disadvantages of coating
It should be noted that modern production of decorative plaster has reached such a high level that the coating can not only come into contact with moisture contained in the air, but also directly withstand exposure to the surface of water, which is a significant advantage. This ability is determined by the creation of an acrylic-based material in combination with special additives. It should be noted that even with constant contact with water, the coating does not lose its color, and in general does not change its original appearance and basic characteristics.
It should also be noted that decorative plaster for the bathroom has a number of other advantages:
- Quite a high level of vapor permeability. A distinctive feature of decorative plaster, compared with the most commonly found tiles, is the high level of moisture absorption when the room is oversaturated, and its return when there is a shortage (an ability similar to plasterboard). As a result, with this finishing option we get a surface that “breathes”, while regulating the microclimate of the room, keeping it at a stable level.
- The second significant advantage is ease of maintenance and operation. Modern materials, unlike their predecessors, are far from being so delicate, which allows them to withstand cleaning even with the use of household chemicals and various types of sponges if severe contamination occurs. But at the same time, it should be noted that most materials have an antistatic effect; to put it more clearly, the coating itself repels dirt, as a result of which it always remains clean.
- And last but not least is the possibility of creating a unique interior, which cannot be said about tiles. Decorative plaster in the bathroom allows you to recreate almost any of your imagination, imitate the look of a coating made of any material, or create a real picture on your wall. Of course, the result of the work depends directly on the master who performs it. Therefore, it is not recommended to carry out such finishing on your own, without any experience.
We should not forget about the unique opportunity to create a rather rich interior and an absolutely individual appearance of the room, but for this you will have to try a little and provide the necessary conditions for the work.
Basics of decorative plaster
Decorative plaster for wet rooms can have almost any base, except, perhaps, gypsum. After all, this material absorbs water well and is intended exclusively for dry rooms. Among the most common options for waterproof plaster are:
- acrylic;
- mineral;
- silicone.
Mineral, for example, is a classic of the genre, and it is used even in the process of facade work.
Silicone plaster
This waterproof decorative plaster for the bathroom combines the characteristics of silicate and acrylic mixtures. Among the most common advantages are:
- high adhesion;
- preservation of structure and color;
- resistance to negative factors;
- vapor permeability.
The composition is not a favorable environment for the formation and development of mold and mildew. With this mixture you can get incredible textured effects, for example: lamb, fur coat, bark beetle. Using a silicone composition, you can finish walls in imitation of marble, granite, and natural materials. Fillers may include grains of different fractions, which are used to create certain effects. The material is very elastic, safe for health and economical. It is easy to apply, and in the process of finishing the walls, the master has the opportunity to avoid material waste. This result can be achieved if the wall is properly prepared.
Mineral plaster
This decorative material, in addition to moisture-resistant characteristics, also has fast setting. Final polymerization occurs 2 days after application, and initial setting occurs within 20 minutes. Since application work is recommended to be carried out in a short time, this speeds up the repair process.
An additional advantage of the material is its high strength, which distinguishes this finish from other types of class. An amazing fact is that the porous structure of the surface repels moisture, and its impact does not deteriorate the characteristics; on the contrary, strength, for example, only increases. This moisture-resistant decorative plaster can additionally insulate walls without blocking the passage of air through the layer. When using acrylic mixtures, such effects cannot be achieved.
Polymer plaster
Polymer plaster, which has the following characteristics, is also suitable for the bathroom:
- impact resistance;
- water resistance;
- plastic;
- vapor permeability.
The material has good adhesion to different surfaces, and some types can even be applied to metal or wooden surfaces. The composition is environmentally friendly. It can be sold dry. This is convenient if the finishing area is not too large, and you can mix as much mortar as necessary without running into excess material consumption. And after some time, the liquid version of the mixture simply has to be disposed of if not used on time.
Silicate decorative plaster
Bathroom walls finished with this mixture will also not lose their ability to breathe. The layer will be vapor permeable, fireproof and dirt-repellent. The material will be resistant to negative factors, which means that operation can be carried out not only in high humidity, but also in sudden temperature changes, which is typical for bathrooms.
This composition is elastic, remains resistant to cracking after drying, and can be applied to various substrates, including mineral and limestone. Old silicate coatings are also suitable as a base surface.
Requirements for plaster mixtures
All materials used in the bathroom must be highly resistant to moisture. This is especially true for plaster mortars, since they are the basis for finishing. If the plaster becomes saturated with moisture and swells, the tiles will begin to fall off and the paint will peel and crack. To eliminate such defects, new repairs will be required, and this is an additional expense, and quite significant. The same applies to decorative plaster: low water resistance will lead to swelling and peeling of the finishing layer.
Decorative plaster for the bathroom
The second condition is resistance to microorganisms. Moisture and heat promote the appearance of fungi, which penetrate into the smallest cracks and crevices. Fungi not only spoil the aesthetic appearance, they are also very harmful to humans. That is why the plaster composition must have strength, resistance to shrinkage and cracking, as well as antiseptic properties. Ready-made mixtures for plastering bathrooms fully meet these requirements.
Moisture resistant plaster
Decorative plaster must additionally have good density and resistance to abrasion. Dirty deposits, dust, and soap suds easily penetrate porous surfaces, and in order to clean everything, you have to frequently wash and wipe the walls. Incorrectly selected plaster under such conditions will quickly lose its attractiveness and begin to wash out and crumble.
Decorative plaster
Photos of toilets in an apartment of unusual design
Let's start with the practical component. In many apartments, the technical rooms are so small that it is very difficult to find a place for a washing machine. First of all, this applies to Khrushchev-era buildings, but other typical high-rise buildings rarely indulge in spaciousness. If this is your case, you can try installing a washing machine in the toilet. There are two options - find a special machine - as in the photo on the left, or install it in a specially made niche covering the pipes. Only the base is required to be powerful, and the machine to have a minimum level of vibration.
Where to install a washing machine in the toilet
Now let's move on to the design delights. Let's start with the floor. In recent years, self-leveling floors have become fashionable, and they can be made with a 3D effect.
The pattern in self-leveling floors can be anything
The image on the floor can be anything, without restrictions. This is a haven for lovers of non-standard solutions and extreme sports...even if only in the toilet.
Photo printing can also be done on walls. Images are transferred onto ceramics with photographic precision. As a result, you can feel like you are on top of a mountain before the start of a ski competition, for example...
Feel like a skier...
There are some pretty weird tile collections out there. For example, in the form of windows of high-rise buildings. It looks interesting, but how comfortable you can feel in such a place is the question...
And if desired, even ordinary finishing materials can be arranged in such a way that you get a masterpiece toilet design.
How to join materials
Docking is a separate task, and the difficulty is not only in the mismatch of thickness and textures. Since the coverings are heterogeneous, the place where they meet looks rather uncultured.
Docking methods:
- Close the joint with a connecting profile. Or, if the plaster is laid out as a wall panel, frame it with molding around the perimeter.
- Deepen the areas for tiling by 10-15 mm, calculating the layer of glue so that the tile is flush with the plane of the decorative plaster.
- Cover the plaster with overlapping tiles. One end will remain open.
- Grind down the edge of the tile at an angle of 45°. This connection is more accurate than the previous one, but takes longer to make.
Sometimes a joint that is not designed at all turns out to be beautiful. The uneven edge of the plastered part of the wall can coexist with the ornament on the tile, and the combination will turn out to be unusual.
Combination with mosaic
When choosing a material for finishing, you can pay attention to mosaic plaster. The solution consists of natural ingredients
It contains:
- marble chips;
- glue;
- tree resin;
- sand.
The appearance of the coating resembles marble or granite. This material emphasizes the luxurious look of the bathroom. Mosaic plaster is sold in the form of a thick solution that can be immediately applied to the walls. There are dry mixtures that need to be diluted with water in a certain proportion.
For interior decoration, compositions are used in which the size of the granules is 0.3-3 mm. The material is resistant to temperature changes and moisture.
If necessary, it can be washed with ordinary soapy water. Mosaic plaster can be easily applied to any surface. The coating allows air to pass through well. High vapor permeability avoids the formation of condensation.
Room design options
Due to the wide possibilities of this decorative finish, it is possible to achieve a flawless and aesthetic surface, which will not only serve to create an exclusive environment, but will also retain its appearance for many years.
- Marbled.
- Under concrete.
- Silk.
- Colored.
- Combination with tiles.
The photo shows decorative black marble plaster in the bathroom.
Plaster is an alternative to expensive analogues, for example, gems or other natural minerals. Finishing with such a texture will give the bathroom a unique unique character.
The photo shows the interior of a classic bathroom with plaster combined with tiles.
Is it possible to use decorative plaster in the bathroom?
Bathroom plaster must be moisture resistant. Then using this decorative material in difficult operating conditions is not only permissible, but also recommended. And if you also use one of the many application techniques, you can achieve interesting effects, create a unique relief on the wall and paint the cladding with structural paint, which will turn the walls into a real work of art.
To prevent a damp room from becoming a place where the finishing cannot withstand the onslaught of moisture and condensation, when choosing decorative plaster you should pay attention to the purpose of the material. Among its characteristics you should look for moisture resistance properties
Is it possible to use decorative material to decorate bathroom walls?
Textured plaster for the bathroom is an alternative cladding method compared to the outdated tile sticker.
This option has recently begun to be used in rooms with high humidity. The performance properties of the material allowed the coating to occupy the top positions in the list of decorative finishes for rooms with a similar microclimate. The base layer is selected taking into account the composition of the masonry wall blocks, and the finishing mixture includes coloring substances and elements that form a textured surface.
Advantages of finishing with plaster:
- the impossibility of repeating the pattern even when using the same composition;
- to create a textured surface, a little skill is enough;
- the walls are easy to wash if they get dirty;
- wear-resistant plaster will not lose its appearance during use;
- safety of the mixture, which does not release toxins;
- increased vapor permeability provides the necessary microclimate in the bathroom.
Technology of applying decorative plaster
Finishing a bathroom with plaster does not require preliminary leveling of the walls, because plastering allows for small defects. But the material consumption is greater.
How high-quality the finishing of a bathroom or toilet with decorative plaster will be depends on:
- compliance with the instructions supplied with the finishing material (usually the information is indicated on the packaging);
- how well the walls were treated before applying the composition.
Surfaces can be plastered at temperatures from +5°C to +35°C and humidity not exceeding 60%. There should be no drafts, and the wiring should be de-energized. In addition, the prepared solution has an expiration date and cannot be stored. Therefore, you need to prepare the solution in a certain volume (as much as is needed at the moment).
Application of decorative plaster
Required Tools
To apply the decorative mixture in the bathroom, you will need:
- trowel;
- masking tape;
- construction mixer;
- rollers;
- spatulas of different sizes;
- brushes;
- graters;
- containers.
To create a beautiful relief on the surface, you will need other available tools, for example, various stamps.
Spatulas
Preparing to apply the solution
Before applying the plaster, the surface of the base must be prepared:
- Remove unevenness by clearing the cracks from the old putty and covering them with cement mortar.
- Drill holes up to 5 mm deep in the brick wall for better adhesion to the plaster.
- On a smooth wall you need to make small notches and cover it with a primer containing an antiseptic.
The packaging of the mixture usually describes the preparation technology and proportions. It is better to stir the solution with a special construction mixer or a drill with an attachment.
Preparing the wall
Applying plaster
There are several ways to apply the composition:
- spray with a trowel;
- anointing;
- hand sticking;
- knurling using a roller.
If the plaster layer is thicker than 0.5 cm, then the mixture must be applied in several stages.
Plaster application process
Stage 1 - Splash
Wet the wall and, with sharp movements, using a trowel, apply a layer of plaster 0.5 cm thick. It does not need to be leveled. On a wooden surface the layer should be 0.9 cm.
Stage 2 - Base Layer
The mixture is spread on the wall with a spatula, after which it is leveled with a rule. The result should be a perfectly flat surface. The thickness of the base coat is from 4 to 7 mm.
Stage 3 - Finishing layer (decorative)
The topcoat can only be applied after the base coat has hardened. Before applying the decorative layer, the hardened base must be moistened.
The decorative coating is applied with a spatula at an angle of approximately 15-20 degrees. The layer should be thin; images and relief can be created before the plaster is completely dry. After the topcoat has set (but not completely hardened), the protruding areas are leveled with a trowel.
How the pattern turns out depends on the method of applying the plaster, and not on its composition. There are many devices and ways to create texture in the form of waves, circles, scales, ornaments, horizontal or vertical grooves.
Coating with paint or varnish makes it possible to make the surface waterproof. Acrylic or silicone paint is suitable for the bathroom. Painting is carried out only after the plaster has completely dried.
The finishing layer is decorative. It will take 2-3 days for it to dry completely. Do not use the bathroom during this time, otherwise the coating may fall off.
Decorative layer
Preparation process
All of the above methods are implemented only on a previously prepared surface. How to prepare it? You just need to do the following:
- clean the bathroom walls of old plaster, whitewash, tiles or other unnecessary elements that impede access to the concrete or brick base;
- cover all existing cracks, chips and holes with cement-sand mortar, and mount metal beacons on a clean wall surface;
- throw a layer of starting solution, representing waterproofing, along the beacons
As a result of all these actions, a new wall is obtained that has an ideal, even shape.
Then you can move on to creating a clean layer, which represents the basis for the new relief. And to do this you need to do the following:
- prepare a solution of finishing plaster;
- throw it onto the hardened starting layer, then level it with a spatula;
- if it is necessary to form a new relief, in this case the grouting step with a trowel can be skipped;
- without waiting for the final hardening of the plaster, start making decorative relief
Today's construction market simply offers an abundance of dry plaster mixtures containing plasticizers and various additives, which provides them with great advantages over conventional cement plaster, namely: they are much easier to apply, dry faster, do not shrink, and are a more durable material that does not cracks on the surface.
Moisture-resistant decorative plasters: manufacturers and features
Among other manufacturers whose decorative plasters are offered for sale, we should highlight VGT and its textured mixture Gallery, for which you will have to pay 1,500 rubles. The consumer will receive an 18 kg bucket. This decorative plaster is a highly viscous coarse dispersion mixture for obtaining a relief coating. Application can be carried out on different types of surfaces:
- plastered;
- brick;
- concrete.
Among the main features of the mixture, it should be noted that careful preparation of the surface is not required, and the mixture itself is capable of hiding even large defects in the walls.
Another manufacturer of plaster compositions is Weber. Her Pas Extraclean mixture with a fur coat effect can be purchased for 3,200 rubles. Its main characteristics of the composition are readiness for use, versatility and the ability to apply not only to internal but also external walls.
An alternative and cheaper option for decorative plaster is Litotherm Factura from the manufacturer Litokol. This is a dry powder, for 25 kg of which you will have to pay 630 rubles. The mixture is white in color, suitable not only for wet but also dry rooms, and remains viable for 90 minutes. This suggests that plaster is suitable for novice craftsmen who do not have much experience in the field of construction and repair.
The use of factory-made plaster mixtures
Ceresit CR 65. Cement waterproofing mass
Plastering with purchased mixtures has some differences. They have higher adhesive properties, so there is no need to spray. The working surface is prepared in the same way, and after the primer has dried, kneading is done. To prepare the solution, you only need a container of a suitable size, clean water, dry mixture and a construction mixer. No cement or sand needs to be added. The proportions for mixing are indicated on the bag with the plaster composition.
Knauf Rotband
Pour the required amount of water into the container, add the powder and mix everything with a mixer at low speed for several minutes. Then the solution is allowed to stand for 5-7 minutes and stirred again. Now it is ready to be applied. Further actions are performed as described above.
Photo of mixing Rotband mixture
It’s even easier to work with ready-made plasters, which are sold in buckets. You don’t need to add or mix anything to them; you can get to work right away. The only negative is that the entire volume must be used up within the time specified in the manufacturer’s instructions, otherwise the composition will harden and become unusable.
Plaster Ceresit
Plaster consistency
Application algorithm
Following the instructions for working with the material and preparing the surface is the key to a high-quality application of the plaster layer. Before starting work, check that certain conditions are met:
- the room temperature should be from 5 to 35 degrees Celsius;
- moisture content in the air – not higher than 60%;
- electrical wiring must be de-energized;
- drafts are not allowed.
Surface preparation
The wall is thoroughly cleaned and prepared for applying the plaster solution. The work is carried out in several stages:
- The old coating is removed from the wall. If repairs are being carried out in a new building, the brickwork is cleaned with brushes with metal bristles, the seams are deepened to one centimeter, and notches are applied to the concrete surface;
- dust is removed with a damp cloth or vacuum cleaner;
- stains of mold and mildew are scraped off, these places are treated with a disinfectant composition;
- rusty, greasy and oil stains are covered with special solutions and cleaned off. If the stain is not removed, the layer of wall material is cut down;
- efflorescence is being eliminated;
- metal elements are removed. If this is not possible, they are coated with paint or an insulating agent;
- all protruding areas and bumps are trimmed off, cracks are sealed with cement mortar, and a reinforcing mesh is applied to large cracks and brittle surfaces;
- the surfaces of the walls are coated twice with a primer mixture;
- if necessary, apply a layer of waterproofing compound;
- if the surface has not been leveled with cement, it is putty.
Mortar coating
Textured plasters are applied in one or several stages - their quantity is determined by the final decorative effect. For example, under the Venetian and some other types, a base base with a thickness equal to the size of the filler is installed. If you plan to apply patterns with figured rollers, plaster the walls in one thick layer.
The solution is applied to the wall surface in several ways:
- spraying with ladles or trowels:
- spreading using trowels and spatulas;
- trimming with a brush;
- sticking by hand;
- rolling with rollers.
Relief creation
Several methods are used to form a relief surface:
- roll the wall with a figured roller, stamp or matrix;
- press down with trowels, nets or other objects at hand;
- using tools, they make furrows using linear or circular movements. To do this, use a spatula, comb or brush with hard bristles;
- The top layer of material is glued to the tool and, lifting, it is partially displaced. This method of finishing is called Versailles;
- use different brush stroke techniques;
- use stencils;
- cut out or cut through patterns;
- perform special rolling of coarse filler.
Is it possible to use multiple options? Quite, since this allows you to create designs that are unusual in their uniqueness.
The final stage
Although decorative plaster compositions are considered resistant to the negative effects of a humid environment, for additional reliability they are coated with varnish or coloring compounds that create a moisture-proof film.
Recommendations from experts
Whatever plaster you use, you can only use a solution that resists moisture, steam, and temperature changes well. However, there are still some pitfalls that complicate the decoration and operation of the shower room. Some tips will help you avoid them. Recommendations:
- To prepare the mixture, use water without impurities at room temperature. The solution must be mixed by sprinkling dry powder into water, stirring it constantly.
- The composition must have a certain thickness, based on the required layer thickness.
- When mixing the solution, you need to understand that this amount must be applied in about 25-30 minutes, otherwise the composition will harden.
- When plastering walls and bricks, you should fill the joints, smooth out defects and irregularities, and then apply the solution to the prepared surface.
Decorative plaster in the bathroom: application features
There are not many main features of applying decorative plaster in the bathroom. But still enough to tinker with. Although there are theoretically no distinctive features compared to other rooms. In total, the following factors must be highlighted during the application process.
Carrying out priming
Initially, before starting to apply decorative plaster in the bathroom, it is necessary to completely prime the surface. In this case, it is necessary to provide a primer of at least 2-3 layers, since in this situation it serves not only as a bonding layer, but also improves the waterproofing of the coating.
Initially, a generous primer is applied, after which the composition must dry completely. Next, apply a second layer, which serves as an additional layer and helps to completely remove dust. If two layers are provided, the last one is applied immediately before starting plastering. When planning to apply three coats, the second is also given time to dry, after which the third is applied and the plastering process begins. It should be noted that the type of primer itself becomes a very important factor; most often a composition with the addition of quartz sand is used. Such a primer, in turn, increases surface adhesion several times.
Application method
It should be noted that the application method itself is slightly different from the standard one. When applying the composition, it is first distributed over the wall in a layer of the required thickness. Afterwards, while distribution is taking place, the decorative plaster in the bathroom, at the starting point, begins to dry out a little. At this point, careful compaction is provided, which is carried out by grouting the solution. The process itself is performed using a falcon made of stainless steel. In common parlance, such a process is called ironing.
Drying
And the last feature is drying control, which is carried out throughout the entire process, directly for the complete drying of the decorative plaster. Typically, the initial setting process itself takes place within 3 hours, in some cases the time can increase up to 5 hours, depending on the thickness of the layer and the type of plaster. But the fact that the material has set does not mean that the entire surface has acquired the properties it needs.
Typically, the full acquisition of operational characteristics takes place within at least three days, and this is only an initial period, after which the bathroom can be used.
It should be noted that for greater reliability, in order to avoid deformation or even falling off of the coating, it is better to keep the decorative plaster in the bathroom for at least a week, without additional exposure to external factors. It is during this period of time that the polymerization process is usually completed and, accordingly, the coating acquires the necessary properties.
Finishing a bathtub with decorative plaster photo
As you can see, the statements of people who do not know all the features about the unacceptability of decorative plaster in the bathroom are erroneous. Considering all the advantages of modern material, one can even say that in some cases it copes with the tasks even better than the usual ceramic tiles. Especially if the entire finishing process is carried out correctly, then in terms of service life, decorative plaster in the bathroom is in no way inferior to tiles. And for a better understanding, we bring to your attention a video on how to finish a bathroom with decorative plaster.
What type of bathroom decorations can you choose?
Plaster in the bathroom is often exposed to aggressive influences. In a room where the temperature and humidity levels change, only waterproof finishes are used.
When choosing a coating, you should consider the following nuances:
- Plaster mixtures are produced ready-to-use and dry; they are convenient to work with because they are easy to dilute to the required consistency.
- Applying a composition with large-sized decorative elements requires experience in wall cladding or the involvement of a professional.
- Water-based decorative coating is not suitable for the bathroom. The plastered surface will not be able to resist external damage without waxing, and when applying varnish, vapor permeability will disappear.
Decorating a bathroom with decorative plaster depends on the personal preferences of the owner.
Flock, stone and mosaic compositions are not suitable for wall decoration. It is also better to refrain from covering bark beetles, because the grooves create conditions for mold to appear.
Textured, thin-layer and structural coatings that do not reduce space and are easy to clean correspond to a humid microclimate.
Textured
This type of plaster is suitable for rooms with an unfavorable microclimate: high humidity and changes in temperature. The cladding is resistant to aggressive elements and mechanical stress.
It is a multicomponent composition that contains:
- natural fibers;
- stone particles;
- mineral chips.
The fillers included in plaster help create different textures. A relief surface is obtained after applying the composition.
Venetian
This mixture is distinguished by its decorative and performance qualities. The composition includes slaked lime, the base is supplemented with acrylic resins, pigments and mineral particles. Marble inclusions in the material provide an imitation of natural stone. Microcalcite in the plaster is replaced with quartz or granite dust.
Venetian cladding looks impressive on walls, visually expands the space of bathrooms and gives additional depth. Imitations of light yellow onyx look warm. After drying, it is recommended to cover the multi-layer coating with wax.
Structural
This plaster should not create a strong volume indoors. The “wet silk” coating, which is applied in a thin layer, looks interesting. Imitation of patina on travertine masonry will suit the design of a spacious bathroom with copper fixtures and antique furniture.
Sanitizing
The composition creates a waterproofing layer and prevents the release of sulfate and other salts. This quality distinguishes the mixture from other cement-sand based plasters.
The protective effect manifests itself as follows:
- moisture from the load-bearing wall is directed to the porous layer, in which sulfate salts are retained;
- the liquid is removed through micropores of the second composition;
- The last layer of plaster dries and creates a film that limits the penetration of moisture into the room.
This type of cladding levels the surface and forms a decorative coating. Suitable for bathrooms and toilets. The plaster consists of several components: first a layer of base primer is applied, the next is a sanitizing layer, on top of which the finishing composition is applied. The room can be decorated in any style and color. There is no need to coat the walls with varnishes or additional mixtures.
Facade
This type of plaster is rarely used when renovating a bathroom. The rough structure of the coating is only suitable for some interior styles. The compositions are used for the design of external facades, and not internal ceilings.
The advantages of the mixture include:
- high strength - the decorative finish will not be damaged as a result of mechanical stress;
- long service life of the material - will allow you to maintain the finish until a new renovation;
- Possibility of use outdoors - moisture-resistant plaster can easily withstand the effects of steam, drops of water and elevated temperatures.
Plaster
The main binder in this plaster does not tolerate use in humid microclimates. This is a possible, but not the best option for finishing work in the bathroom. The environmentally friendly material is used to decorate interior walls that require leveling. The solution is applied without prior puttying in a thick layer. The presence of special additives in gypsum plaster ensures adhesion to any substrate. It is recommended to use it as a starting coating, on top of which a decorative layer is applied.
Cement
Plaster based on this material creates a strong, durable layer that is insensitive to high humidity, temperature changes, and mechanical stress. A composition that contains binders and antiseptic additives is suitable for bathrooms.
Moroccan plaster in the bathroom
This type of plaster is rarely used for wall cladding in bathrooms. In the East, where the coating appeared, the mixture was used for interior decoration of palaces. The coating was applied to surfaces that were often in contact with water. The plaster is suitable for finishing cladding of sanitary rooms. The classic application technique is labor-intensive and expensive, but the luxurious and unusual design is worth the investment.