Painting the walls
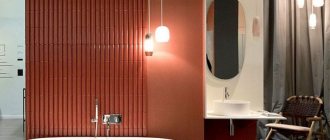
Some people still associate painting walls with creepy oil paint that peels off in chunks over time. But current materials have stepped far forward in their performance properties, and many designers use paint in their projects.
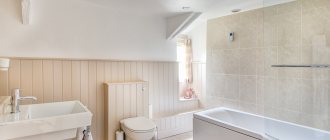
This is especially true if you want to save money on renovations: the shower area should be tiled, creating a bright accent, and the remaining areas should be painted. The material provides a wide field for creativity, and also allows you to decorate the bathroom in any shade and change its appearance in a couple of days.
Alkyd enamel is suitable for painting; it will form a film and protect the walls from moisture. Another good option is water-dispersed compositions, which are almost odorless. They dry quickly, but are not resistant to abrasives and washing with hard brushes.
Stylish cheap renovation
If you decide to make a simple and cheap, but stylish renovation, consider the following:
- Do everything yourself, don't hire workers.
- Buy inexpensive but high-quality material.
- Don't buy wallpaper, panels or paint at the first store you come across. Monitor prices, call several sellers - the task is to choose the best price-quality ratio.
Remember that self-repair requires time and effort, so it must be done for 5-7 years. Before you begin, evaluate your design ideas and allocated budget.
Budget version of flooring
A feature of the bathroom is poor ventilation and high humidity. Therefore, the floor covering should be given attention. The finishing material must be resistant to mechanical wear and aggressive damp environments.
The floor is under high load, so it is better to lay tiles. Its area is small and it requires little material. To save money, you can purchase items from last year's collection.
If you decide to do without tiles, use linoleum. There is no need to remove the old coating to install it.
Budget plumbing options
The biggest expense in the bathroom and toilet is the purchase of new plumbing fixtures.
But you don’t have to buy a new bathtub—you can renovate your old one. The unsuitable coating is replaced using self-leveling acrylic, acrylic liner or enamel.
After restoration, the bathtub looks like new, and a lot of money is saved. If repairs fail, consider purchasing an affordable analogue; an economy class shower cabin is also suitable.
An affordable option is a smaller acrylic bathtub, because the price is determined by the dimensions of the product.
You can also assemble the shower cabin yourself - you need to buy a shower tray, plumbing fixtures and curtains. You choose the appearance and dimensions of the cabin yourself.
Walls and ceiling
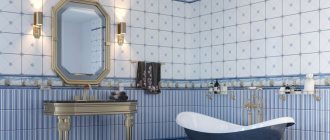
An expensive, but high-quality and long-lasting material is ceramic tiles. For major repairs, it is better to choose it. When buying branded products, you pay for the name.
For affordable repairs, give preference to high-quality and inexpensive analogues; even materials from Chinese manufacturers in the mid-price category are suitable.
Other design options are painting, PVC panels or wallpaper. Before applying a new coating, you need to prepare the walls - dismantle the old paint, wallpaper, panels. You cannot lay new tiles on the floor without removing the old covering.
When choosing PVC panels for walls, you should purchase fasteners and a frame. They are easy to assemble and are not exposed to moisture and mold. But the main disadvantage is easy breakage and fragility even with a slight impact.
When gluing wallpaper, keep in mind that the walls must be free of chips and unevenness. The wallpaper is easy to glue, dries quickly, and comes in many colors and shades. But they are fragile, prone to damage - it is easy to tear or scratch such material.
A simple ceiling finishing for cosmetic repairs is the application of water emulsion or whitewash. It is suitable for flat surfaces.
For uneven ceilings, tile joints, wires, passing pipes, suspended ceilings are optimal. They hide all defects and imperfections and look aesthetically pleasing. Such ceilings are made from plastic, are easy to install, and are inexpensive.
Wall panels instead of tiles
The range of modern panels for bathroom decoration is so rich that choosing them will not be difficult. The simplest and cheapest option is PVC, higher quality and more expensive is MDF. PVC panels are long sheets of plastic with internal perforations and an external pattern. They can be matte, glossy, imitate stone, wood, tiles and mosaics, or have a neutral shade.
PVC panels can be installed without the help of specialists and are easy to clean. Goes well with coloring. To install the panels, you need to attach a frame made of wood, metal or plastic to the facing wall, purchase a special fastening solution, primer, sealant and corners.
Floor
The most budget-friendly way to improve the floor is to lay high-quality linoleum. It does not allow moisture to pass through and is easy to install. But if the floor tiles are in good condition, you can coat them with special paint with polymers, and put a rug on top so that the coating does not wear out.
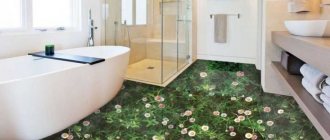
More impressive and relatively inexpensive options are flooring made of mosaic tiles (you can find cheap ones) or pebbles. The second method will bring uniqueness and natural motifs to the interior. Pebbles are easy to install, but the floor from them turns out to be quite hard, like on a pebble beach. The advantage of this coating is the massage effect.
Wallpaper or self-adhesive
Another way to save your family budget is to use moisture-resistant wallpaper instead of tiles, avoiding wet areas. This material allows you to make the bathroom more “livable” and cozy, great for recreating a classic style, as well as country and contemporary. In any case, beautiful wallpaper will add character to the room and surprise guests.
When choosing wallpaper, you should give preference to canvases that are marked with three waves and a brush. The optimal solution is vinyl, which masks wall imperfections and is easy to clean. By decorating your bathroom with wallpaper, you will save money and time: unlike tiles, they are cheaper, and the installation takes no more than two days.
Another option: self-adhesive film. It has a wide selection of colors, and its back side already contains glue. The front side consists of a pattern with a polymer coating that protects the material from moisture.
Before pasting the walls, they must be degreased and carefully leveled, since the film does not hide, but often emphasizes, defects. Another advantage of self-adhesive film is quick “commissioning”, since you do not need to wait for the glue to dry. The material is easy to care for - just wipe with a damp cloth.
Sheathing using frame technology
A more familiar and common option is finishing the bathroom with plastic panels and constructing a frame. This allows you to fix the cladding without first leveling the walls, and also to hide all communications behind the cladding.
Required tools and materials
To carry out the work you will need:
- perforator;
- dowels and screws;
- wooden beam for mortgages;
- guide and rack metal profile;
- straight hangers;
- polyurethane foam;
- corrugation for electrical wiring.
Preparing the walls
Wall preparation involves dismantling the old finish and sealing large defects that affect the load-bearing characteristics of the partitions. Additionally, the walls are treated with a deep-penetrating primer for mineral surfaces with antiseptic additives. Also at this stage, water and sewer pipes are laid out, electrical wiring is laid to sources of consumption.
Note! The electrical wire is laid in a corrugated tube, which is attached to the base (wall or ceiling) with special clamps.
Frame installation
To construct the sheathing, a galvanized profile for plasterboard is used, since wooden blocks are susceptible to rotting and warping when used in wet conditions. The frame posts are mounted in the corners of the room and secured to the wall using direct hangers.
Vertical posts are attached to the base with direct hangers.
Horizontal jumpers are attached to the vertical posts in increments of 40–60 cm, to which the plastic trim will subsequently be attached. To connect profiles at an angle of 90°, the edge of the profile is cut and placed on the top shelf of the guide and attached to it with self-tapping screws.
In places where attachments are installed: cabinets, shelves, heated towel rail attachments, and so on, additional jumpers (mortgages) are provided. To ensure that the fastening of the equipment is as reliable as possible, it is recommended to reinforce the profile with a wooden insert, which is fixed with self-tapping screws.
Reinforcement of the frame in places where attachments are attached.
A frame for the box is also assembled around the riser.
Advice! To give additional rigidity to the frame in places where any elements are attached, it is recommended to foam the space between the mortgage and the wall. You can also foam the corners: this will make the frame less noisy.
A similar frame structure is assembled on the ceiling base for its cladding.
Installation of PVC cladding
The bathroom trim starts from the ceiling. Along the perimeter, a starting profile is attached to the metal guides, into which the edges of the panels are inserted. The strips are attached to the cross members of the frame with self-tapping screws and a press washer. To ensure that the junction of the panels is minimally noticeable, they are tightly connected to each other. But there are models with a selected edge, which, after joining two strips, forms a V-shaped seam. Therefore, when choosing a material, you need to pay attention to this nuance.
After covering the ceiling, they begin to install the plastic on the wall frame:
- The starting strip is fixed at the bottom and top. It can be glued to the floor covering with silicone to create a sealed joint.
- The panels are inserted into the grooves of the starting profile and fixed to the frame with self-tapping screws.
- When connecting two panels in the corner of a room, use a corner profile.
To make the finish look cohesive, the outer stripes of one row must have the same width. This is calculated before the first strip is attached. Another option to decorate a corner beautifully is to bend the panel and attach it without using additional corners. To do this, 2-3 cm is cut out from the back side of the plastic (the front part should remain intact). After this, the panel can be easily bent in the desired direction to form an outer or inner corner.
Bathroom without decorative finishing
Exposed brick and concrete have long been no longer perceived as something crude and cheap: this is a current design technique actively used in loft interiors. Brickwork adds relief to the room, so it looks interesting and attractive.
Gray concrete acts as a magnificent backdrop for any bright accessories and snow-white plumbing fixtures. Such surfaces must be treated with antiseptic impregnation, and the brick coated with moisture-resistant varnish.
Budget bathroom design in the photo
Budget bathroom interior
Budget bathroom interior
Budget bathroom interior
Budget bathroom interior
Budget bathroom interior
Budget bathroom interior
Budget bathroom interior
