When planning their own cottage, many owners design a balcony space where they can relax or work. Therefore, before starting construction, each developer carefully plans what kind of balcony he will design in a private house.
A balcony in a private house can have different shapes, sizes and locations
Advantages and disadvantages of construction
A balcony in a private house provides a number of advantages to its owner:
- Additional area. The main advantage is the expansion of space, which can be used at your discretion. In summer it is a place for entertainment and relaxation, in winter it is for storage.
- Facade decoration. Now you can find models of balconies that take into account not only its usefulness, but also its beauty.
- Spare emergency exit. We cannot avoid a random emergency, but we can prepare for it. It can serve the housemates as an additional evacuation option, in particular when they are on the second floor.
- Access to the street. Few people like to go out into nature in bad weather. Equipping it with a canopy and furniture, you can sit here and enjoy fresh air in any situation.
- Lighting. If there is not enough light entering the house, a balcony will help create a corner that will be well lit. To avoid direct exposure to ultraviolet rays, you can install a roof or canopy.
But there are several points that may cast doubt on the need to install a balcony in a private house:
- Difficult to install. Along with high costs, you will face difficulties in planning, calculations, and construction work, especially for finished buildings. It is advisable to deal with this issue before building a house.
- Designing with your own hands can be dangerous: defects in the design or installation can result in an accident.
- Heat loss in living rooms. If the loggia is not fully insulated, the thermal insulation of the room may be significantly reduced due to the balcony door.
What could your terrace be like?
Designing a terrace does not require special knowledge or high costs. The most important thing is to make a small free-standing or wall-mounted platform. If necessary, you can decorate it with railings, shrubs and equip it with a canopy roof that will protect it from sunlight and rain.
The most popular material for a terrace is wood. If you choose this option, do not forget that wooden structures need regular treatment with special materials against pests and protection from moisture.
On the terrace you can install a soft corner, a set of moisture-protected garden furniture, and a dining table. Ready-made terrace decor can be found in hypermarkets that sell garden furniture. There you will be inspired by interesting ideas. For a pleasant pastime and tasting delicious dishes prepared in the fresh air, you can buy and install a grill system.
Use your personal needs to determine the area of your terrace. For example, to place a chair or chaise longue with a small table, 2 square meters is enough. m. area, but the dining table and barbecue area will require much more space.
Imagine and make good use of the area of your balcony or terrace. Remember that for outdoor recreation in the summer, you can equip an open area on the ground floor, and for winter you can have a glass balcony upstairs. In any case, it is better to take into account all the nuances of the layout at the design stage of a private house.
Did you find this article helpful? Please share it on social networks: Don't forget to bookmark the Nedvio website. We talk about construction, renovation, and country real estate in an interesting, useful and understandable way.
Classification by material
The first step to creating a balcony layout for a private area is to choose what to make the base from. You can use three materials that are resistant to wear: wood, concrete or metal.
Concrete
This option can be installed if the house is built either concrete or brick. The material is quite heavy and can be a special burden for the home. The reliability of the structure is determined by the massiveness of the walls. Therefore, before installation, make sure that the façade is strong: if in doubt, you can equip it with additional supports.
Equipping a house with a concrete balcony has a number of other features:
- First, one of the load-bearing sides is secured to the wall of the building by electric welding with anchors.
- The foundation slab is deepened into the load-bearing wall along its entire length so that approximately 10-12 cm remains from the floor level.
- The slab is installed at a two percent slope to the surface of the walls (so that during precipitation, liquid and debris do not accumulate, but drain).
- Waterproofing in the form of water-repellent coatings is placed on top and filled with concrete screed.
- Door thresholds are 10 cm above the floor surface.
- Parapets are formed from metal gratings at least one meter high.
Wooden
It would not look entirely appropriate on concrete buildings. It is advisable to choose this type, respectively, for houses made of wooden frames.
Primary requirements:
- Beams are made from wooden beams with a cross-section of at least 10x20 cm, which are pushed into the load-bearing wall to a depth of 25 cm at a distance of 80 cm.
- All joints must be covered with a water-repellent mixture - bitumen mastic.
- Metal corners or strips can be used for fastening to walls.
- Install racks measuring 40x100 mm to the beams using M12 bolts or studs.
- The space is filled with lags 50x100 mm at a distance of about 30 cm.
- The flooring is constructed from boards at least four centimeters thick. It is necessary to provide a durable covering so that the floor does not sag.
To make the wooden structure less subject to wear, protect the surface from various influences: moisture and mold, fire, insects. To do this, cover the frame with special products and additionally install a visor.
Forged
The metal type of balcony is a cross between wood and concrete. The weight of the structure is not very light, but it is definitely inferior to the concrete version. They can be adapted to any home: you just need to choose a beautiful sketch. But more often it can be found on brick facades.
Material Features:
- Has high strength. With timely treatment against corrosion, it can last for a very long period (more than a hundred years).
- The monolithic structure is welded from individual parts before being attached to the base. The finished product should not be larger than the slab and the doorway, so as not to subject it to forced changes.
- Install only on a strong, level slab. If there are holes or damage, it must be restored using cement-sand mortar.
- To secure the fence, iron mortgages are used.
The shape of the forged product is selected independently based on the style of the house. You can use a variety of ornaments or make a laconic fence.
Tips and nuances for adding a balcony to the first floor of a building
There are a number of individual points that relate to the addition of a balcony to an apartment on the first floor of the building. From a construction point of view, it is worth considering the following nuances:
- Any type of balcony must have a very solid foundation. This is especially true in cases where it is planned to expand the space of the living room through partial or complete combination of premises;
- The foundation of the balcony must fit tightly to the foundation of the building. The quality of further insulation of the room depends on this;
- The roof must be installed at an angle;
- Under no circumstances should the door open into the balcony. The surest option is when the door opens into the room. Firstly, it will save space on a small balcony, and secondly, it will protect you from situations with plastic doors “slamming”;
- Choosing stained glass or panoramic glazing for a balcony attached to an apartment on the first floor of a building is a bad idea. In this case, you should take special care of security and at least install bars on the balcony windows, or even better, an alarm system.
And a little about the legal side of the issue:
- A solid strip foundation is the most reliable option, but before installing it, be sure to consult with lawyers. The fact is that the city authorities can force you to pay for the part of the land on which the foundation was erected, since in this case it passes from public use to your personal property;
- Obtaining permission to add a balcony on the second floor is much more difficult. A good option is when the neighbors below have already built a balcony for themselves, and it can serve as a support for the structure on the second floor. Otherwise, the structure must be supported on special supports that do not threaten the integrity of the load-bearing wall of the building;
- Remember that collecting documents and permits before construction begins is much easier and cheaper than trying to legalize an extension after it has been completed;
- It is almost impossible to make a design for an attached balcony yourself. To do this, it is better to turn to specialists, because they are already familiar with all the possible nuances and pitfalls of approving and legitimizing such buildings.
Adding a balcony to an apartment on the first floors of a building is a very complex and lengthy process, which should be approached with special responsibility. You can independently carry out such a redevelopment only after thoroughly studying all the nuances of the legal legitimization of such structures and the technological side of the issue. But the easiest option would be to contact a trusted construction company that has successful experience in implementing similar projects.
Types of structures
Based on the principle of glazing a balcony in a private house, two types can be distinguished: closed and open.
Open
An open balcony consists of only two elements - a base plate and a fence. The option is adapted more as a recreation area rather than a storage area, since the area is protected from the environment only by the roof and cornice.
A beautiful and modern decorative element for the façade of cottages, which can easily be converted into a terrace. Then a simple extension will become part of the residential area. Interesting decoration and designer fencing will add more sophistication.
Before installation, take into account the specific nuances of installing an open balcony. You can get acquainted with them in the video of a construction specialist:
Of course, the open balcony area has a number of disadvantages. However, with the right finishing and selection of design and canopy equipment, it looks as advantageous as possible. With such a loggia you can be closer to nature.
Closed
A closed balcony involves full glazing of the room, which increases its functionality. It is protected from wind, precipitation, dirt and dust, excess noise and insects. Can become another living room or a place for heat-loving plants.
If you want to make this option more visually attractive, you can equip the loggia with an interesting design or decoration. You can liken it to an open type with the help of panoramic floor-to-ceiling windows.
Original advice from designers
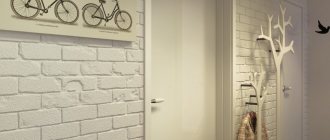
- Space saving is facilitated by racks and shelves installed on different surfaces - the parapet and end surfaces.
- A protruding window sill can be used as a table or plant stand.
- The design of windows with a balcony should be in the same style as the entire room. Classic curtains will not work; short curtains are outdated. Austrian, roller or Roman blinds and horizontal blinds look fashionable, stylish and original. Vertical elements are not preferable as they will interfere with movement.
- To visually increase the height of ceilings, there is no better solution than a glossy stretch ceiling. To add coziness, on the contrary, ceilings in dark shades look better.
- Regardless of the area, it is not recommended to use large lamps or long cords.
French balconies
French balconies also attract special attention. This is one of the types of structures - closed, completely glazed. In fact, it is only a frame for a window opening, but its installation must be provided for at the planning stage of the balcony room.
Installation of the French type of building occurs according to the following scenario:
- Anchor plates are screwed to the box at intervals of 80 cm.
- The junction of the block and the opening is sealed with sealing tape, then proceed to the installation of the outer blocks on the supporting blocks.
- The remaining blocks are brought in one by one using screws at a distance of 40 cm, then secure the resulting structure together with dowels.
- Fill the gaps with polyurethane foam, trim them and apply a special vapor barrier tape.
Cantilever beams with supports are an option for cases where they want to install the structure next to a finished, lived-in home. You should choose wooden or reinforced concrete racks depending on the appearance of the cottage. If you are purchasing a tree, pay attention to the type - only a strong and rot-resistant option (larch, oak) will do.
You determine the foundation yourself: it can be part of a finished house or a separate area.
We dig holes under the pillars, calculating an additional 10 cm, and form the base:
- for wooden pillars - sand cushions;
- for concrete - formwork in the form of a truncated cone.
Install the supports, fill them with concrete and wait for them to dry. Next, fill it with soil and compact it.
The frame of the balcony surface is formed from beams from 5x25 cm. All beams are laid edgewise; we use self-tapping screws or dowels as fastenings. Then cantilever beams are placed, pre-treated with antiseptic and roofing felt.
The walls are sealed with membrane insulation. The holes in the concrete wall are concreted, the joints are also filled with sealant. Cantilever beams are covered with a lattice structure and continuous flooring.
Design features
You should check in advance the possibility of glazing the balcony, taking into account the norms of current legislation. Permission must be obtained in the following situations:
- the load on the power parts of the building structure increases;
- the appearance of the facade, the door (window) opening changes;
- it is planned to expand the balcony with removal along the slab;
- natural light in the adjacent room deteriorates;
- free access to the installed fire escape and escape passage is blocked.
To approve the redevelopment, contact the relevant department of the municipality. After completion of the work, changes in the technical parameters of the object are registered in the USRN database.
Location in two-story houses
It is possible to equip a balcony in a private house only if there are at least two floors. The structure can be placed in different areas of the cottage.
A popular solution is to place it above a veranda, porch or bay window. So the superstructure plays the role of a roof, which is required to protect open areas. The loggia looks stylish and at the same time is a practical room.
They prefer to install private balconies in the center of the facade. The building is located under a common roof. Construction costs will be significantly reduced: no additional cornice is needed. The most interesting solutions are obtained in the chalet style - the roofs are made in the shape of a log triangle.
Basic conditions:
- spacious veranda, close to the size of the living rooms;
- panoramic windows;
- beautiful decoration and furniture in alpine style.
You can place a balcony on the roof itself:
- On the roof slope. At the selected location, the rafter legs are cut off and a frame is installed on which the balcony is attached.
- Window-balcony. Outwardly it looks like a roof window in a slope, but if desired, you can open the handrail and expand the area.
Roof balcony
Interesting solutions
You can be inspired by interesting design solutions of various designs:
- Under the roof of a "chalet".
- Above the veranda.
Finishing stages: step-by-step instructions
The approved project is used to purchase materials and tools. After preparing the surfaces, install the sheathing. Free cells are filled with insulation. Next, a layer of waterproofing, siding or other sheathing elements are secured.
Design of your dream balcony - how to prepare for renovation?
First you need to decide on the design of the loggia or balcony, calculate the time, budget and draw up an action plan. The more thoroughly you are prepared for the repair process, the better - this will allow you to avoid unnecessary headaches and unpleasant surprises. For glazing and insulating a balcony or loggia, it is best to choose warm months - this will significantly reduce discomfort. Calculate how much money should be spent on repairs and try not to plan your budget back to back; you should always be prepared for the fact that in reality the process may turn out to be a little more expensive. Decorating a balcony with your own hands, in turn, is a great way to save money and show your imagination and creativity. After everything is sorted out in theory, it’s time to move on to practice.
Insulation of the structure
The simplest option is to fill the free cells of the sheathing with mineral wool and attach a film for waterproofing. They also use polystyrene foam and granular expanded clay backfill. Extruded polystyrene foam is more expensive compared to these materials. However, such slabs with a thickness of 4-6 cm will provide effective thermal insulation and additional protection against moisture penetration. A high-quality solid layer is created from foamed polymers, which are applied to the surface using special equipment.
It is easier to carry out installation work from the inside. But in this case, the dew point shifts towards the room, increasing the risk of moisture and freezing of the walls.
Waterproofing
This layer is created:
- bitumen-based paint;
- special plaster;
- roofing felt or sheets of other moisture-resistant material.
Cast mastic is used on a balcony with a complex floor configuration. We should not forget about the need to install ceiling waterproofing if the balcony is located on the top floor of the building.
Creating a sheathing
The wooden parts of the structure are treated with an antiseptic. The first beam is installed at a distance of 5-6 cm from the ceiling if it is planned to install a suspended structure with built-in spotlights. Next, the sheathing is created in increments of 40-50 cm. The parallelism of the horizontal lines is controlled by the building level. Dowel nails are used for attaching to walls. The slats are connected with self-tapping screws.
Wall covering
The installation technology determines the choice of appropriate material. The paint is applied to the prepared surface. When working with decorative plaster and ceramic tiles, careful leveling is not necessary. Siding, plywood, drywall and other panels are installed on the sheathing
.
Lighting and decor
2021 did not bring any special changes to the decoration of balconies. Hidden lamps, a minimum of decorative ornaments, and light curtains that do not take up much space and do not get underfoot are still in trend.
And even though there are not many new balcony designs, they all help create the most comfortable or practical room and use the extra meters in the most convenient way.
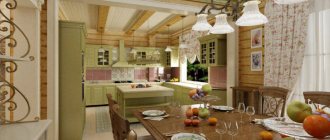
Wooden houses: design options
Balcony areas for wooden private houses are mainly built on as an integral element of the roof. For example, front and roof structures. Moreover, they can be located either in a recess or protrude beyond the façade.
It is important at the stage of building a house to place one pediment deeper in accordance with the design of the loggia. A hanging rafter system can be used as a frame.
In the front balcony, the base slab is insulated with a special coating, then waterproofing is applied, and a cement-sand screed is poured on top. Next, the fence is installed. For wooden cottages it is better to make it from wood or metal.
For your reference, here are a few photo examples of the construction and finishing of balconies in wooden houses:
Decoration
The terrace and balcony should definitely stand out on the facade of the house, because in fact, that’s what they were built for.
Many designers recommend using decorative elements from the materials from which the terrace or loggia was built. In our case, we are considering, first of all, an extension, which means the optimal solution is decorating with natural wood.
What can be included in the decorative elements?
- decorative beams;
- decorative panels;
- furniture;
- flowerpots with plants;
- vegetation right on the terrace (they weave and gradually grow, which is very fashionable in the West).
The decor on the wooden terrace is very original and attractive (photo).
Siding
You can improve the quality characteristics of your balcony by covering it with siding. Siding is often used in multi-story buildings, but it can also be adapted to a private home. Advantages of cladding:
- installation can be carried out on any surface of the fence;
- ease and durability of installation;
- resistance to changes in moisture and temperature;
- the material is not afraid of ultraviolet rays;
- does not corrode and rot;
- long service life;
- easy to care for;
- has a nice look.
What's better?
The answer to this question depends on the ultimate goals of specific people.
If residents need additional space for an office or gym, it is better to choose an apartment in a new building with a loggia.
Balconies are suitable for lovers of fresh air and open space. After all, it is more convenient to drink coffee in the morning or tea in the evenings on the open terrace.
Beautiful ideas
- Open arched balcony. This attractive structure acts as a canopy over the entrance to the house. The semicircular shape prevents the accumulation of snow and water during rain, and the spacious area allows you to organize a good rest.
- Wooden attached balcony. Using this design, you can simultaneously organize two cozy corners for relaxation. The base platform here will act as protection for the terrace from precipitation.
- The semicircular unglazed balcony simply amazes with its magnificence. An interesting solution in this case would be the use of forged fences.
What to give preference: roof or visor?
The roof is not included in the list of mandatory components of a balcony, but it can significantly expand its functionality. Instead of a roof, a canopy can also be installed, which will also act as protection from bad weather and direct sunlight.
Roof requirements:
- The surface area of the roof should be slightly larger than the surface area of the load-bearing slab and balcony railing.
- The roof must be installed at an angle to prevent accumulation of snow mass.
The roof can be single-pitch or gable. The first option is the simplest and most budget-friendly, the second is ideal for corner balconies.
A special Marquise canopy will help give your balcony an unusual and stylish look. This metal structure is covered with a special fabric, which allows it not only to act as a protective element, but also to emphasize the individual style of the entire structure.
Dome-type visors are less popular. This is due to certain difficulties in its manufacture, but many owners of individual buildings prefer this method of decorating the facade structure.
The arched visor, which is practical and highly functional, looks stylish and elegant.