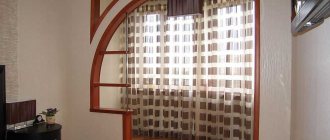
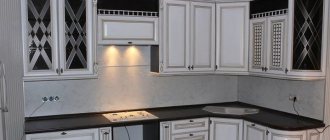
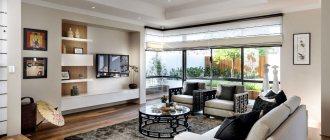
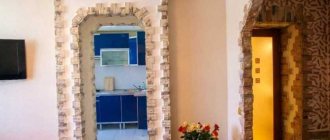
Arches in the kitchen interior are multifaceted. This is not only an opening for passage from one room to another, but also an important interior detail, in some cases a source of artificial lighting and even a disguised closet. And if the shape of the arch is determined by the strength of materials, then their design is limited solely by human imagination, and the material used can be almost any building material.
Most often, the arch for the entrance to the kitchen is made of stone, wood, gypsum board or plastic - but in terms of ease of installation, plasterboard structures are unrivaled . Their production does not require too specific knowledge and skills, and can easily be done with your own hands.
Functionality and types of arches in the kitchen interior
“Nothing and no one prohibits you from designing and creating an individual kitchen design with an arch”
In addition to fulfilling its main function - an opening for passage, the arch for the entrance to the kitchen can also be used to solve purely interior, decorative problems:
- a small room visually increases in volume when using arched openings instead of ordinary doors with bulky leaves;
- with the help of arches it is easy to divide large rooms into zones (for example, a kitchen block and a living room) without cluttering the space as a whole;
- an arch or even its imitation is an integral part of some interior styles.
The arch visually increases the volume of the room
The architectural structure of the arch has remained unchanged for many centuries - it is a vaulted structure creating a thrust; but its form can be very different. Arches of the classical form are most common, as they are the simplest to build, but design structures whose outlines are most easily described by the word “incomprehensible” are also not so uncommon.
But, despite all the variety of arched forms, they are usually divided into several large categories.
Classic
As you can see in the photo, classic kitchen arches have the outline of a geometrically regular semicircle. They are universal, so they naturally fit into any design. Most often, designs of this type are used in antique or Mediterranean style interiors; they are quite appropriate in Empire and Provence styles.
Classic arch for the kitchen
Portals
This type of arches is distinguished by the severity of its forms with their simultaneous simplicity and is very practical - it allows you to create a spacious passage between rooms, even with a low ceiling height. Externally, the portal structure is usually a rectangular-shaped opening with rounded edges.
The portal allows for a spacious passage
Modern
As you can see in the photo, the arch for a kitchen in the Art Nouveau style is a kind of hybrid of a portal and classical design. The shape of such a structure is a segment of a circle: the sides of a right angle formed by a horizontal floor and a vertical wall are connected by a geometrically regular arc. From an architectural point of view, such an arch lacks one of the supports and the arch - they are combined into a single whole. The most successful type of arch in cases where the strict style of the interior needs to be diluted with designer “mischief” to enliven the atmosphere.
Arch in Art Nouveau style in the interior of the kitchen
Pointed structures
Pointed arches are a legacy of Gothic architecture of medieval times, and they are installed in corresponding interiors. The distinctive and most characteristic feature of such arches is their strongly elongated shape with a pointed arch, reminiscent of a narrow leaf of a plant. They fit quite difficult into modern architecture, but visually they greatly increase the height of the room.
Elongated arch in Gothic style
Romantic style
In the interior of a kitchen, arches of this type have an elongated, rounded shape, usually elliptical in order to simplify installation. Thanks to their soft outlines, they fit well into the interior of spacious rooms. They do not require a large ceiling height - the structural strength of the arch itself is great, and the aesthetics and ease of passage are determined by the correct choice of the proportions of the opening.
Trapezoidal and square openings
Relatively rare forms. A trapezoidal, rectangular or square arch to the kitchen is original, and if the wrong approach to design is used, it looks simply grotesque. But this design is as simple as possible to manufacture - it is enough to install decorative inserts made of plasterboard or sandwich panels into the slopes of a regular rectangular opening.
Square arch
Eastern (Arabian) arches
As you can see in the photo, in the kitchen the Arabian-style arch has the shape of an inverted horseshoe. This does not allow it to fit into any interior, however, it will be quite appropriate in designs of the corresponding styles (Moroccan, for example, or Indian). There are extremely many design options, and some of them are a combination with other types - but even in this form they are organic only in interiors with oriental motifs.
A colorful oriental arch will create an individual kitchen design
Only the traditional and most common types of arches are listed, but nothing and no one prohibits you from designing and creating an individual kitchen design with an arch. It can be either a mixture of two or even several classical types, or even a completely abstract form, but with the obligatory observance of the condition: the load on the vault (top) of the arch should be as minimal as possible.
In many cases, the arch plays an exclusively decorative role and does not serve as a load-bearing support - in this case, its design is made in the same style as the furniture in the room.
Design of a plasterboard arch for a kitchen instead of a door
Drywall is one of the most popular when creating an arch. Its functional features allow you to give the bends any shape. Drywall does not require special installation skills and is also distinguished by its environmental friendliness. The latter feature makes it suitable for homes where small children live.
Thanks to the use of plasterboard, it is possible to create a structure of any shape, while the price of the material is affordable for most customers.
Photos of various types of plasterboard arches in the kitchen are freely available on the Internet. This will help you decide on the final option. Using drywall as a basis for creating an arch, you can safely experiment with its design and design. Elements made of different materials can act as decor. Let's look at the most popular of them.
- Wallpaper.
Non-woven or vinyl, they will not only fit well into any interior (thanks to the variety of colors and textures), but will also make cleaning the opening easier (they can be cleaned using water).
- Dye.
A water-based emulsion without odor or toxic fumes is what you need for a safe home.
Large kitchens in private homes provide a huge field for unusual design solutions.
- Stone.
For arches made of plasterboard, not a natural one (it’s very heavy), but an artificial one is suitable. It can be very different in texture: granite, marble, brick, etc.
- Stucco molding.
Patterns made using this technique will become a true decoration of any home. It is better to choose polyurethane as a material for it. It is lightweight and therefore adheres well to the plasterboard base.
Stone cladding will look like an independent decorative element.
- Textile.
The use of fabric for wall decoration dates back to ancient times. However, even today this approach to design has not lost its relevance. To decorate the arch, it is best to use brocade, tapestry or jacquard.
Textiles are also used to disguise the opening itself. How to close a finished arch in an apartment between the kitchen and the room? It’s very simple: use curtains made of any fabric, ball mesh or pendants. This approach will make the kitchen atmosphere more homely and cozy.
Materials for making an arched opening
The material is usually chosen not only to be appropriate in a given stylistic design, but also in accordance with financial capabilities. What should you know before making an arch in the kitchen?
Stone
The most reliable and durable option is a stone (brick) arch, but at the same time it is also the most expensive, requiring high professional skill. In addition, without additional decoration, such a design looks quite unpresentable for the interior of a living space.
Stone arch in the interior of the kitchen
Wood
Much more practical and convenient are arches made of wood - an accessible and relatively inexpensive material. The main disadvantage and inconvenience of wooden structures is the complexity of manufacturing curved elements, but this is more than compensated for by the convenience and ease of installation. In addition, as can be clearly seen in the photo, in many cases minimal decorative wood processing is sufficient for such arches in the kitchen to give a spectacular appearance.
Decorating the arch in the kitchen with wood
GKL and wood boards
It is even easier to install arches from plasterboard sheets - this material allows, with certain skills, to make openings of any degree of curvilinearity. Small flaws in shapes can be easily corrected with putty, and the finishing allows you to give the surface the texture of any natural or artificial material. The only disadvantage of kitchen design with a plasterboard arch is the relative duration of finishing work.
Kitchen design with plasterboard arch
The structural basis of such arches is a frame made of special metal profiles or wooden slats, subsequently sheathed with sheet material. This frame is universal, and instead of drywall, if necessary, it is quite possible to use sheets of fiberboard or chipboard, plastic and even sheet metal.
Polyurethane arches
Polyurethane is an artificial material, similar in its physical and strength characteristics to plastic. Such plastic structures are usually sold as a set of ready-made elements necessary to assemble an arch in an opening of a suitable configuration. Assembly is quite simple and does not require high qualifications; no finishing work is required.
Polyurethane arch for the kitchen
The main disadvantage of polyurethane assemblies is that their mechanical strength is not very high, so they should never be used as load-bearing structures. The main and almost only function of polyurethane foam arches in the kitchen interior is decorative.
The combination of a kitchen arch with a bar counter
The bar counter, like the arch itself, has long become a familiar element of the kitchen. Their combination is an original and convenient solution. Thanks to the arched shape, the space itself is smoothed out and becomes softer. The bar counter will help create an atmosphere of ease and lightness.
The large kitchen allows you to combine the arched opening with the bar counter.
The practicality of this tandem is explained by the ability to quickly prepare drinks and serve them in the living room. However, it should be taken into account that the interior opening must be large enough. Otherwise, the bar counter will not become an original and practical element of the interior, but an obstacle to movement between rooms. Therefore, a number of factors should be taken into account before deciding on such a redevelopment.
A deep arch, often asymmetrical, is used to arrange the bar counter.
There are also options when a separate niche is allocated for the bar counter, which is an independent part of the modified door passage. At the same time, it can retain its original rectangular shape.
The kitchen arch is a very beautiful original answer to the question “How to increase the space of the kitchen and make it softer?” She is able to bring special, unique accents to the interior. Confirmation of this is a photo with different kitchen designs with an arch. However, you should not neglect the recommendations and follow only the appearance of this design. When choosing the right one from the many options, you need to make sure that it is right for you.
Closing the arches
As can be clearly seen in the photo, the peculiarity of the kitchen arch is its constant openness for passage and, which is sometimes very unpleasant, for viewing. Situations when an arch needs to be closed are not that rare, and the easiest way to do this is to use a curtain of one kind or another.
The simplest and most popular option is to curtain the arch opening with ordinary curtains that fit harmoniously into the existing interior. Unfortunately, such curtains have a very serious drawback - they are excellent dust collectors and perfectly absorb all surrounding odors. The only way to combat this is to regularly wash the curtains, which does not improve their appearance or durability.
Curtains in the arch fit harmoniously into the interior
A similar option is the use of roller blinds (Roman blinds), which when folded represent a compact roller. They are more convenient from the point of view of use, but have all the inherent disadvantages of textile materials.
Another common option is shown in the photo - curtaining the arch to the kitchen with tulle.
Blinds made of plastic or wooden plates are more practical - they can be either vertical or horizontal. At the same time, they allow you to visually increase the height or width of the room, which in some cases is very useful. When folded, the blinds do not take up much space and are almost invisible. The only drawback is that it is not the greatest ease of use, but it is inherent only in low-quality cheap models.
DIY arch installation
To carry out the installation yourself, you must have construction skills. If you have never held a screwdriver and hammer in your hands, then it is best to seek help from professionals who will carry out the installation quickly and competently. It is better not to take on work with wood, stone, brick without experience. You can handle drywall, MDF and chipboard yourself.
It is important to prepare the necessary set of tools
First, take care of the necessary tools and materials:
- saw (a grinder may be useful);
- screwdriver;
- drill, hammer drill;
- level;
- plumb line;
- roulette;
- liquid Nails;
- self-tapping screws;
- corners.
Preparing aluminum guides
The aluminum profile is attached with dowel nails to the base. First of all, attach the arc (the sides will need to be trimmed), then - the guides on the sides. Between them it is necessary to install stiffeners at a distance of 15-20 centimeters from each other.
Everything installed must be checked for level, taking into account the strength of the material and the walls themselves.
Bend plasterboard sheet
The arc for the arch is made according to a template. It is applied to a sheet of drywall and then carefully cut out. To bend the sheet, you need to make a cut and bend along this line.
Plasterboard sheet is bent by breaking
How to install an arch in the kitchen with your own hands (video)
To better understand the process of installing an arch with your own hands, we suggest watching a video lesson with a detailed description of all stages.
Installation plan for a classic arch between the kitchen and the living room
- It is necessary to install the frame and secure it with dowels. The frame parts are fastened with self-tapping screws. To strengthen the arc, use a rack profile. The frame is installed at a distance from the edge of the opening - this place will be taken by the covering sheet.
- The arch casing is mounted from plasterboard. All parts are fastened with self-tapping screws; they can first be placed on “liquid nails”.
- The screws must be screwed in at a distance of ten centimeters from each other, recessing the caps flush.
How to close the arch?
This could be plasterboard, chipboard, plywood, MDF - that is, the material from which the entire structure was assembled.
Arch as an entrance to the kitchen
Initially, the door to the kitchen was intended to cut off specific odors from the rest of the premises - the lack of hoods of adequate power left no other options. With the advent of modern forced ventilation systems, the need for solid kitchen doors has disappeared, and nowadays they are installed more out of tradition than necessity. Moreover, in small-sized apartments, where each such door takes up approximately a square meter of living space.
Features of wall materials
The completely natural desire to regain these lost meters is easily satisfied by using an arch to transition between rooms, because all doorways are, in fact, ready-made “portals” that need a little decorative design. Arches in the kitchen interior can be expanded or narrowed, given a different shape, or even moved to another place . You should only take into account that while in individual households redevelopment can be carried out at your own peril and risk, then in apartments you can’t just do it - you will need a lot of permissions from the relevant organizations.
There are a lot of building materials that were and are used to make walls in apartment buildings. The most common ones are the following:
- brick;
- monolithic concrete;
- foam concrete;
- plaster (in old housing stock);
- wood (in low-rise buildings);
- reinforced concrete panels.
For redevelopment, obtain permission from the relevant organizations
In all cases, except the last one, cutting even a new arched opening usually does not cause problems if it is not done in load-bearing walls. But in panel houses this is much more difficult - due to the design features of the panels (the reinforcement embedded in them is pre-stressed to give the reinforced concrete the required strength), cutting them is prohibited. In many situations, it is much easier to remove the panels that serve as partitions completely, and then make new partitions from a different material, providing arched openings in them.
Arches from gypsum plasterboard
The easiest way to make such partition walls is from plasterboard sheets - this building material has long established itself as inexpensive and practical. It is very convenient to use it to give the desired shape and final design of a ready-made arched opening. When using gypsum boards, it is easy, if the scale allows, to arrange niches in the slopes of the arched opening, which can subsequently be used as mini-cabinets and sources of artificial lighting.
Using gypsum plasterboard, the arch can be given any shape
Decorative design of arches from gypsum plasterboard
A successful selection of the decorative design of the arch allows you to completely transform the interior of the kitchen, ennobling it and giving it an aristocratic look. This works especially well when decorating an arched opening with lighting from an LED strip or miniature recessed lamps. It would not be superfluous to cover the arch with varnished wooden elements - this will be a good solution for most interior styles.
Illumination of the arch with wall lamps
If space allows, then it would be best not to limit yourself to one arch, but to arrange several arched openings - this will not only visually increase the volume of the room, but will also greatly facilitate the task of making the overall design harmonious. In addition, this technique makes it possible to zone the internal volume of the kitchen, while at the same time practically not limiting the freedom of movement around it. You just need to take into account that to support the arched vaults you will need to install support columns and decorate them in a suitable style.
Zoning the kitchen space with an arch
Stone cladding of arches
Natural materials, which include stone, are used quite often for finishing work, especially in modern design projects. This method of decorating passage openings in the kitchens of country houses is especially popular; completely stone arches, shown in the photo, are not uncommon there.
The maximum effect is achieved when decorating the arched entrance, the kitchen wall “apron” and the countertop with light-colored stone, and finishing the hood with it - all this allows not only to visually expand the space, but also to be very practical. This interior is perfectly complemented by classic furniture and wrought iron lamps, especially if the surface of the wall near the stove and the hood mounted above it is also designed in the form of an arch. The main condition is to maintain the unity of the color style, especially if the decision is made not to “stick out” the stone elements too much in the overall design.
The stone cladding of the arch is combined with the cladding of the kitchen
In general terms, facing with stone, especially dark stone, gives the room the atmosphere of a medieval castle, for the construction of which, as is known, only natural materials were used - and these days this is an unconditional sign of status and wealth. Similar effects can be achieved when using brick as a material for making an arch - it can hardly be called a natural material, but, with the right approach, it revives the interior of the room very well.
Brick cladding enlivens the kitchen interior
Sometimes a successful design solution is a combination of facing stone and acrylic tiles, which cover the slopes of the opening. The combination of sandstone stone along the contour and mosaic on the inner surface of the kitchen arch, as in the photo, looks very original.
Arch as an element of space zoning
The need for zoning the kitchen space arises quite often. Despite numerous attempts to make the boundary between rooms as inconspicuous as possible, in many cases its presence is simply necessary.
Most often, the arch as a zoning element is used in such cases.
- After combining the kitchen and hallway, each room continues to fulfill its original role.
- To visually separate the cooking and eating areas.
- When combining the kitchen and living room leaves the need for functional separation.
Arches do not require any fittings; you can only choose an interesting and elegant decor.
Essentially, in such cases, the arch is a modified partition.
Alternative ways to design an arch
Stone and brick are expensive building materials. If you have a limited budget, it is quite possible to decorate the arch in more affordable ways.
Panels and overlays
The most common way of decoration is with finishing panels and overlays made of MDF or polyurethane. They can imitate the texture of any building material, but most often it is wood of rare and expensive species, suitable for any type of interior.
Finishing the arch with MDF panels
The installation of such decorative elements is simple and does not require high professional skills; they are attached with glue and special nails with a tiny head. The work begins with framing the inner surfaces of the arch; after this operation is completed, the outer linings are installed - this is no more difficult than installing a door frame.
Stucco molding
Decorative stucco is used mainly in the design of arches for antique kitchens. To attach it, glue of the “liquid nails” type is used, but in some cases, just as in the previous case, you can use nails without heads.
Arch with stucco in the interior of the kitchen
Wallpaper
The simplest and most cost-effective option for decorating an arch is to cover its surfaces with wallpaper. The range of this finishing material is very large, and you can choose an imitation of any texture; In addition, you can use wallpaper for painting. The only rule is that before you start gluing, you need to use a small sample to check whether the resulting result matches your plans. Let's see how to make an arch decorated with wallpaper in the kitchen.
The procedure differs from the design with panels and stucco. When working with wallpaper, first of all, the outer sides of the arch are pasted over, and a small (2-3 cm) supply of wallpaper is left along their contour. After the wallpaper glue has dried, this stock is tucked inward, onto the slopes of the arch, and is also glued. And lastly, prepared sheets of wallpaper are glued to these gateways and slopes of the arch.
This design is done quickly and simply, but has its drawbacks, the main of which are the low mechanical strength of the wallpaper and its rapid abrasion.
Preparing drywall
To make a classic opening, you will have to bend drywall for an arc. This is done in two ways:
- Dry. This method is complex and is not always possible for a beginner in repair matters. It consists in making cuts on one side of the sheet, with the help of which further bending occurs.
- Wet. As the name suggests, drywall needs to be wetted. Cut off an element of the future design from the sheet and apply multiple punctures with an awl. Wet the part with water and place it on a template previously made from any materials. As soon as the gypsum board gets into the improvised form, it will take the same shape. The part can be used for further work after drying.
Arched design of other architectural elements
“You can diversify your kitchen design if you design the space in the work area as an arch”
The passage opening is not the only element that can be designed in the form of an arch. For example, windows made in this style look very impressive - with their help it is easy to give the interior a medieval touch, making it interesting and elegant.
You can diversify your kitchen design if you design the space in the work area in the shape of an arch. Cabinets with arched doors will look harmonious with it, and even lamps may well have arched decor. If you have a traditional fireplace, its arch-shaped portal will look very impressive.
Arch-shaped space in the work area
The color scheme is usually chosen in such a way that attention is focused specifically on the arched elements of the overall composition. You can make them contrast with the rest of the interior, you can highlight them with texture, you can even give them an unexpected shape - but you need to try to maintain a fine line: arches should attract attention, but not be the central element of the entire setting.
General recommendations
The most important condition when installing an arch as an entrance to the kitchen is that this architectural detail should fit into the existing interior as naturally as possible, and not look ridiculous. The material and type are chosen in accordance with the general style of the room - wood and plasterboard are more suitable for classics, while brick or stone will look much more organic in a loft. For high-tech, plastic is best suited.
When planning an arched passage to the kitchen, you should install a powerful forced-air hood in the work area and make sure it is working - otherwise the specific cooking smells will spread throughout the house.
The abundance of decorative elements in the design of the arch, as can be seen in the photo, does not fit well with the small size of the room - in small kitchens it is better to make openings in a simple style . In addition, arches do not look very good if the ceiling height is much lower than three meters - in such cases, standard two-meter doors look much more organic.
Openings in a simple style are suitable for small kitchens
The arched opening should be well lit - this is especially true in cases where the arch leads from the kitchen to a dark corridor. These rooms often have different ceiling levels and different brightness lighting - this point is best thought through in advance.
Adjacent rooms connected by an arch must be designed in the same style - otherwise the opening will look simply ridiculous and inappropriate.
Features of arched passages
Some have concerns about the construction of such structures:
- Possibility of drafts;
- Smells from the kitchen will move throughout the apartment. You will need to install a powerful hood in the kitchen;
- Violation of the strength and durability of wall structures, panel ceilings;
- Arched structures are not allowed at the junction of the kitchen and the nursery or bedroom.
- The arch between the room and the hall in small houses does not look aesthetically pleasing, is ineffective and has no direct purpose;
