Expert advice
First of all, this room should be:
- equipped with very reliable systems for supplying cold water, heating it to a hot state, sewerage system, ventilation;
- comfortable for visits, consider good insulation;
- illuminated by dim lamps;
- equipped with reliable plumbing;
- spacious for movement, leave about 1 m of free space to the washbasin or bathtub;
- finished with materials that are resistant to humidity and temperature changes.
Since the house is private, all work on connecting to the centralized sewerage system and water supply is carried out by the owner at his own expense.
But you can drill a well on the site, install an electric pump, and there will be no problems with the supply and drainage of water in the bathroom.
Read here! Bathroom faucet: 90 photos of luxury accessories from the latest collections of the season
To heat the water and the premises, it is recommended to install a double-circuit boiler, which will heat your home in winter and provide hot water.
Pay great attention to wastewater disposal. Of course, it is cheaper to build a regular drain pit. But, if funds allow, it is better to purchase a good septic tank for water filtration.
Finishing walls, floors and ceilings
Tree
With the help of wood, the bathroom is decorated in Scandinavian style, eco-style, Provence and country styles. Modern finishing materials are already treated at the factory with special compounds and become resistant to deformation and high humidity. Successfully used:
- solid array;
- laminated veneer lumber;
- lining;
- veneer;
- parquet board;
- laminate.
Moisture-resistant wood-containing materials can imitate expensive wood species with the appropriate texture and color scheme. Several simple and economical design options with wood trim: the walls and ceiling are veneered, the floor is laid with laminate or parquet boards. The walls and ceiling are finished using laminated veneer lumber, and partitions for zoning are also created from it. In houses made of rounded logs, everything remains in its natural form, only additional surface treatment is carried out with water-repellent and antiseptic compounds. Combined finishing is popular, when in places with high humidity the walls are lined with ceramic tiles, and in other areas - with wood.
Tile
A traditional design solution for a bathroom is tiling surfaces. For the floor, unglazed porcelain stoneware tiles are used, which may have special grooves for water drainage. Floor tiles must be non-slip. The walls are covered with glazed or enameled ceramic tiles with a glossy water-repellent coating. A huge variety of color palettes and textures will satisfy any aesthetic needs. Light, cool colors visually expand the space.
Fashionable mirror tiles have the same ability to “pull apart” walls. Panels made of photo tiles that imitate windows or paintings look original. Polystyrene tiles with a water-repellent coating are widely used for ceiling finishing. It can be one tone or with a pattern, smooth or embossed.
Mosaic tiles
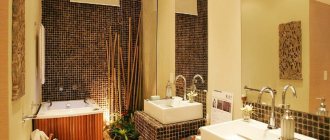
Mosaic tiles will help you decorate your bathroom brightly and creatively. It can be ceramic, glass, metal and even pebbles. You don’t have to compose individual fragments yourself - they sell ready-made solutions with a specific pattern. The mosaic floor looks elegant. To implement this idea, they use special mosaic floor tiles, which are thicker and stronger than regular ones. A mosaic ceiling is associated with luxury.
For cladding corner and radial architectural elements (protrusions), tiles on a flexible basis are used. It is also suitable for decorating columns and arches.
Not only simple geometric patterns are laid out with mosaic tiles, but also landscapes, urban paintings and any other images. It is organically combined with ordinary ceramic tiles, enriching the interior and emphasizing its individuality.
Marble
Marble is strongly associated with wealth and luxury. Marble cladding of walls and floors is unsurpassed in its beauty and durability, but is expensive, so it is available to a narrow circle of homeowners. It is not without reason that this material has been used since ancient times, mainly in the residences of high-ranking persons. But you can use marble in combination with other finishing materials and thereby get a decent interior for a reasonable price.
Marble flooring brings the spirit of antiquity to the bathroom, but requires the application of anti-slip compounds. Natural texture, unique natural patterns formed by veins - all this increases the aesthetic value of marble. Its color range is also rich: from snow-white to black, from yellow to pink. Marble in blue, gray and green shades looks organic in the interior of bathrooms.
Wallpaper
Water-repellent, washable wallpaper is quite suitable for finishing walls and ceilings and even bathroom floors. It is advisable to use them in combination with tiles or stones, which are difficult to do without near a washbasin or bathtub. A universal solution would be wallpaper in subdued colors. If the room is furnished with plain, light-colored furniture, you can diversify the interior by covering the walls with colorful floral wallpaper. For the floor and ceiling, 3D photo wallpapers are used, which surprisingly accurately imitate the starry sky, herbs and flowers, and the depths of the sea. Wallpaper helps to zone a room and visually increase the space. One of the advantages is non-triviality. If you want to surprise your guests, then wallpaper will do this role perfectly.
Painting
Thoughts about painting the walls in the bathroom encounter an invisible barrier. And all because of long-outdated stereotypes. But specialized paint and varnish materials are excellent for rooms with high humidity and temperature. They are widely used by designers in European countries to create exquisite interiors. The only difficulty here is to level the base surfaces. If you managed to get perfectly smooth walls and ceilings, you can safely start painting them. The catalogs contain hundreds of color options and shades.
Combined with a wealth of textures, this variety opens up endless possibilities for designers. When choosing paint, they trust well-known manufacturers, who guarantee its moisture resistance and environmental friendliness.
Ventilation
You cannot do without solving problems with ventilation in the bathroom in a private house.
Any owner dreams of having clean air in his home, free of various harmful fungi and mold.
Installing a supply and exhaust ventilation system is simply necessary when arranging a bathroom in a private house.
Exhaust hood in a bathroom in a private house can be natural or forced.
Forced - this is powered by an electric fan that pumps in clean air or pushes out dirty exhaust air.
- Pond film
Materials for ceilings in bathrooms
- Ways to make money on telegram
Natural exhaust hood works on the principle of temperature differences between indoors and outdoors.
For especially economical owners, you can install a recuperator, that is, a device for removing exhaust air from the room, drawing in fresh air from the street, and even equipped with a heat exchanger.
With this installation you will “kill two birds with one stone”: you will ventilate the room and heat it.
Installation conditions
A bathtub built into the floor is a rather complex structure to install and arrange, which requires certain construction and design work. However, the result is worth this long and painstaking process .
It's no secret that to get the maximum visual effect, you need to have a fairly impressive space. Indeed, in a small room of this kind, a bathtub not only looks ridiculous, but also is fraught with injury. A bathtub requires not only a large room, but also certain preparations for installation - that is, support and a reinforced structure. That is why, even when designing the house itself, it is necessary to think about the design of the built-in bathtub. The shape of the container is important; in addition, it may be necessary to connect utility networks.
Bathroom floor
The bathroom floor in a private home needs a thoughtful solution. Of course, it must be moisture-resistant, non-slip and warm.
The most commonly used tiles are natural stone or ceramic. But the tiles must be thick and rough.
- Application of Kirchhoff's laws
Painted bathroom - overview of options for painting a bathroom (77 photos)
- Bathroom hood - which one to choose? Review of popular models +80 photos
For these purposes, they also use linoleum (a very budget option, but it is short-lived), waterproof laminate, and cork.
For lovers of beauty and zest, you can use glass or mosaic.
Built-in bathtub is not an option for everyone
This kind of bathtub is incredibly beautiful and modern , but this option may not be suitable for everyone. First of all, installing such a bathtub in an ordinary city apartment is almost impossible, for which there are a number of reasons. One of the main ones is the design features of city houses, the floors of which are not designed for such changes. You can't just take a tool and cut a hole in the floor and put a bathtub in there. Such a large hole will significantly weaken the supporting structure of the house itself; the weight of the built-in bathtub will have a direct and extremely negative impact on the structure.
Such changes must be approved by the relevant authorities , permits must be obtained and a lot of checks must be completed. Your neighbors below will not be happy about this turn of events either. Therefore, in order to make a bathtub built into the floor in a city apartment, it is necessary to at least buy the apartment that is located on the floor below, and also develop a special project that involves making changes to the design of the house. In such a project, it is imperative to provide an action plan to strengthen structures that would compensate for the changes made. In addition, the project must be agreed upon and permission obtained. Do not be upset if the first project of such a bathroom turns out to be a failure.
Based on the above, we can conclude that building a bathroom into the floor in a city apartment is unwise. As an alternative in this case, you can use a bathroom on the podium, but again, if space allows.
The only option for a built-in bathtub is a private country house. However, even in this case, before undertaking such an event, it is necessary to calculate whether such a structure will withstand the roof of the house. What is this connected with? First of all, this situation is due to the fact that the foundation of the building can literally float and the house can turn into a complete house of cards. In addition, by violating the integrity of the foundation slabs of a house, you will significantly weaken its load-bearing capacity, and the soil, in turn, having received such mobility, can behave completely unpredictably.
However, if the house was installed on a so-called strip foundation , then in this case you are very lucky - a bathtub in the floor can become a reality. All that remains is to decide on the size, shape and design. To do this, you can rely on your flight of fancy, or you can turn to a specialized professional. In addition, many bathtub manufacturing companies offer some room design options.
Bathroom decoration
The design of a bathroom in a private house allows the owners’ imagination to flourish wildly. This room can become not only a multifunctional room, but simply delight the eyes of visitors.
First of all, the bathroom must be more or less spacious, and for this, all unnecessary objects must be removed.
Various photos of a bathroom in a private house will help you choose the color scheme to decorate your room. The most neutral color for walls is white.
Against its background, a beautiful washbasin and various accessories stand out very favorably. Combinations of white with blue, light blue, sunny yellow, green, and gray are good for the bathroom.
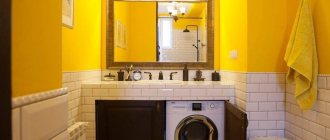
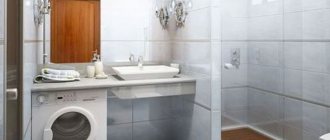
To increase the space in the design of a bathroom in a private house, it is good to use a small washbasin in the corner, a sit-down bathtub or shower stall, or a compact washing machine.
It is better to use a sliding door. A large beautiful mirror on the wall will increase your space.
Lighting near the mirror or bathroom shelves will fill the entire space with additional light.
If the wall of the house allows, then the best option would be a bathroom with a window in a private house. You can also cut a window in the ceiling.
Always use this feature in any room to improve lighting.
Bathroom arrangement
Stage 1 - sewerage
Avoid right angles
As a rule, you should start not with the water supply, but with the sewer:
- regardless of the size of the bathroom in a private house, you need to take the sewage system out to the street, where you need to equip either a storage tank or a septic tank;
- When laying pipes, it is best to avoid right angles, as this creates a risk of blockage. Therefore, if there is a need to turn by 90⁰, then you can use two fittings of 45⁰ or three of 30⁰;
- in addition, if the pipeline section exceeds 5-6 m, then an inspection must be installed on it. If in the house it is enough to insert a fitting, then on the street you will need a manhole;
Inspection in the manhole
| Diameter in mm | Slope cm/mpogon | |
| Optimal | Minimum | |
| 50 | 3,5 | 2,5 |
| 100 | 2,0 | 1,2 |
| 150 | 1,0 | 0,7 |
| 200 | 0,8 | 0,5 |
Table of required slopes
- when laying a sewer system with your own hands, the instructions require observing a certain slope, which is indicated in the table above;
- the fact is that increasing or decreasing the slope leads to the fact that solid sediments will not be washed away - water will simply flow over them without being washed off the pipe wall;
- You noticed that the table does not include the 32nd pipe, which is used for dishwashers and washing machines. But in such cases, the flow will be forced, so if technically necessary, construction allows even a slight counter-slope;
Basic design of a homemade septic tank
- To drain, you can, of course, make do with a cesspool, but this is not hygienic, and the smells from it will spread throughout the estate;
- so I want to tell you how to equip a homemade septic tank from concrete rings - it’s much cheaper than buying it in a store;
- the first two containers that you see in the schematic image serve as coarse filters - heavy particles simply settle to the bottom here;
- the third container is already, as it were, a fine filter - but it is best to bury it to a layer of sand - there the wastewater will not bother you;
Distances from the septic tank to other objects
- If we are building a septic tank, we should not forget that this is a potentially dangerous object for the environment. In this regard, it must be installed at a certain distance from other objects. ;
- these distances are indicated in the schematic image above and if you adhere to them, then you will not have any problems with the sanitary and epidemiological station or with your neighbors;
Gudron is an excellent waterproofing material.
- in addition to the distance of the septic tank from various objects, you should waterproof each tank, and it is best to do this with tar, in any case, it has the lowest price;
- if you live in the northern region of Russia, then you will most likely have a question about how to insulate pipes, since in some places the depth of soil freezing reaches more than two meters;
- Stores sell special cylinders made of mineral wool, polystyrene foam and extruded polystyrene foam, but these are quite expensive. I prefer to simply wrap the pipes with mineral (basalt) wool, and cover the insulation with roofing felt on top for waterproofing .
When laying pipes in a trench, you should fill its bottom with sand, lay the pipeline at the desired slope and fill it with 50-100 mm of sand on top. After this, pour plenty of water on the sand, and it will immediately settle (in 20-30 minutes), after which the pipes can be filled with soil.
Stage 2 - water supply
Installation of a submersible pump
For water intake (unless, of course, there is a centralized water supply near your house), you will need a submersible pump for a well or borehole. The power of such a unit will depend on the amount of water consumed in your family, but to roughly imagine the volumes, you can use the table below.
| Name of the bathroom | Water consumption |
| Washbasin taps | 0.4m3/hour |
| Bidet | 0.4m3/hour |
| Toilet | 0.4m3/hour |
| Washing taps | 0.7m3/hour |
| Dishwasher | 0.7m3/hour |
| Washing machine | 0.7m3/hour |
| Shower cabin | 0.7m3/hour |
| Hydrant for watering the garden | 0.7m3/hour |
| Bath | 1.1m3/hour |
Water consumption per hour in different bathrooms
Schematic diagram of connecting a submersible pump
We will assume that you have chosen a pump of the power you need and have taken into account the well flow rate (dynamic level) to ensure an uninterrupted water supply. You will also need to install a pumping station, where a reserve tank, sensors and automation will be installed.
It is most convenient to do this in a pit, which can be equipped in the house or in any of the outbuildings. So, you can hide the entire station so that it does not interfere.
This is what the station looks like in the pit
Regardless of the distance of the well to the house and its depth, you will have to extend the electrical cable for the submersible pump. It is most convenient to use a terminal box with four inputs and outputs for splicing , as shown in the top photo.
But this is not always possible and sometimes you have to make the connection directly in the trench. To do this, heat shrinkage should be used - such insulation does not allow moisture to pass through and can be used underground with a clear conscience .
To connect the pump to the distribution unit, a polyethylene hose with a diameter of 32 mm is definitely used (some use metal plastic, but I do not recommend this). The size of the reserve tank is of great importance - the larger its capacity, the fewer the number of engine starts and stops, but for domestic purposes you will not need more than 100 liters.
The factory settings of the sensor include starting the pump at 2 atmospheres and stopping it at 3 atmospheres. But if you want to increase this gap, then you can set the switch on to 1.5 atmospheres, and the switch off to 5 atmospheres.
Stages of soldering polypropylene
| Section (mm) | Welding depth (mm) | Heating time (sec) | Cooling time (sec) |
| 20 | From 14 to 17 | 5-6 | 2-3 |
| 25 | From 15 to 19 | 6-7 | 3-4 |
| 32 | From 16 to 22 | 8-9 | 4-5 |
| 40 | From 18 to 24 | 12-13 | 5-6 |
| 50 | From 20 to 27 | 18-19 | 6-7 |
| 63 | From 24 to 30 | 24-25 | 7-8 |
| 75 | From 26 to 32 | 30-31 | 8-9 |
| 90 | From 29 to 35 | 40-41 | 9-10 |
Soldering depth and time depending on size
If polypropylene pipes up to 90 mm in diameter are used for heating, then a 20th pipe is usually used for water supply. Pay attention to the welding depth and time indicated in the table above. This is very important, since insufficient depth and holding time will make the soldering weak, and overdoing these parameters will lead to sagging in the middle of the pipe and a narrowing of its diameter.
All PPR pipes are divided into regular ones - these are PN-10 and PN-16 (intended only for cold water) and reinforced ones - these are PN-20 and PN-25 . Of course, you can use different labels for cold and hot water lines when remodeling your bathroom.
But the fact is that PN-20 is a universal pipe that can withstand a working pressure of 20 bar, 2 MPa or 20.4 kgf/cm2, with a nominal temperature of 80⁰C, therefore, it is suitable for both DHW and heating. Personally, I use it for both cold and hot water - it’s very convenient and reliable. Such a pipeline can be hidden under plaster or drywall without any fear.
The principle of fixing pipes: brown indicates the wall, gray indicates the groove, and red indicates the pipes. White - hangers, cross - screws
If the bathroom has plaster, then the pipes are hidden in grooves, as shown in the top image, since it is possible to build a bathtub with a beautiful design only with hidden communications. To hold the PPR in the channel, they are pressed with perforated tape hangers. But if you have drywall, then the groove is not needed, and the pipes can be pressed directly to the wall with the same hangers .
Stage 3 – electrical wiring
Use sockets with a cover in the bathroom
I will say right away that there is no such thing as the optimal size for a bathroom - it all depends on the capabilities and desires of the owners. Also, the number of lighting fixtures, which can be surface-mounted or built-in, wall-mounted or ceiling-mounted, depends on the size.
Of course, recessed lamps look more beautiful, but for this you need a sufficient height of the room, which will allow you to make suspended ceilings 7-10 cm deep to accommodate the inside of the socket.
If there is an electric boiler in the bathroom, then the connection for it is made with a separate wire (copper with a cross-section of 2-2.5 squares is suitable for this) and exactly the same wire will be needed for the automatic washing machine.
Both of these devices should be protected by circuit breakers that trip when overloaded or short-circuited . If the washing machine is plugged into an outlet, then it is not needed for the boiler - an automatic machine is enough, since the outlet begins to melt after a while due to loosening of the terminals.
Stage 4 – smooth walls
The principle of installing beacons - profiles are indicated in white, and threads are indicated in blue
We continue to consider the topic of how to make a bathroom in a private house, and to lay the tiles we need a smooth rough surface - this can be either drywall or lighthouse plaster. In the diagram above you see the rules for installing beacons.
They are fixed to cement-sand mortar at a distance that is at least 15-20 cm less than the length of the building code that you will use at the moment. Nylon threads are stretched diagonally and horizontally so that they do not touch the profile crest (distance 0.5-1 mm).
The same principle can be used to install beacons on the floor, under a screed, as well as a frame made of CD profiles for drywall, only here the step will be 40 cm - 4 CDs per sheet. Under the tiles in the bathroom, moisture-resistant sheets (gypsum plasterboard - they are green in color) are used, although, in extreme cases, wall sheets (gypsum plasterboard) can also be used.
Plastering on beacons
After installing the plaster beacons, you can start plastering the very next day. The main thing is that the cement-sand mortar sets, but not before, otherwise you will knock down the profiles using the rule .
The mixture is spread with a trowel or spatula between two beacons and then pulled together from the bottom up, cutting off the excess. But after passing, there will be pits and furrows that need to be immediately filled up and passed over again until the surface becomes smooth. There may be 5 or 10 such passes, but the better you sift the sand for the solution, the less their number will be.
Grouting plaster
Some craftsmen do not consider it necessary to grout the surface under the tile after plastering it, but I think this is wrong. After processing with a float or half-grater, it becomes smooth and convenient for further finishing.
Grouting is usually done the next day or after 4-5 hours - if any unevenness occurs, the crumbled mortar is picked up from the floor, slightly moistened and the errors are repaired. You don’t have to wait long to lay tiles - they can be installed immediately after grouting, but for screed you need to wait 5-6 days so that you can walk on them.
Strengthening the sheathing with boards and OSB
In the case of drywall, everything is somewhat simpler and faster, since there is no “wet” work, but problems arise with hanging cabinets, mirrors, a boiler or the same sink. Therefore, to create a solid base, you can use boards or OSB, as shown in the top photo.
The wood is fixed flush with the profiles and fasteners can be screwed into it. But for the boiler, due to its large mass, a more reliable fastening is needed, so here the board is screwed directly to the wall with anchor bolts, but always flush with the profiles.
Stage 5 – finishing the walls, floor and ceiling
The gap between the tiles indicates a defect
When choosing ceramic tiles, you should check its quality and this is not only the appearance, but also the quality of the surface. That is, the tile must be perfectly flat.
To check these parameters, you need to press two tiles against each other with their front surfaces - if you find a gap of more than 1 mm, then you have a defective product. When laid, such tiles will have “teeth” - the edges will protrude, or it will turn out to be convex, which is also not very beautiful.
Combination of black and white colors
In addition, the diagonal of the tile may be knocked down. To check, apply two copies with the same surfaces to each other, place them end-to-end on a flat surface (for example, on a table) and check the height of the corners.
If you notice a discrepancy of at least 1 mm, this means that the diagonals are knocked down and you will have to play with crosses when installing - the seam will not be very even. Of course, such errors are hidden very well by grout, but people have different requirements and a millimeter-scale failure can be a real problem for some.
Pink bathroom design
Ceramic tiles are laid on tile adhesive such as “Master” or “Ceresit CM 11” and for this it is most convenient to use a comb trowel with a tooth depth of 10 mm (after installation, the layer is compressed to 5-6 mm). It’s best to start with the second row, calculating it so that the top row turns out uncut - it’s much more beautiful this way.
But it is best to install the bottom row after you have laid the floor - the cut pieces will overlap the edges of the floor, especially since you can install a special plastic corner or plinth there.
Installing ceramic tiles on the ceiling
I would like to say that bathroom designs in a private house, as well as in an apartment building, allow the installation of ceramic tiles on the ceiling. To do this, it is best to use drywall as a rough surface, as in the top photo.
Of course, there will be a large load here, so it is best to install CD profiles not every 40 cm, but every 30 cm, that is, 5 pieces per sheet . Such a structure can easily cope with the load from ceramics and glue, which has been proven by my many years of experience.
Grouting joints
Grouting the joints can be done immediately after you remove the spacer crosses, and it is done with a special soft rubber spatula, as shown in the top photo. After covering, run your finger along the seam - the mixture will sink slightly, and the seam will look smooth and beautiful. When you grout, you should wipe the tiles after 20-30 minutes - otherwise the solution will harden and it will be extremely difficult to remove it.
The principle of installing a slatted ceiling
The ceiling can simply be puttied over the ceilings, but you can also make it suspended in order to use recessed lamps. Suspended ceilings can be made of plasterboard, PVC panels or slats, as in the top image. In addition, PVC stretch ceilings (matte, semi-matte or glossy) will look very good in the bathroom in combination with tiles.
Stage 6 - installation of plumbing units
Types of toilet release
The toilet should be selected according to the type of outlet, and this is directly related to the way you installed the faucet tee - from the wall or from the floor, at a right angle or obliquely. For connection, you can use a plastic (PVC) corner or corrugation.
It will depend on your desire, but for oblique releases, corrugation is more suitable. If you have laid ceramic tiles on the floor, then you should not install the toilet earlier than after 5-6 days - when the solution is fresh, the tile may crack or the dowel simply will not hold, since there will be no expansion .
Toilet installation
It is best to install the toilet on silicone - firstly, sand may get under the sole and it will creak and, secondly, the sole itself may be uneven and it will wobble.
To do this, you need to put the toilet in its original position, circle the base with a marker, and also mark the holes for the toilet dowels. After this, move the toilet to the side, apply silicone to the inner edge of the drawn oval and drill holes for the dowels.
Be careful when tightening the toilet bolts - you can squeeze them and the ceramic will crack.
Bathtub with plastic screen
There is no point in separately describing the installation of each plumbing unit - this is done quite simply. I just want to say that in cases where the bathtub is made of acrylic, it is best to install it on bricks, and not on its original legs - this way it will be most stable. To create rigidity, you should inflate the bricks with foam, install a bath on them and fill it with water so that the foam does not move it out of place.
Installation of a shower stall
A few more words about installing the shower stall - although this is not stated in the instructions from the manufacturer, it must be installed on silicone. That is, silicone is spread between the wall and the pallet, between the wall and the vertical guides of the door frame, and also between the pallet and the lower arc of the slide, as shown in the photo above. These precautions help avoid leaks.
Photo of a bathroom in a private house
Source

